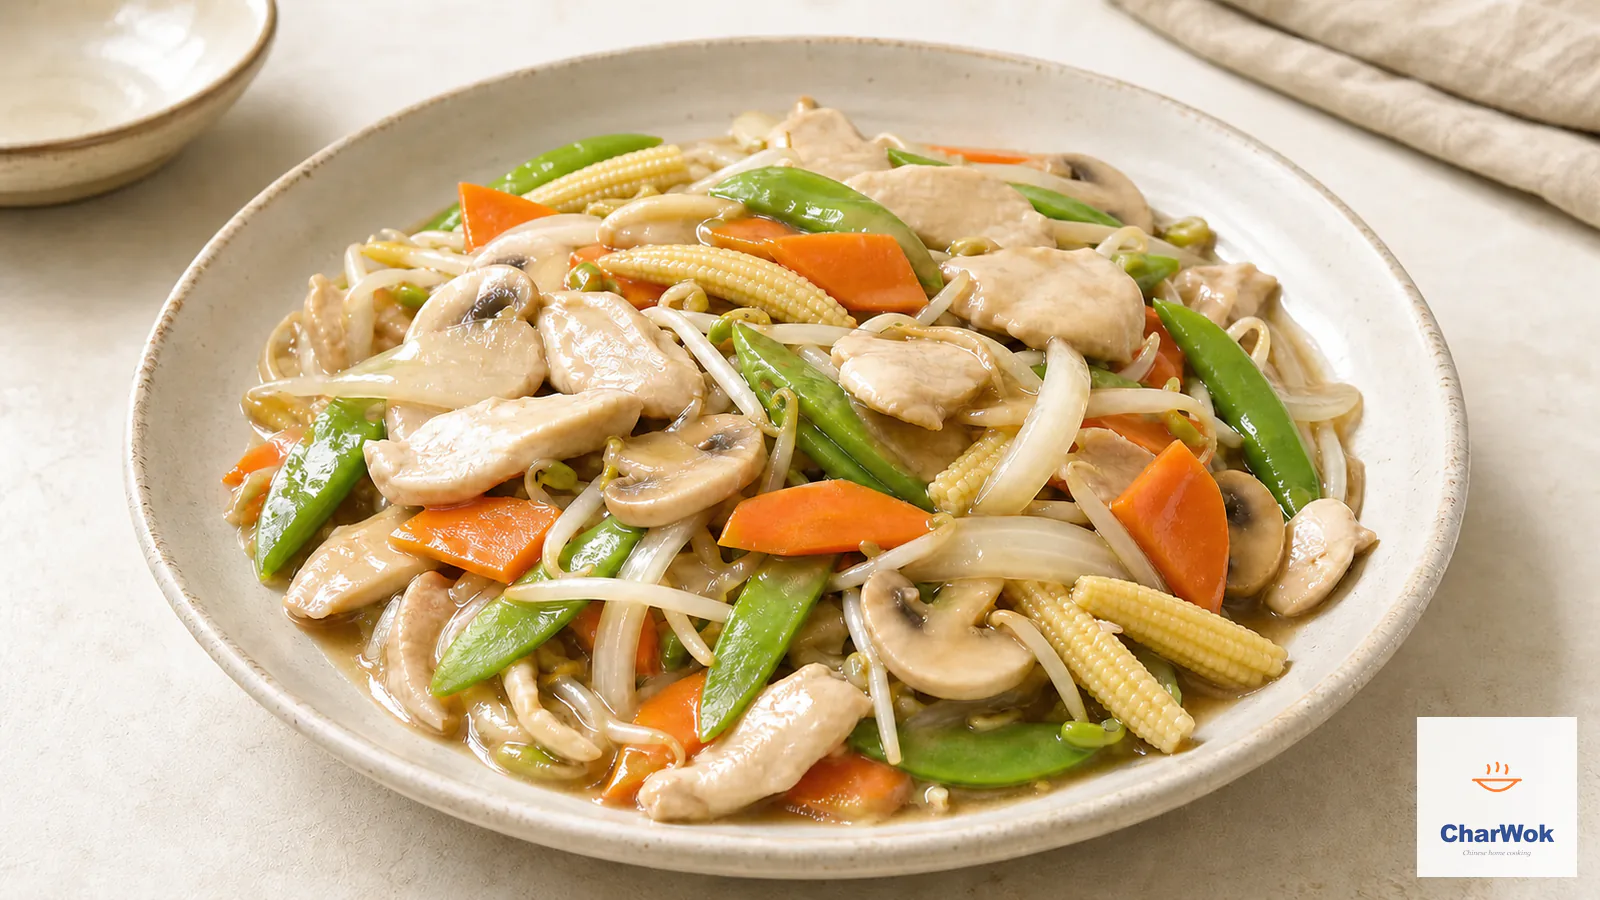
Chicken chop suey is the dish that taught a generation of Americans what "Chinese food" tasted like, and the reason it landed on every takeout menu is the same reason it belongs in your weeknight rotation: it is a stir-fry built around a glossy, starch-thickened sauce that coats everything and lets nothing go to waste. The home version fails in two predictable ways. The chicken turns to rubber. The vegetables collapse into a puddle. Both are fixable in under a minute of cooking time, and neither requires special equipment, just a couple of techniques most home cooks already half-know.
This works well when the vegetable drawer is a collection of odds and ends and one chicken breast needs to stretch across two people. It is more template than fixed formula: once the ingredients are sorted by cooking time, the vegetables can change without changing the method. It also belongs among the classic Chinese takeout dishes that benefit from being served straight from the wok.
At a glance: velvet the chicken with starch and water, give it a short first sear, and move the still-undercooked slices to a clean plate. Cook the vegetables in waves, return the chicken, then finish it in the sauce until the thickest slices reach 74°C (165°F). The first sear builds texture; the final temperature confirms doneness.
What makes a chop suey a chop suey
If you strip chop suey down to its essence, what you have is a stir-fry held together by a glossy, starch-thickened gravy that clings to every piece. The name comes from a Cantonese phrase for "mixed pieces" or "odds and ends," and that is the honest description: a quick, forgiving stir-fry of a protein and whatever vegetables are on hand, all bound in a sauce that does most of the flavor work. It is the kind of dish a working kitchen throws together from leftovers, and that is exactly what makes it ideal for a home cook staring into a half-empty crisper drawer.
The reason it works as a weeknight dish is structural. You have a quick-cooking protein, vegetables that finish at different rates, and a sauce that does the heavy lifting on flavor. Swap the chicken for shrimp, thinly sliced beef, scrambled egg, or pressed tofu and you are still cooking chop suey. The technique, not the ingredient list, is what defines it.
Choosing the vegetables (and slicing them to match)
Chop suey is a clearinghouse for the crisper drawer, but not every vegetable belongs in the wok at the same moment. The whole game is matching cooking time to density. A raw carrot and a bean sprout do not finish together, and if you treat them as one group you get either raw carrot or dead sprouts.
I group ingredients into three waves. Wave one is aromatics and dense veg: onion, garlic, carrot. Wave two is medium vegetables that need a flash of heat but not real cooking: snow peas, baby corn, thin celery. Wave three is everything tender or wet: mushrooms, mung bean sprouts, and the precooked chicken. If you swap in alternatives, just sort them the same way. Bok choy stems go in wave two and the leaves in wave three; the method is exactly the one I use for a quick garlicky bok choy stir-fry. Thicker greens like gai lan (Chinese broccoli) go in wave two; napa cabbage and mung bean sprouts are wave three.
Cut to a uniform thinness, not a uniform shape. A carrot sliced into thin coins will cook through in the same window as a snow pea; a chunky dice will still be crunchy when the peas are done. Bias-cut everything to roughly 3 mm (about ⅛ inch) and you can stop watching the clock and start watching the pan.
Why the chicken needs velveting
The single biggest complaint people have about home stir-fries is that the meat is tough and dry next to the slippery, almost custardy texture you get from a restaurant. The restaurant trick is called velveting, and the home version is embarrassingly simple. You coat thin slices of chicken in a little starch and water, let it sit, and the starch does two things during the sear. It swells into a thin gel layer around each slice that locks in moisture the meat would otherwise lose to the hot oil, and it smooths the surface so the chicken cooks through gently rather than seizing up. That is also why the slices get pulled so quickly: the coating protects the outside while the inside barely finishes.
Starch choice matters here a little, and less than people think. Tapioca starch and cornstarch are interchangeable in this dish; use whichever is already in your pantry, in the same quantity. The only real difference is cosmetic: tapioca gives a touch more clarity and shine, cornstarch a slightly more matte finish. Neither one will make or break dinner, and the technique works identically with either. If you want to read more on how common thickeners behave, my notes on Chinese seasonings and pantry staples go deeper. For a beginner, cornstarch is the right call. Do not overthink it.
A pinch of salt in the marinade seasons the meat from the inside out, and a few drops of oil added last give the coated slices a light film so they slide apart the moment they hit the wok instead of welding together. Skip the oil and you will spend the first ten seconds of cooking breaking the chicken apart with your spatula while the hot spots overcook.
Ingredients
Ingredients at a glance
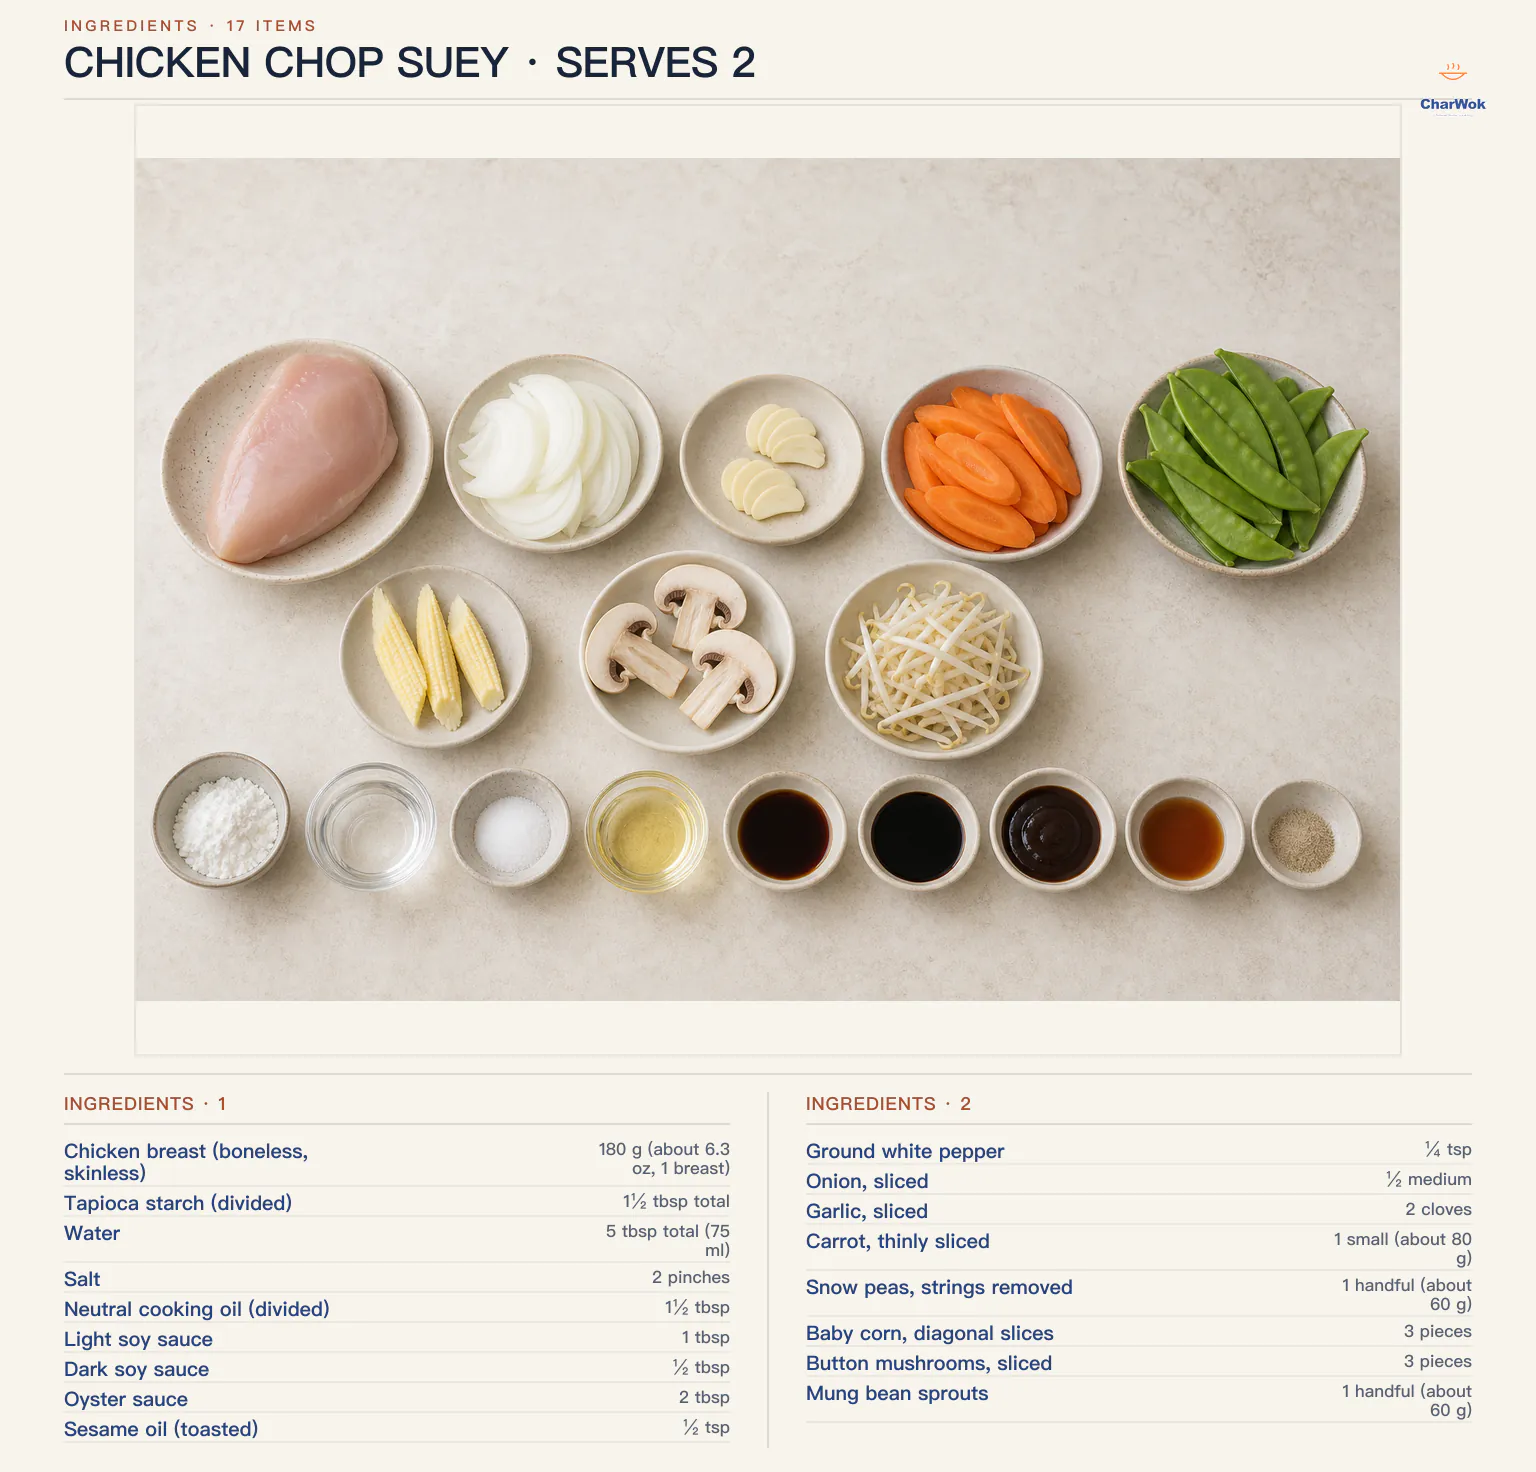
Serves 2 as a main with rice, or 3 to 4 as part of a multi-dish meal. Active cooking is about three minutes; have everything prepped and within arm's reach before you turn on the stove, because once the wok is hot there is no catching up.
| Ingredient | Amount | Notes / substitute |
|---|---|---|
| Chicken breast (boneless, skinless) | 180 g (about 6.3 oz, 1 breast) | Thigh works and is more forgiving; slice thin either way |
| Tapioca starch (divided) | 1½ tbsp total | ½ tbsp for the chicken, 1 tbsp for the sauce; cornstarch substitutes 1:1 |
| Water | 5 tbsp total (75 ml) | 1 tbsp for velveting, 4 tbsp for the sauce |
| Salt | 2 pinches | One for the chicken, one for the sauce |
| Neutral cooking oil (divided) | 1½ tbsp | Peanut, canola, or sunflower; not olive oil |
| Light soy sauce | 1 tbsp | The salty, salty backbone; see light vs. dark soy sauce |
| Dark soy sauce | ½ tbsp | For color only; if omitted the dish looks pale but tastes fine |
| Oyster sauce | 2 tbsp | Mushroom stir-fry sauce can replace it; for a shellfish allergy, use only a product whose ingredient and allergen labels fit your needs |
| Sesame oil (toasted) | ½ tsp | Added raw to the sauce for aroma; do not use it as a frying oil |
| Ground white pepper | ¼ tsp | Black pepper works; white just keeps the sauce clean-looking |
| Onion, sliced | ½ medium | Yellow or white; cut into thin wedges |
| Garlic, sliced | 2 cloves | Sliced, not minced, so it fries without burning |
| Carrot, thinly sliced | 1 small (about 80 g) | Cut on the bias to roughly 3 mm |
| Snow peas, strings removed | 1 handful (about 60 g) | Sugar snap peas or thin celery are fine substitutes |
| Baby corn, diagonal slices | 3 pieces | Optional; water chestnuts add a similar crunch |
| Button mushrooms, sliced | 3 pieces | Cremini or shiitake work |
| Mung bean sprouts | 1 handful (about 60 g) | Added last so they stay crisp; bean sprouts turn soggy fast |
Method
- Slice and velvet the chicken. Cut the breast crosswise (across the short side) into slices about 5 mm (about 0.2 inch) thick. Cutting across the grain shortens the muscle fibers, which is the real secret to tenderness, more than any marinade. Put the slices in a bowl with ½ tbsp tapioca starch, 1 tbsp water, and a pinch of salt. Stir until every piece is coated and the liquid turns milky. Finish with a few drops of oil and mix again. Walk away and prep everything else; 10 minutes of rest is plenty.
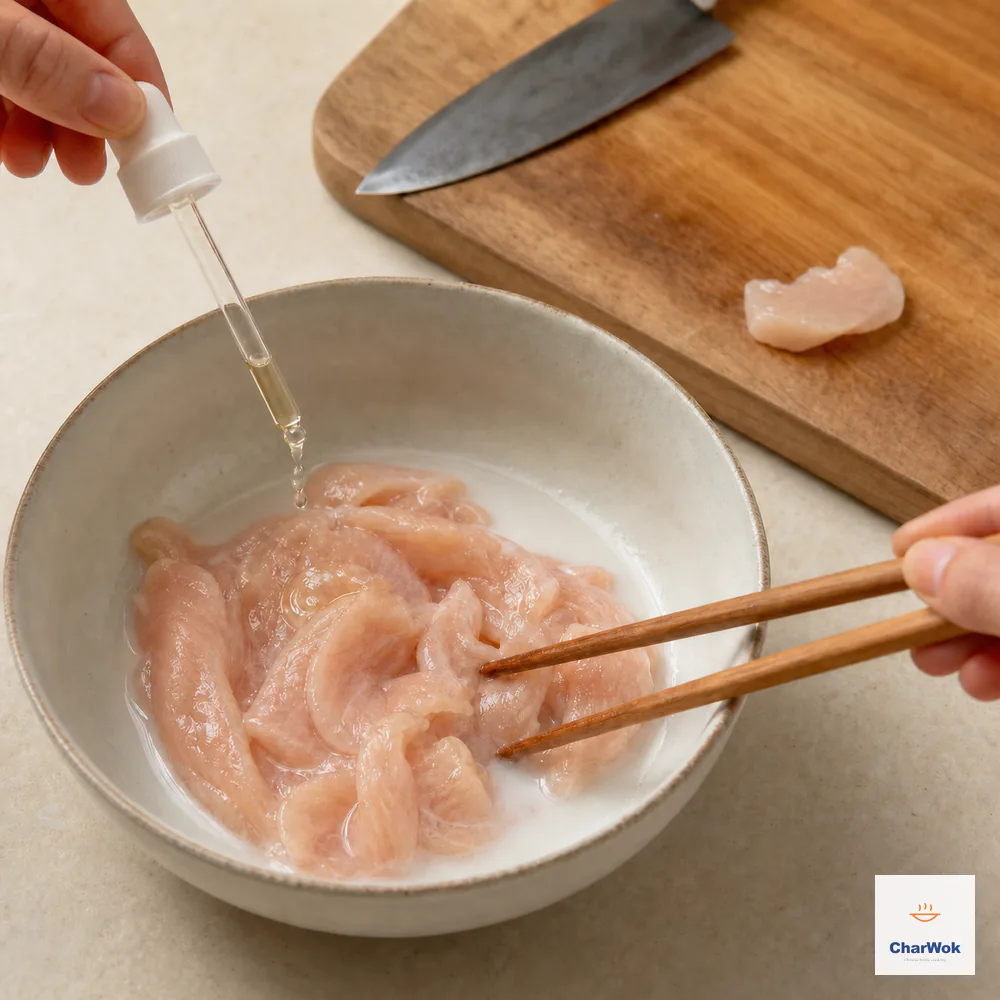
Cut the breast crosswise into 5 mm slices, coat with ½ tablespoon tapioca starch, 1 tablespoon water, and a pinch of salt until lightly milky, mix in only a few drops of oil, and rest for 10 minutes while preparing everything else.
- Mix the sauce. In a small bowl, combine 1 tbsp light soy sauce, ½ tbsp dark soy sauce, 2 tbsp oyster sauce, ½ tsp sesame oil, 1 tbsp tapioca starch, ¼ tsp white pepper, a pinch of salt, and 4 tbsp water. Stir until the starch dissolves. Set it near the stove, because it goes in at the very end and the starch will settle to the bottom while it waits.
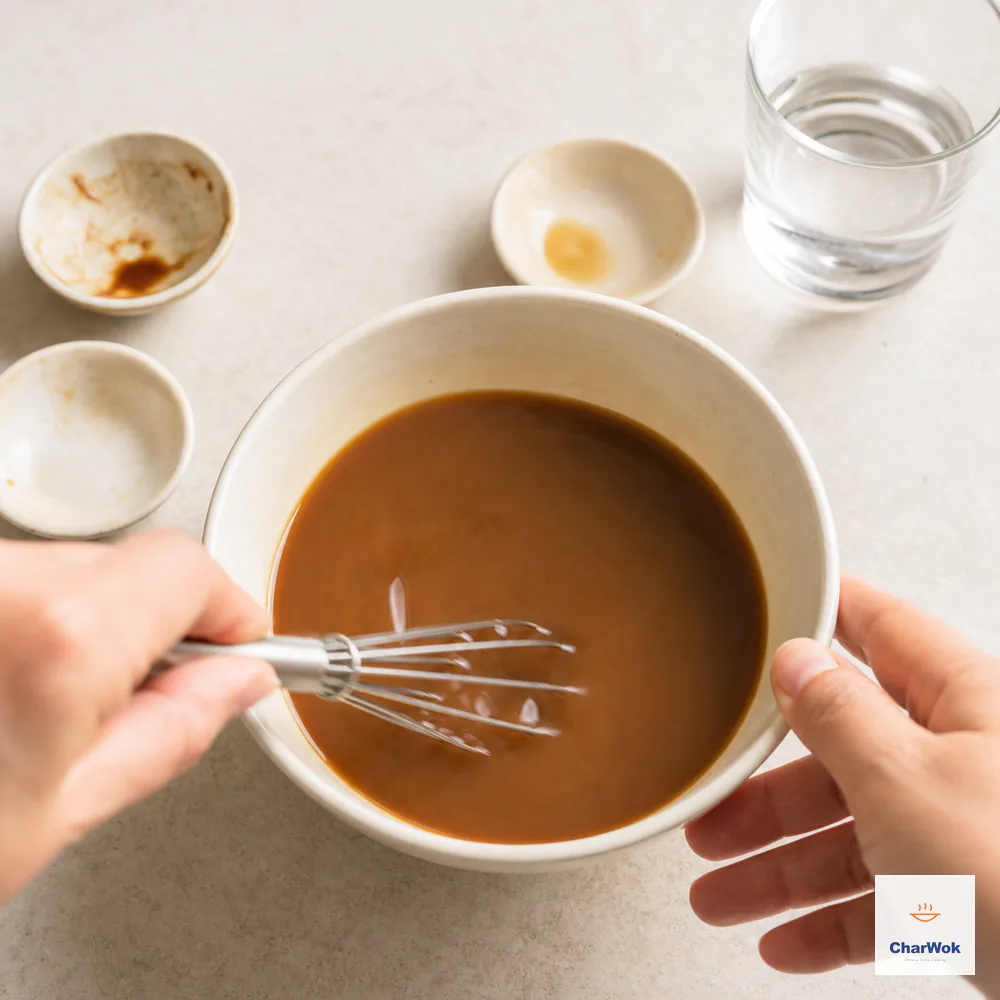
Whisk the light and dark soy sauces, oyster sauce, sesame oil, tapioca starch, white pepper, salt, and 4 tablespoons water until smooth, then stir from the bottom again immediately before pouring.
- Preheat without smoke. For carbon steel or stainless steel, preheat over medium-high until a water droplet glides across the surface, then wipe the pan completely dry. Add 1 tbsp oil and heat it to about 175–180°C (347–356°F), when it shimmers but does not smoke. For nonstick, add the oil before heating and stay within the maker’s heat limit. If any pan smokes, take it off the burner and let it cool.
- Give the chicken a partial first sear. Spread the slices in a single layer and let them sit briefly so the underside can brown. Toss for about 45 seconds, only long enough to set the coating and turn the exterior opaque while the center remains undercooked. Transfer the chicken to a clean plate. This is a planned first stage, not a color-based doneness check.
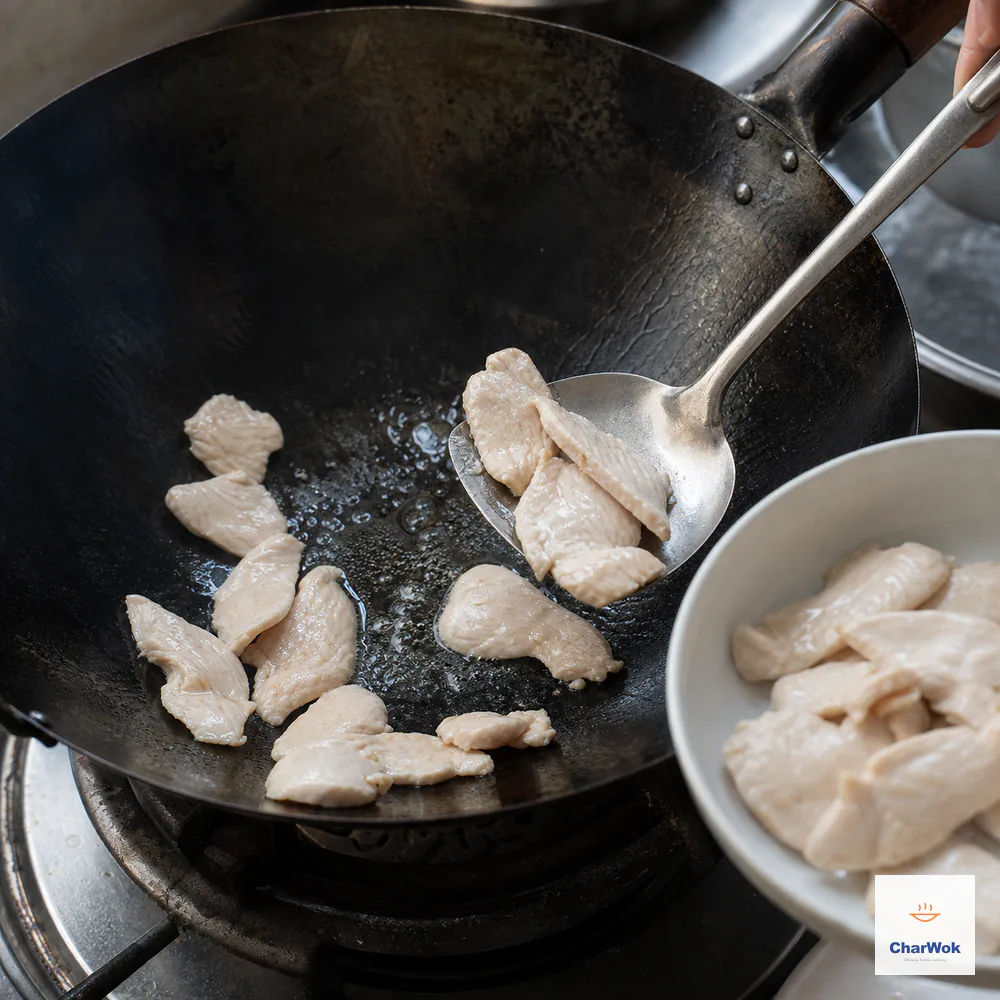
The first 45-second sear only sets the coating and exterior; move the still-undercooked slices to a clean plate, then verify 74°C (165°F) after they return to the sauce.
- Bloom the aromatics. With the pan still hot, add the remaining ½ tbsp oil, then the onion and garlic. Toss for about 15 seconds, just until the garlic is fragrant and the onion edges soften. Burnt garlic is bitter, so if your heat is ferocious, drop the pan off the burner for a beat.
- Cook the vegetables in waves. Add the carrot and stir for 15 seconds. Add the snow peas and baby corn and stir for another 20 seconds. The vegetables should look barely wilted, still bright, and the pan should be dry or nearly so. If a pool of liquid is forming, your heat is too low, push everything up the sides of the wok and let the water boil off.
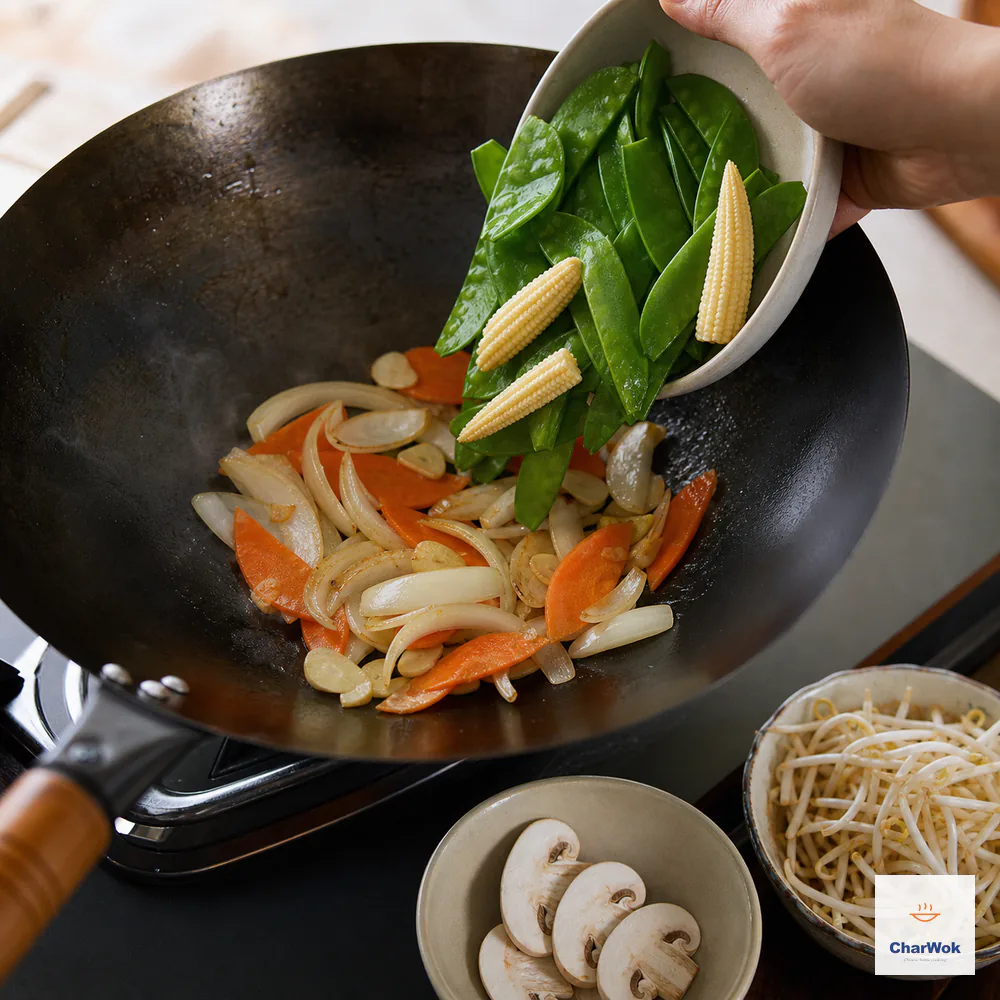
Bloom the onion and garlic, stir-fry the carrot for 15 seconds, then add the snow peas and baby corn for another 20 seconds, keeping the vegetables bright and the wok dry while mushrooms and sprouts wait.
- Return the chicken and add the tender vegetables. Slide the chicken back in along with the mushrooms and mung bean sprouts. Toss briefly to combine. The mushrooms release a little water here, which is exactly what the sauce needs to glide into.
- Add the sauce and finish the chicken. Give the sauce bowl a final stir to resuspend the starch, pour it around the pan edge, and toss as it changes from cloudy to glossy. Continue until an instant-read thermometer inserted into the thickest chicken slices reads 74°C (165°F). If the sauce thickens before the chicken reaches temperature, add 1 tablespoon water and keep stirring. Plate only after the temperature check.
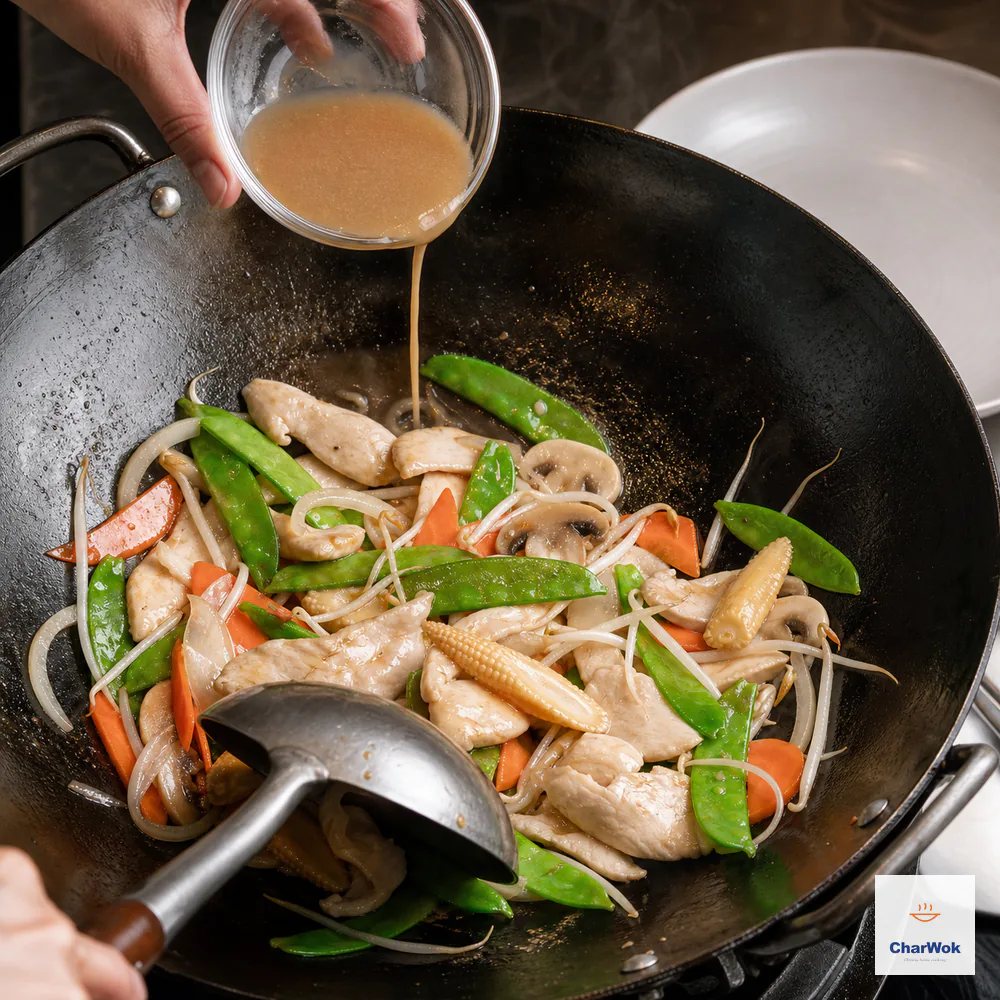
Return the chicken, mushrooms, and sprouts, add the stirred sauce, and toss until the thickest chicken slices reach 74°C (165°F); add water if the glaze tightens before the temperature check.
Food-safety sources: the U.S. Fire Administration cooking-fire guidance, the U.S. government’s safe minimum internal temperature chart, and FoodSafety.gov leftover guidance.
When things go wrong
These are the most useful signs for diagnosing the result and correcting the next batch.
- The chicken is rubbery and gray. It likely overcooked in the first sear or the slices were too thick. Keep that first stage brief, use a clean plate for the transfer, and rely on a thermometer during the final sauce step rather than extending either stage “just in case.”
- The sauce is thin and watery. Either the wok was not hot enough, the cornstarch settled and you poured off the top of the bowl, or too much vegetable liquid diluted it. Crank the heat for ten more seconds and it will usually tighten up. If not, dissolve a quarter teaspoon of starch in a tablespoon of cold water and stir it in.
- The sauce is a gelatinous lump. Too much starch or it cooked too long. Thin it with a tablespoon of hot water or stock and toss vigorously off the heat.
- The vegetables are soggy and the plate is swimming. Crowded pan or low heat. A wok holds less than you think; cook in two batches if you are scaling up. Salt draws water out of mushrooms and sprouts, so save the salt for the sauce, not the vegetable stage.
- Everything sticks and tears. The pan was not evenly preheated, the oil was too cool, or the chicken was crowded. Use the gliding-water-drop check on uncoated metal, wipe it completely dry, add the oil, and wait for a shimmer without smoke. Sear in two batches if needed.
- The garlic burns and turns bitter. Garlic goes in with the onion, not before it, and only for a few seconds. If your burner runs hot, slide the pan off the flame between additions.
Variations and other proteins
The sauce and the cooking order are the constants; almost everything else is negotiable. A few directions I keep coming back to:
- Shrimp. Swap the chicken for 200 g of peeled, deveined shrimp. They velvet in the same slurry and cook even faster; pull them the instant they curl tight and turn opaque, or they go cottony.
- Beef or pork. Thinly slice a tender cut (flap, sirloin, or pork tenderloin) across the grain. Beef takes well to a little extra black pepper in the sauce; pork loves a spoon of oyster sauce doubled. The technique behind beef and mushroom stir-fry is the same family of move.
- Vegan tofu. Pan-fry firm or pressed tofu cubes until golden on two sides first, then treat them as the protein and add them in the final wave. The crisp edges pick up the sauce the way chicken does; the method rhymes with home-style braised tofu.
- Eggs, not meat. For a lighter version, scramble two eggs in the hot wok first, scoop them out soft, and fold them back at the very end so they stay custardy. A loose-scramble approach like the one in chive and egg stir-fry is the texture you want.
- Change the sauce family. Replace the oyster sauce with a spoon of fermented black bean sauce for a funkier, more savory chop suey, or add a teaspoon of chili oil for heat. The base ratio of 1 part starch to 4 parts liquid stays the same.
- Use it up. This is the real point of the dish. Half a bell pepper, a few asparagus spears, a handful of celery, leftover cooked rice on the side, it all works. Sort by density, cook in waves, sauce at the end.
Serving and storing
Serve immediately over jasmine rice, or pour the whole thing over cooked noodles the way lo mein gets dressed. For advance preparation, slice and velvet the raw chicken, cover it, and keep it refrigerated separately from the cut vegetables and sauce. Do not partially cook chicken and refrigerate it for later finishing; cook the full dish to 74°C (165°F) when you are ready to serve.
Refrigerate leftovers in shallow airtight containers within 2 hours, or within 1 hour when the room or outdoor temperature is above 32°C (90°F). Use within 3 to 4 days. Reheat in a pan with a splash of water, or in the microwave, until the thickest chicken pieces reach 74°C (165°F); the vegetables will be softer either way.
If you want to keep going
Once this template is in your hands, a lot of the stir-fry canon opens up. The velveting step alone is the backbone of cashew chicken, black pepper chicken, and kung pao chicken; the only thing that changes is the sauce and the finishing stir-ins. For a chicken-and-vegetable plate with a different posture, chicken and mushroom stir-fry leans earthy, while oyster sauce chicken is the slow-braised cousin. And if you are stocking the pantry properly, the Chinese chicken recipes by cooking method list is a good map of where to go next.
FAQ
These questions cover the substitutions and timing choices that most affect the result.
Can I use chicken thigh instead of breast?
Yes, and thigh is genuinely more forgiving because its higher fat keeps it juicy past the point where breast would dry out. Slice it the same way, across the grain. The trade-off is a slightly heavier bite; breast reads cleaner and lighter against the sauce.
Do I really need to pull the chicken out before cooking the vegetables?
Yes. If it stays in the whole time, it can overcook before the carrots soften. Give it a brief first sear, move it to a clean plate, then return it for the sauce step and cook the thickest slices to 74°C (165°F). The thermometer, not a fixed final 30 seconds, determines when it is ready.
Can I make chop suey without a wok?
A large, heavy skillet works, ideally cast iron or carbon steel. The downside is the lower, flatter sides mean less room to push food away from the heat, so cook in two batches if the pan looks crowded. A nonstick skillet is fine for beginners but will never give you the browning a seasoned steel pan does.
Why is my sauce shiny in the restaurant but dull at home?
Two reasons. Restaurants use tapioca or potato starch, which gives a clearer gloss than cornstarch. And they finish with a few drops of oil or sesame oil off the heat, which floats on the surface and catches the light. Do the same and the difference is immediate.
Is chop suey actually Chinese?
Not as a named dish inside China. It is a Chinese-American invention from the early 1900s, built from real Cantonese stir-fry technique but tuned for Western plates. Calling it inauthentic misses the point; it is a legitimate dish with its own century of history.