There is a moment, four days into sprouting mung beans in a bowl on your counter, when you lift the towel and find pale threads twice the length of the beans themselves, packed so tight they push the plate up off the colander. That is the payoff. Most home cooks never get there, because the usual advice, "rinse and wait," leaves out the two things that decide whether you get fat, crunchy sprouts or a slimy, bitter mess. I will show you both, then turn the harvest into a two-minute stir-fry that tastes nothing like the watery tangle you get from a takeout box.
Store-bought sprouts are fine. Homegrown are a different ingredient. The roots are still turgid, the bean splits cleanly, and there is no faint refrigerator smell. The garlic-and-oil treatment that works on tender greens is exactly right here, because the sprout itself is doing most of the work.
Two things decide everything: keep them dark and keep them weighted. Darkness prevents the green pigment and bitter phenolics that form under light; a plate pressing down on the sprouting mass forces the shoots to thicken and push roots into the holes rather than curl uselessly. From 50 g (about 1/4 cup) of dry beans you get roughly two servings in four to six days; the exact weight depends on how long you let them grow. If a rinse ever smells sour, the batch is already lost, throw it out.
What you are actually growing
A mung bean sprout is two edible parts joined together: the split yellow seed coat and cotyledons at the top, and the long white radicle (the embryonic root) below. The crunch lives almost entirely in the root, which is more than 90 percent water locked inside each cell as turgor pressure, with the rigid cellulose wall pushing back. That is why a sprout is crisp when raw and collapses into stringiness the moment heat bursts those cells and lets the water escape.
Light is the enemy. Exposed to it, the root tip produces chlorophyll, turning the whole shoot pink-green, and the plant ramps up phenolic compounds as a defense. The result looks healthy. It tastes bitter. Commercial sprouts are grown in opaque rotating drums precisely to dodge this. At home, two layers of dense cloth over a non-transparent bowl get you 90 percent of the way there.
Equipment, and what each piece is actually doing
People tend to overthink this. Four items, all already in a normal kitchen.
- A perforated basket (a colander or a wide sieve). Think of this as the growing tray: it lets the twice-daily rinse pass straight through so the beans are never swimming, and the open mesh gives the lengthening shoots somewhere to anchor. Anything with a tight, solid base will trap moisture and rot the crop.
- A deep bowl, dark enough to read nothing through. This is your blackout chamber. The basket nests inside it; the surrounding wall is what keeps the developing shoots in the dark, which is the whole point. A clear glass vessel will not work unless you are willing to wrap it.
- A pair of clean, closely woven kitchen cloths. Use one as the damp blanket laid over the beans themselves; the other goes over the bowl as an outer curtain. Two layers, not one, because the inner one delivers moisture on cue while the outer one seals the light out.
- A saucer or small plate sized to drop inside the basket. Skip this and you will harvest a tangle of wispy threads. Resting a little mass on the growing clump makes each shoot push back against the load, and that mechanical resistance is what thickens the stem into something worth eating.
The beans, and how to pick them
Buy whole dried mung beans from an Asian grocer or the bulk section. You want beans that are uniformly green, glossy, and plump. Toss anything dark, cracked, or shriveled. Beans that have been sitting on a shelf for two years have a lower germination rate and you will get a sparse, patchy batch. I keep mine in a jar and use the same bag for mung bean jelly and summer soups, so nothing goes stale.
Ingredients for the stir-fry (2 servings)
Ingredients at a glance
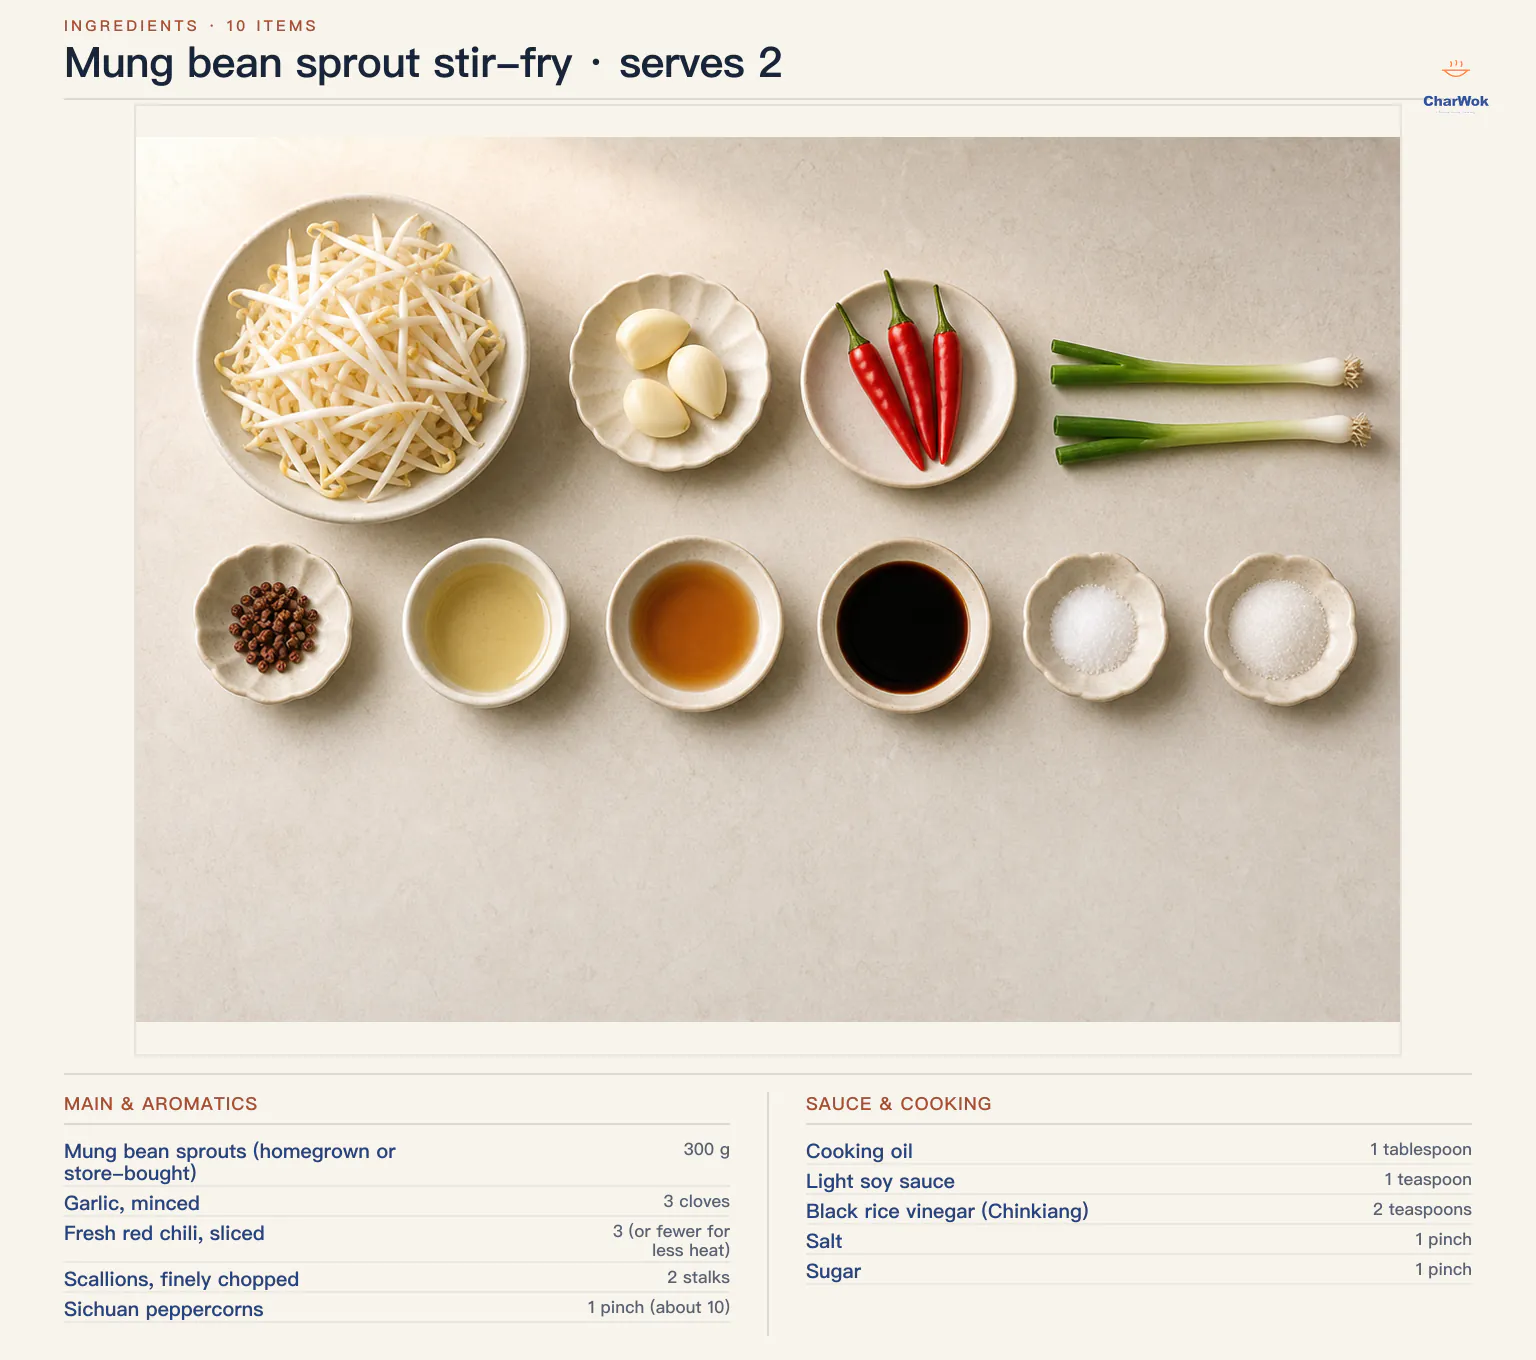
| Ingredient | Amount | Notes / substitute |
|---|---|---|
| Mung bean sprouts (homegrown or store-bought) | 300 g | About two servings grown from 50 g (1/4 cup) of dry beans, or one supermarket bag |
| Garlic, minced | 3 cloves | Fine mince; crushed cloves will scorch in a hot wok |
| Fresh red chili, sliced | 3 (or fewer for less heat) | Thai bird or Fresno. Seed them for less heat, or omit for a non-spicy version |
| Scallions, finely chopped | 2 stalks | Green and white parts |
| Sichuan peppercorns | 1 pinch (about 10) | Optional but recommended; see the Sichuan pepper guide |
| Cooking oil | 1 tablespoon | Neutral, high-smoke: peanut, canola, or grapeseed |
| Light soy sauce | 1 teaspoon | Light is correct here; dark would muddy the color. Soy sauce primer |
| Black rice vinegar (Chinkiang) | 2 teaspoons | The dark, malty one. Black rice vinegar notes; rice vinegar is a thinner substitute |
| Salt | 1 pinch | To taste |
| Sugar | 1 pinch | Balances the vinegar; do not skip |
How to sprout them, day by day
- Soak (Day 1). Rinse 50 g of sorted beans, drop them in a bowl, cover with three fingers of cool water, and leave them 12 to 24 hours at room temperature. You are looking for the seed to swell to about twice its dry size and split its coat, with the pale germ just beginning to poke through on a few of them. This rehydration is non-negotiable: a bean that is still chalky inside will not sprout on schedule.
- Build the chamber (Day 2). Tip the water off and tip the beans into the basket, shaking them into a single loose bed so each one has breathing room. Wet the inner cloth, wring it out, and lay it on top; rest the plate on the cloth; lower the basket into the dark bowl; throw the second cloth over everything. Park the whole rig somewhere out of direct sun, on a counter that does not get warm. Under the sink or a pantry shelf beats the windowsill.
- Rinse twice daily (Days 2 through 5). Morning and night, lift the basket out, lift the plate off, but leave the inner cloth on the beans. Run cool tap water over the cloth and the beans for ten seconds, let it drain completely, then replace the plate and re-cover. The cloth stays put so light never touches the shoots. Rinsing supplies moisture and clears away loose hulls, but it does not make sprouts safe to eat raw; the same warm, humid conditions that help beans sprout can also let harmful germs multiply.
- Let them push. As the sprouts lengthen they will lift the plate. That resistance is what you want; let them push against it. If you skipped the plate you would get thin, tangled shoots that snap instead of crunch.
- Harvest (Day 4 to 6). The sprouts are ready when the roots are 5 to 8 cm (2 to 3 in) long and tightly packed. Lift the whole clump out of the basket; the shoots will be laced through the mesh, so you may need to coax them free with your fingers. If your kitchen is warm, expect the short end of that window.
- Clean before use. Rinse the sprouts in a bowl of cold water two or three times, skimming off the loose green hulls that float to the top. The hulls are harmless but they look messy in the finished dish.
Anything you do not cook today keeps best loose in a paper-towel-lined bag, loosely closed, on a fridge shelf for about three days. Past that they go limp and start to smell like a stagnant pond. Sprouts can carry harmful bacteria even when they look and smell clean, and rinsing does not remove that risk. Cook them thoroughly; pregnant people, children under five, adults 65 and older, and anyone with a weakened immune system should avoid raw or undercooked sprouts.
The stir-fry itself
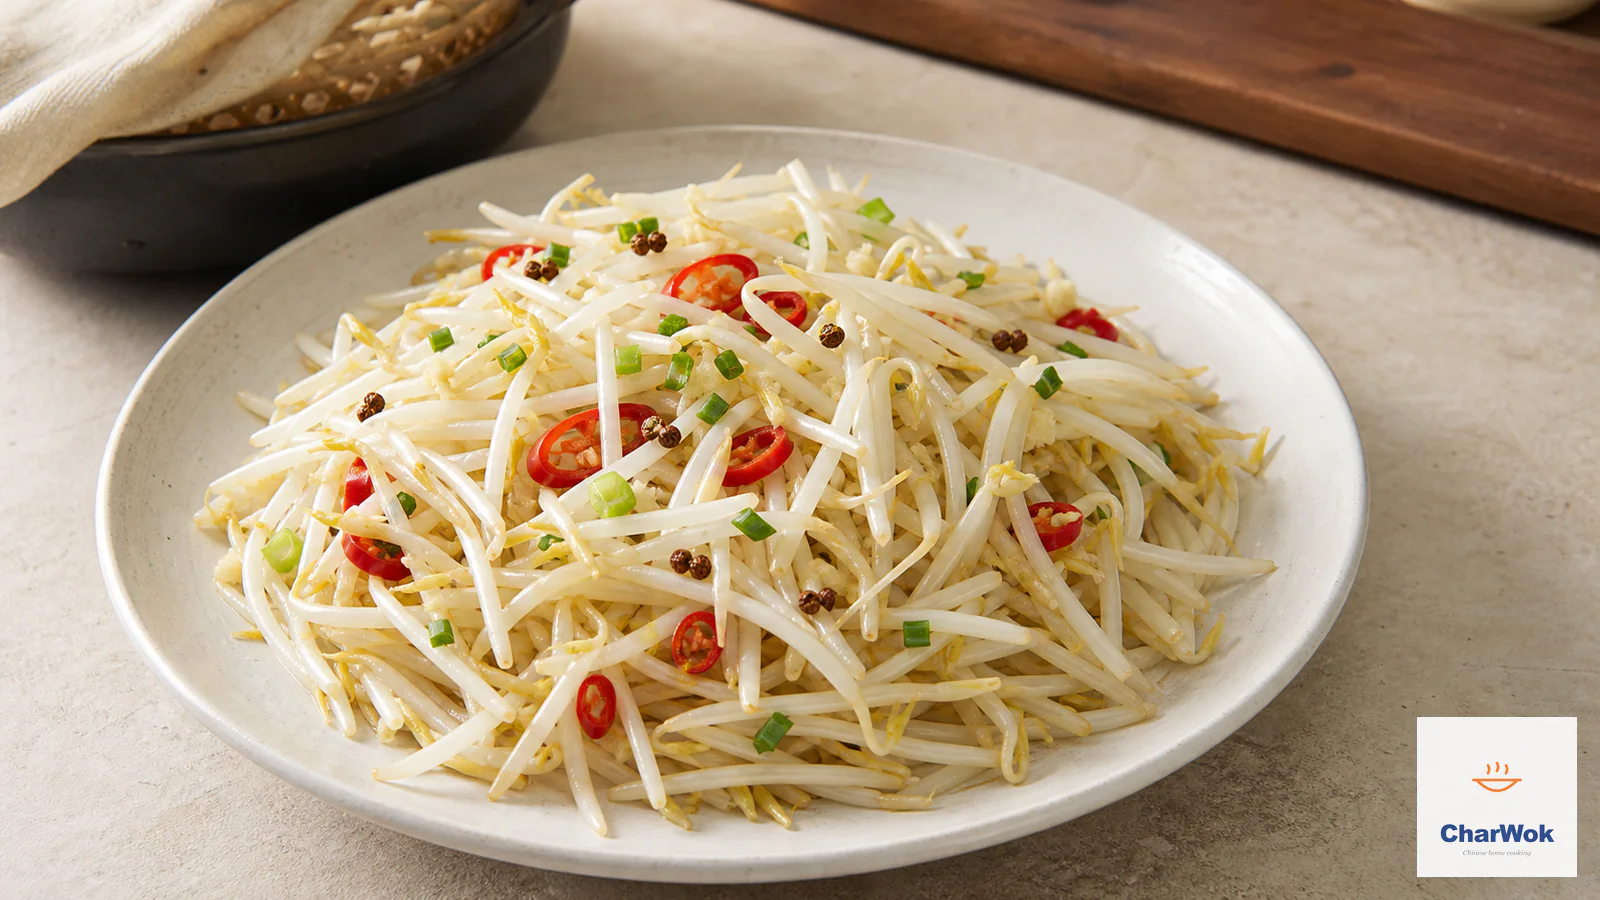
Here is the whole problem in one sentence: sprouts are mostly water, and if you cook them slowly they sweat into the oil and you end up boiling them grey. The fix is a very hot wok and a fast cook, while still keeping them in the pan until they are steaming hot throughout. If you have never seasoned and heated a wok properly, this is the recipe that will show you why it matters.
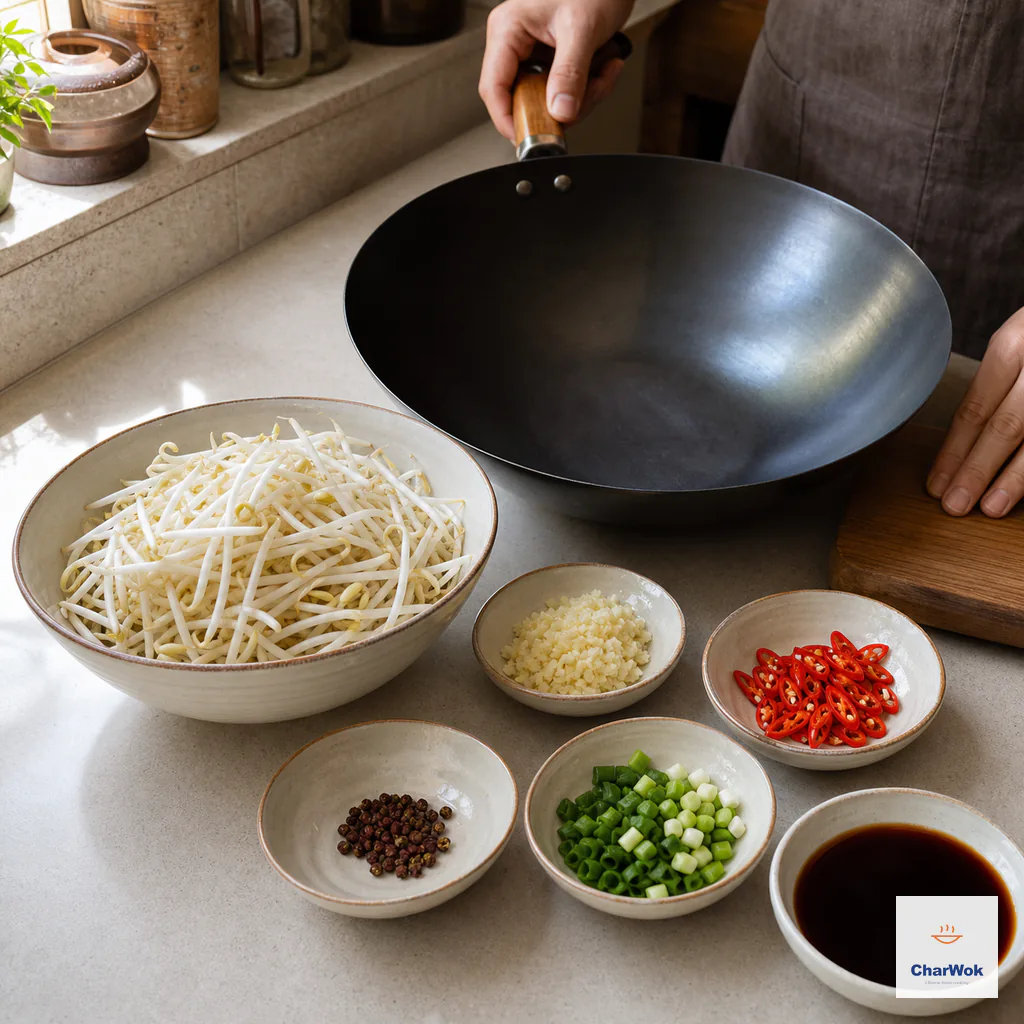
Drain the sprouts thoroughly, prepare every aromatic and stir the soy, black vinegar, salt and sugar together before the wok is heated.
- Pre-mix the seasoning. Stir the soy, vinegar, salt, and sugar together in a small bowl. The dark vinegar is the backbone here; its roasted, malty edge is what makes the dish read as northern Chinese rather than generic. Keep it next to the stove.
- Heat the wok until it smokes. High heat, dry wok, thirty to sixty seconds. When a wisp of smoke rises, pour in the oil and swirl. If the oil does not shimmer instantly, the wok was not hot enough.
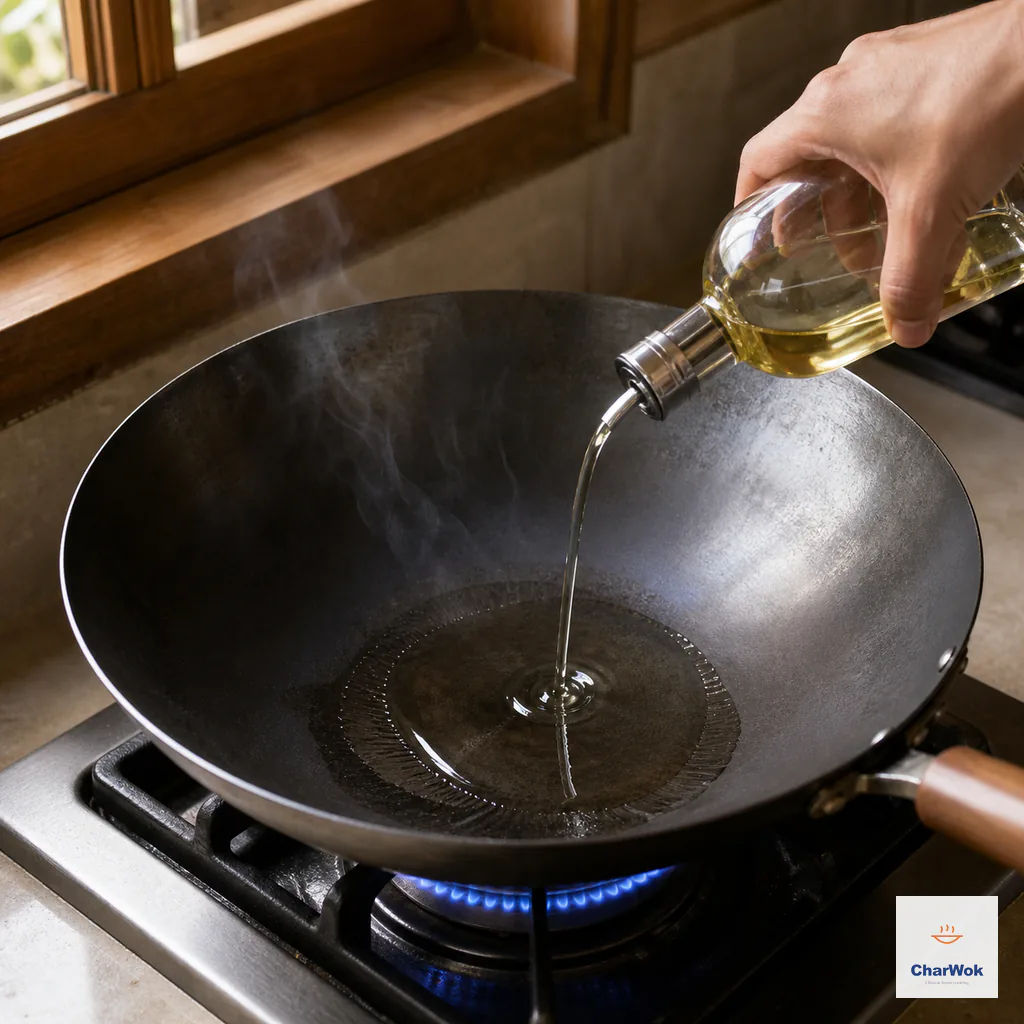
Heat the dry wok over high heat until the first faint smoke appears, then add the oil; it should shimmer immediately.
- Bloom the aromatics (10 seconds). Garlic and Sichuan peppercorns go in. Toss fast. The garlic should be pale gold, not brown; brown garlic turns bitter and will dominate the whole dish.
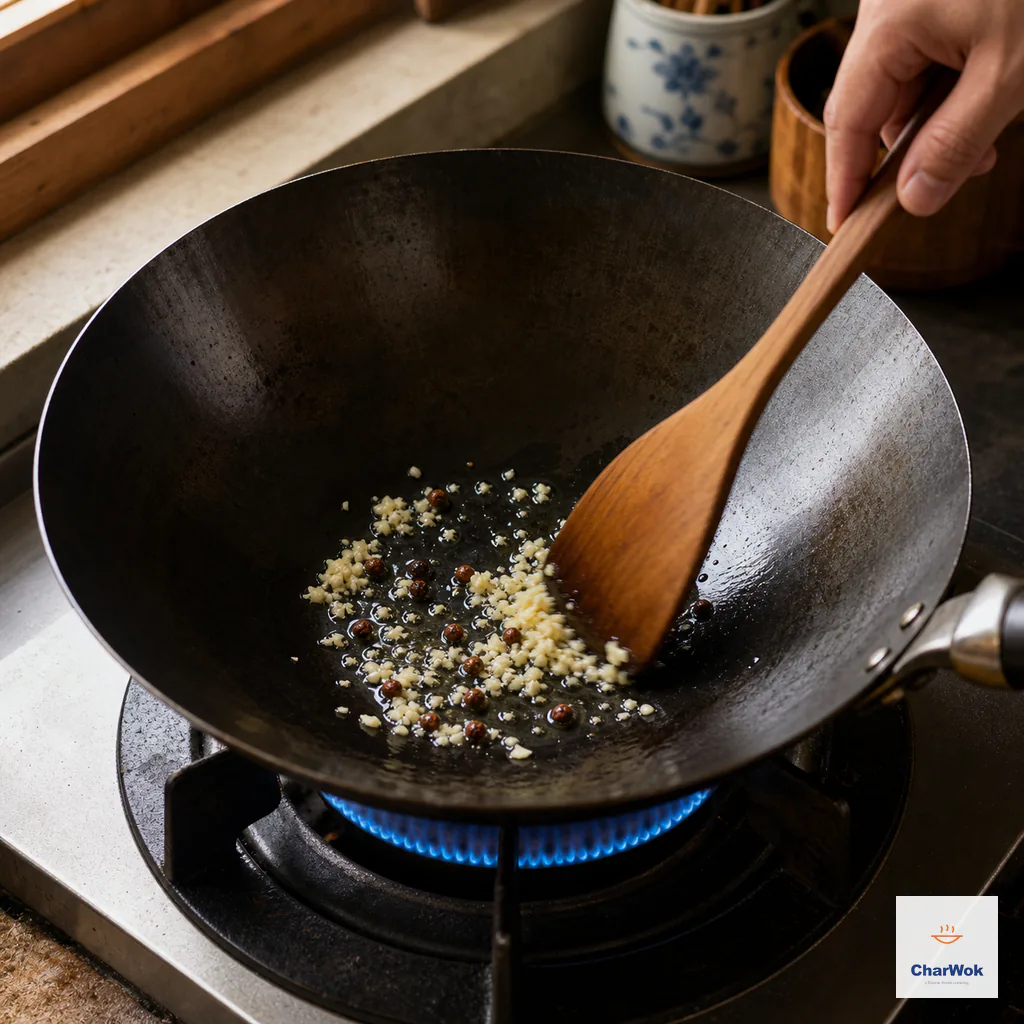
Bloom the garlic and optional peppercorns for only about 10 seconds, moving constantly and stopping before the garlic turns brown.
- Add the sprouts and chili. Tip in the sprouts together with the sliced fresh chili, then toss constantly so every sprout hits the hot metal. Keep cooking until the sprouts are steaming hot throughout and have softened enough to bend; depending on the wok and batch size, this usually takes about 90 seconds.
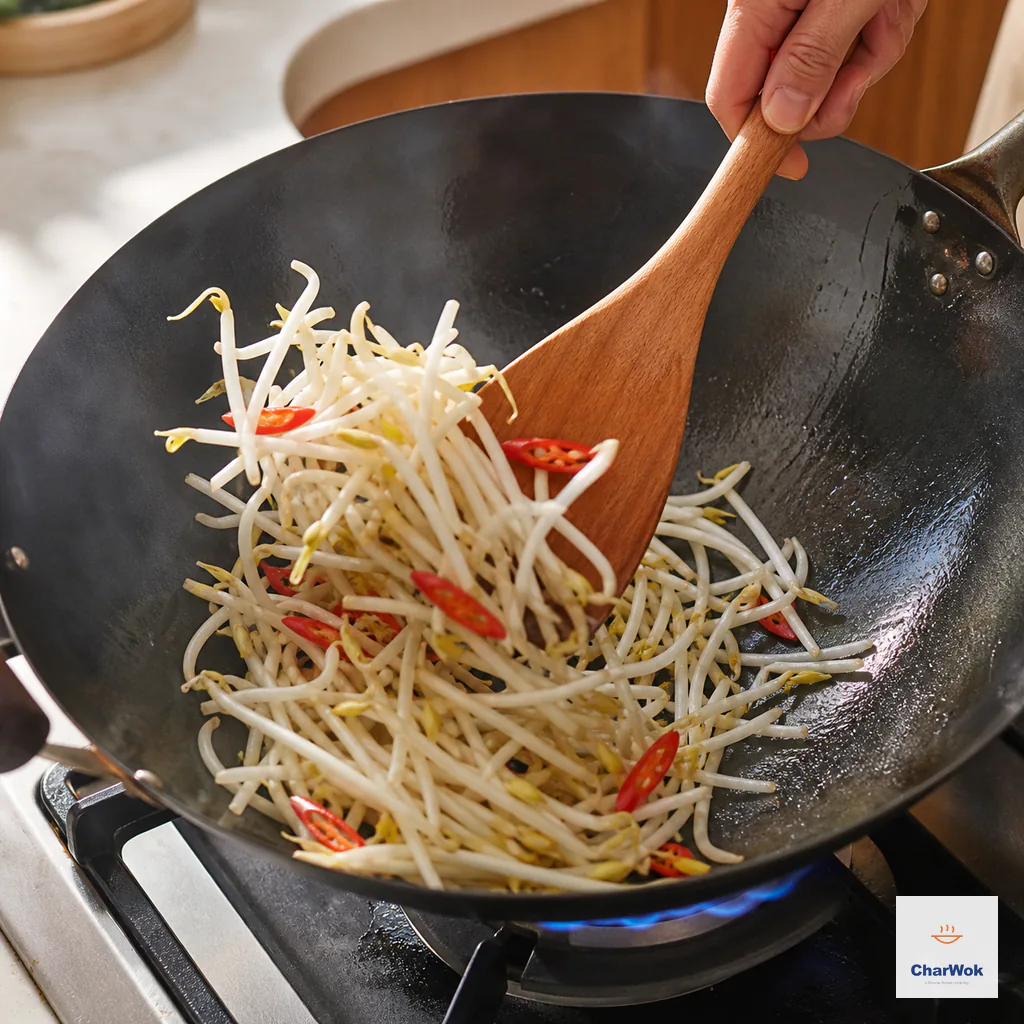
Add sprouts and chili together and toss constantly for 30 to 45 seconds; stop while the stems are still opaque white and no liquid has pooled.
- Sauce and finish. Pour the seasoning around the edge of the wok so it hits the hot metal and flashes, then toss in the scallions. Keep tossing for about 30 seconds, checking that the whole batch is piping hot before it leaves the wok.
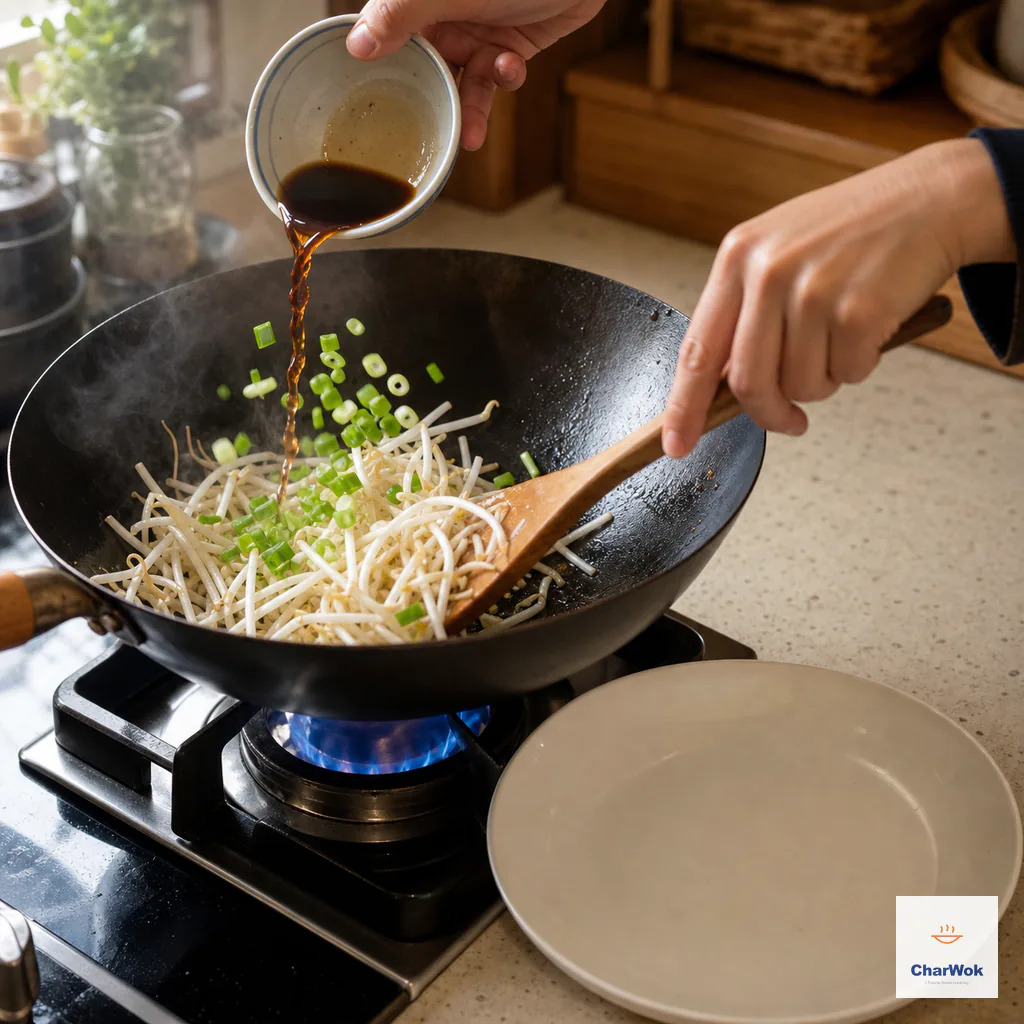
Pour the seasoning around the bare hot rim, add scallion at the same moment, toss only a few times and move the sprouts straight to the waiting plate.
The technique is the same one behind dry-fried green beans and broccoli with garlic sauce: high heat, fast work, sauce off the side of the pan. Once it clicks, you will stop overcooking greens for good.
When things go wrong
I have ruined more batches of sprouts than I have perfected. Here are the four ways it fails and what to do.
- The beans smell sour or vinegary mid-sprout. The batch is spoiled. There is no rescue: discard it, scrub and sanitize the equipment, and start over. Good drainage and clean equipment reduce spoilage, but no rinse schedule can guarantee that a batch is free of harmful bacteria.
- The sprouts came out pink, green, or bitter. Light leaked in. Check that the outer cloth fully covers the bowl and that you are not peeking more than twice a day. Trim and use them anyway in a strongly seasoned dish where the bitterness is masked.
- The sprouts are thin and curly, not fat and straight. No weight on top. Next time use the plate, and add a heavy mug on top of it as the sprouts lengthen.
- The stir-fry came out watery and limp. Heat was too low, or the sprouts sat in the pan too long. Next time, get the wok genuinely smoking, work in two smaller batches if your burner is weak, and pull the pan off the heat the instant the sauce hits.
- The garlic burned and turned bitter. It went in before the oil was ready, or you left it too long. Add the garlic only after the oil shimmers, and move straight to the sprouts within ten seconds.
Other ways to use a big harvest
A two-minute stir-fry is the obvious move, but a fat batch of homegrown sprouts deserves more than one outing.
- Quick-pickle them after cooking. Cook the sprouts until steaming hot throughout, shock them in ice water, drain hard, then cover with a sweet-sour rice-vinegar brine with a slit chili and a smashed garlic clove. Refrigerate promptly and use within a few days. They are brilliant on the side of red-cooked pork belly or anything deep-fried.
- Stack them into a bánh mì or wrap. Thoroughly cook the sprouts first, cool them promptly in the refrigerator, then toss with a few drops of rice vinegar before adding them to the sandwich.
- Fold them into a savory pancake batter. Stir a handful into a loose scallion-pancake or jianbing batter, then cook until the center and the sprouts are steaming hot rather than leaving a raw layer inside.
- Add them to soup or congee. Stir the sprouts into boiling congee or clear chicken broth and cook them through in the pot. Pouring hot liquid over raw sprouts in a serving bowl may only wilt them, not heat them thoroughly.
Variations and pairings
For a smoky, less bright version, swap the black vinegar for a teaspoon of chili oil plus a few drops of vinegar. Add a handful of soaked dried shrimp in step 3 for umami depth, the same trick that lifts simple vegetable stir-fries. If you want it richer, scramble two eggs in the wok first, set them aside, and fold them back in at the end. And if you enjoy the growing as much as the eating, you can use the same counter-top setup to grow garlic sprouts too.
Serve alongside something with body. This dish is a side, not a center. It cuts the richness of red-braised pork and balances a plate of fried rice. For a fully vegetarian meal, pair it with a tofu stir-fry and a clear soup.
Storing and reheating
Raw sprouts keep three days max in the fridge, in an open bag with a paper towel. Once cooked, sprouts do not reheat well; they weep water on the second pass and turn stringy. Cook only what you will eat. If you do reheat leftovers, heat them until steaming hot throughout rather than giving them only a quick warm-through.
A few common questions
Homegrown sprouts are one of those small kitchen projects that pay back many times the effort. The setup takes ten minutes, the daily ritual is thirty seconds twice a day, and the reward is an ingredient that makes a two-minute stir-fry taste like it came from somewhere with a better stove than yours. Start a batch this week, and once you have the rhythm, the same weighted-bowl method will grow you garlic sprouts through the winter.