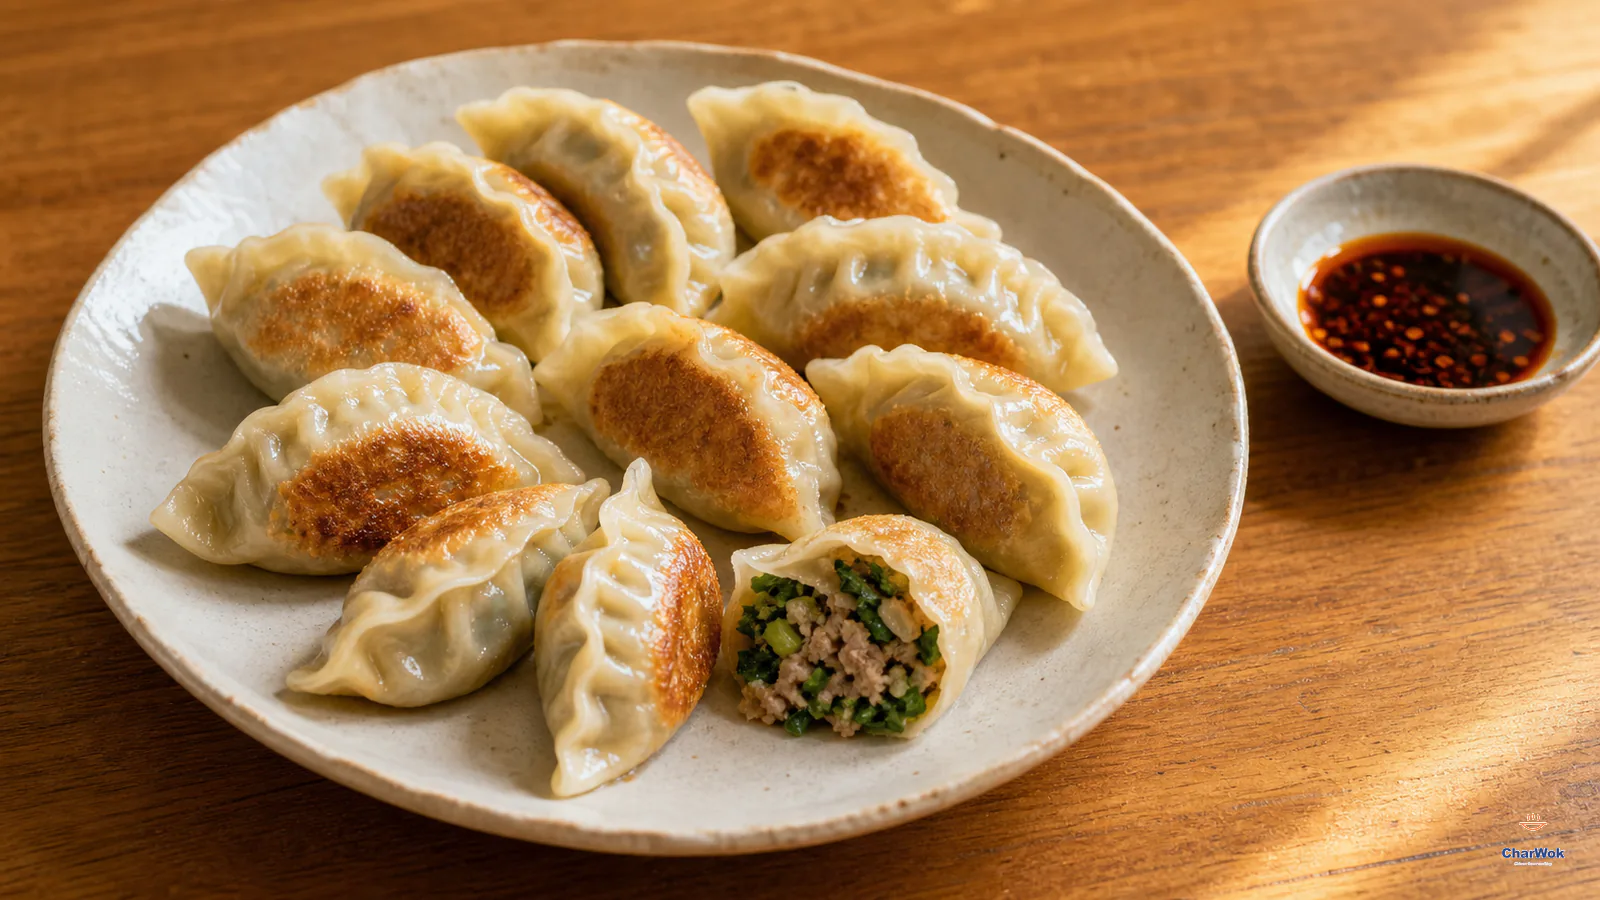
A great potsticker is two textures sharing one wrapper: a shellacked, nearly glassy bottom, and a soft, pleated top that gives way to a filling so juicy it runs onto the plate. The dish most home cooks struggle with is not the flavor. It is the crust. You fry, you steam, you lift the lid, and the bottoms are pale, or gummy, or glued to the pan in a ragged sheet.
Pork and garlic chive (jiu cai, 韭菜) is the filling I reach for first. The chive is sharp and sulfurous in a way supermarket chives never are, and it cuts through rich pork without needing ginger or stock aromatics. It is also unforgiving. Mix the chives in too early and they weep green water into your filling all afternoon. Get the timing right and the dumplings stay fat and clean.
At a glance. A low-hydration dough, about 52% water to flour by weight (130 g water to 250 g flour), rested twice. Stir the pork in one direction with cold liquid until it turns sticky and paste-like; that is the myosin binding the juices in. Pan-fry to color, then add water to one-third the dumplings' height and steam the tops under a lid. The make-or-break moment is letting the water fully boil off before the final crisp.
What these dumplings are, and where they sit
Potstickers are jiaozi that took the pan-fried route. The same wrappers and fillings can be boiled, steamed, or pan-fried; the technique in the skillet is the only thing that distinguishes a guotie (锅贴, "pan-stuck") from a boiled dumpling. Northern China treats pork-and-chive as a foundational pairing. The chive is one of the first fresh green things of spring, and pork was historically the everyday meat of the north. If you want the wider story of how jiaozi are built, the complete jiaozi guide walks through the families; this article goes deep on the pan-fried chive version specifically.
One thing to decide up front: store-bought wrappers will get you 80% of the way with a tenth of the effort, and I use them on weeknights. But the texture of a hand-rolled wrapper, thinner at the edge and slightly thicker in the center with a real chew, is what makes this dish worth the hour. If you have never made dumpling wrappers from scratch, this is a forgiving recipe to learn on.
Ingredients
Pan-fried pork and Chinese garlic chive dumpling ingredients at a glance
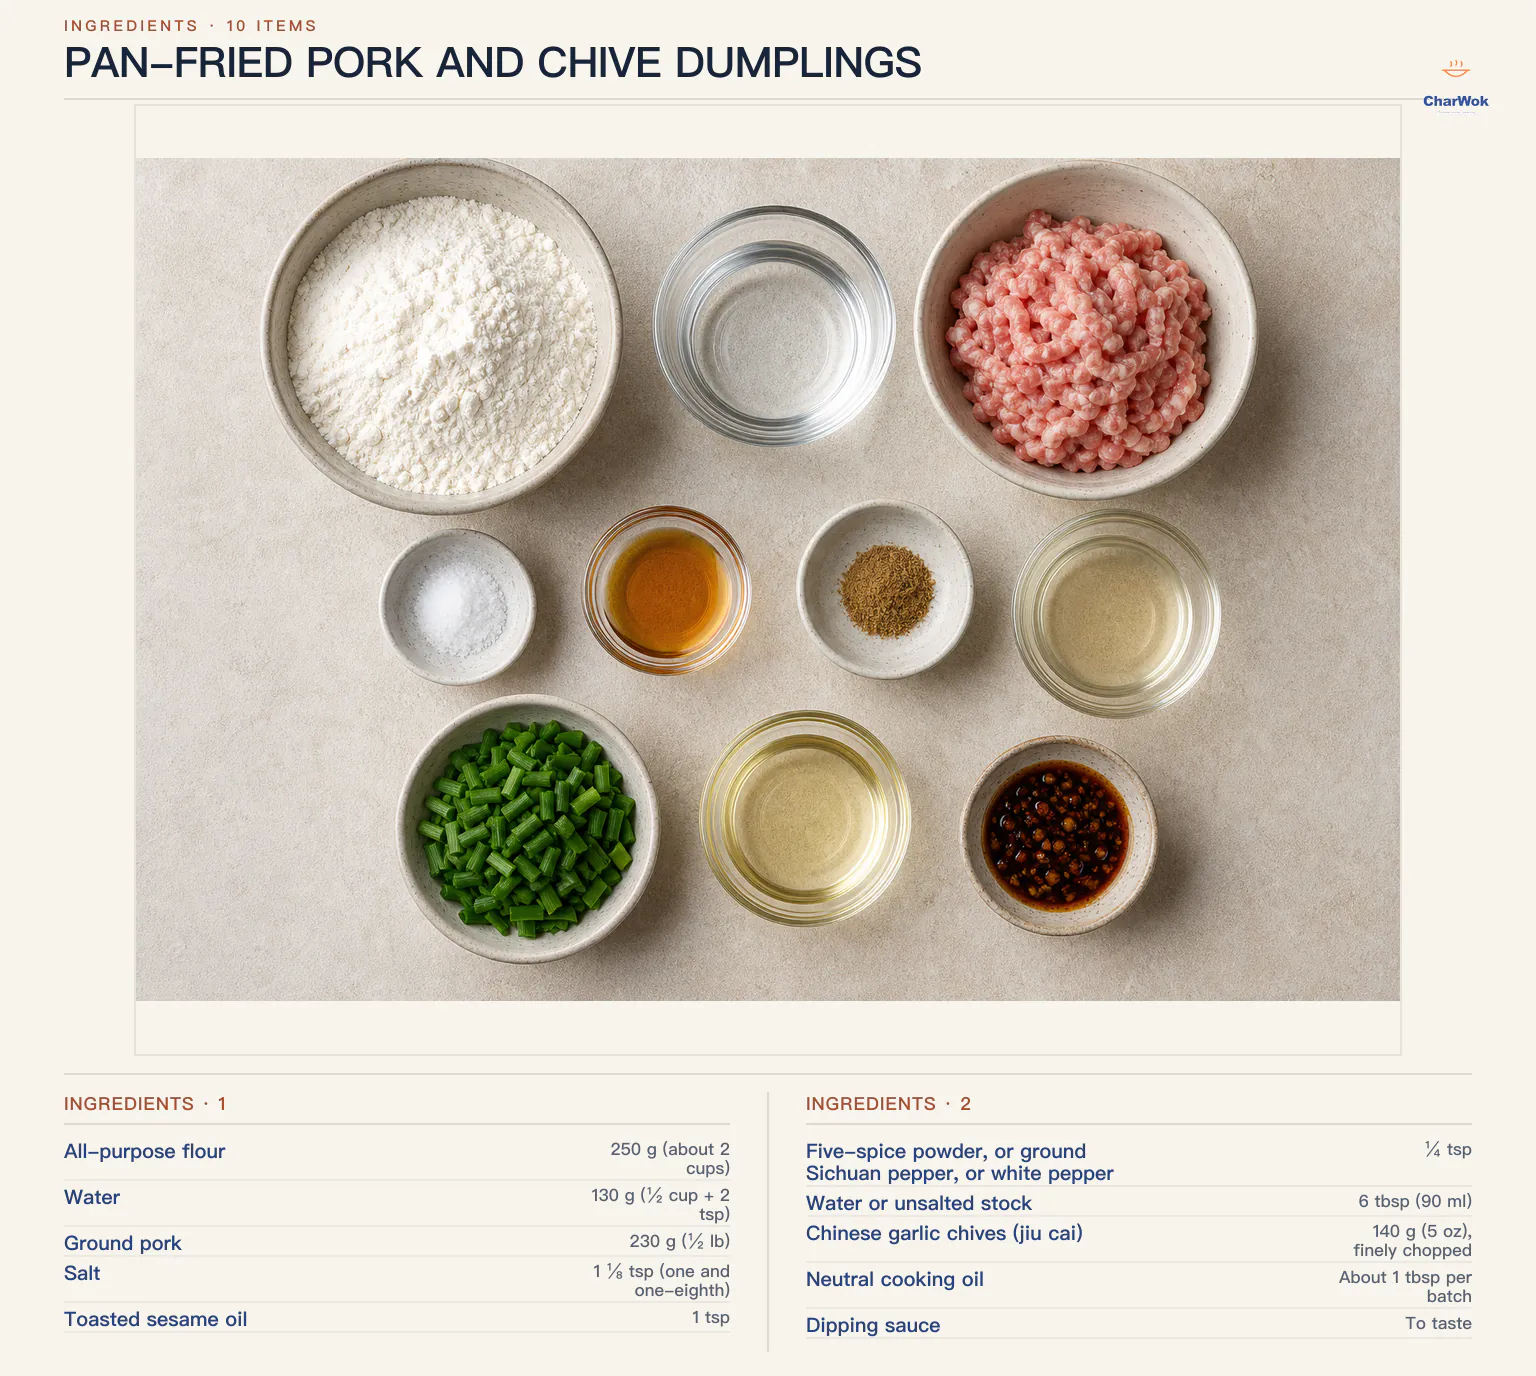
| Ingredient | Amount | Notes / substitute |
|---|---|---|
| All-purpose flour | 250 g (about 2 cups) | US all-purpose works. For more chew, swap in 20% bread flour. Avoid 00 or cake flour here. |
| Water | 130 g (½ cup + 2 tsp) | Cold tap water is fine; this is not a hot-water dough. Weigh it. Ten grams off changes the feel. |
| Ground pork | 230 g (½ lb) | Ask for 70 to 80% lean. Too lean and the filling is dry; too fatty and the pan spits and the bottoms never crisp. |
| Salt | 1 ⅛ tsp (one and one-eighth) | Measured level. This is 1⅛ teaspoon total, matching the source recipe, and it seasons both meat and the chives that follow. |
| Toasted sesame oil | 1 tsp | For aroma, not cooking. Add it raw to the filling. |
| Five-spice powder, or ground Sichuan pepper, or white pepper | ¼ tsp | Pick one. I use white pepper for chive; five-spice competes with it. See the five-spice guide if you want to know what you are choosing between. |
| Water or unsalted stock | 6 tbsp (90 ml) | This is the liquid you beat into the pork. Cold water is standard; stock adds roundness. |
| Chinese garlic chives (jiu cai) | 140 g (5 oz), finely chopped | Flat, garlicky green stalks sold at Asian markets, not the hollow round chives. Substitute napa cabbage (salted and squeezed) if you cannot find them. |
| Neutral cooking oil | About 1 tbsp per batch | Peanut, canola, or grapeseed. Not olive oil. |
| Dipping sauce | To taste | Chinese chili oil and black rice vinegar are the classic pair. |
The dough: rest it twice
This is a stiff dough by design. At 52% hydration there is not enough water to make it immediately smooth, and that is the point: you let time do the kneading for you. Gluten relaxes as it rests, so a dough that fights you at minute one kneads up silky at minute fifteen.
- Bring it together, roughly. Add the water to the flour in two or three splashes, stirring with chopsticks or a fork. Stop the moment no dry flour remains. It will look shaggy and unpromising. Press it into a ball, cover, and walk away for 10 minutes. The flour hydrates while you ignore it.
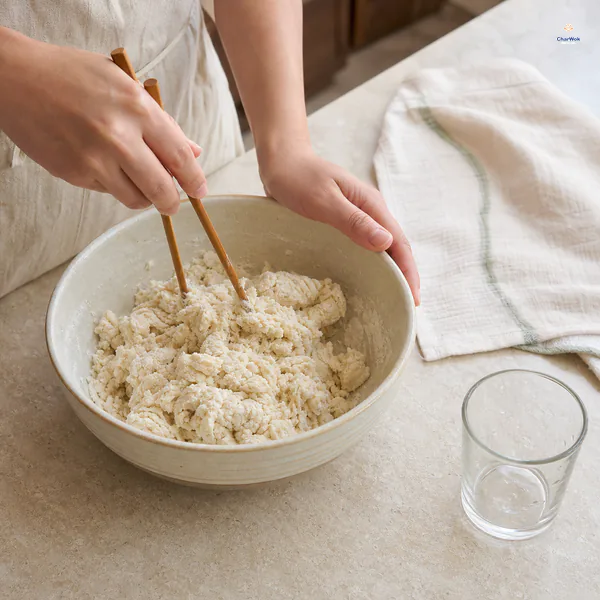
Add the cold water in two or three splashes and stop mixing as soon as no dry flour remains; gather the firm shaggy dough into a ball, cover and rest for 10 minutes.
- Knead, then rest again. Knead the rested dough for a minute or two until smooth. Cover and rest 30 to 60 minutes. The longer rest makes the dough pliable enough to roll thin without springing back. If you have a stand mixer with a dough hook, run it on low for about 8 minutes, then rest.
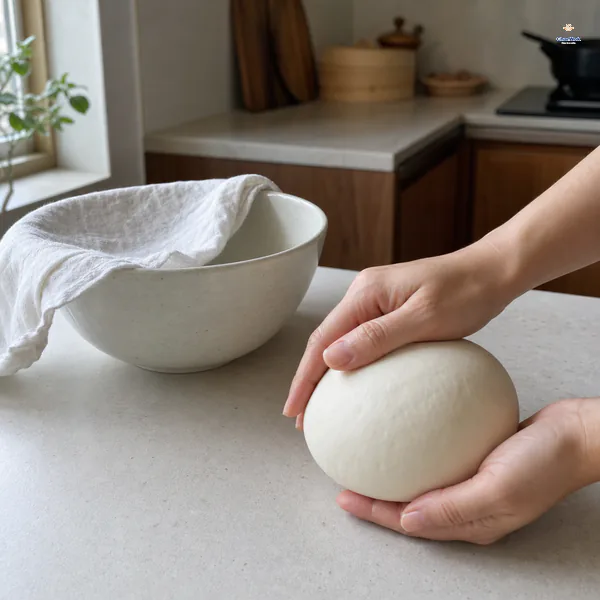
After the first rest, knead until smooth, return the dough to the bowl and keep it covered for another 30 to 60 minutes.
- Test the readiness. Press a thumb into the dough. The indent should fill back in slowly and leave a soft, almost pillowy surface. If it snaps back hard, give it another 15 minutes.
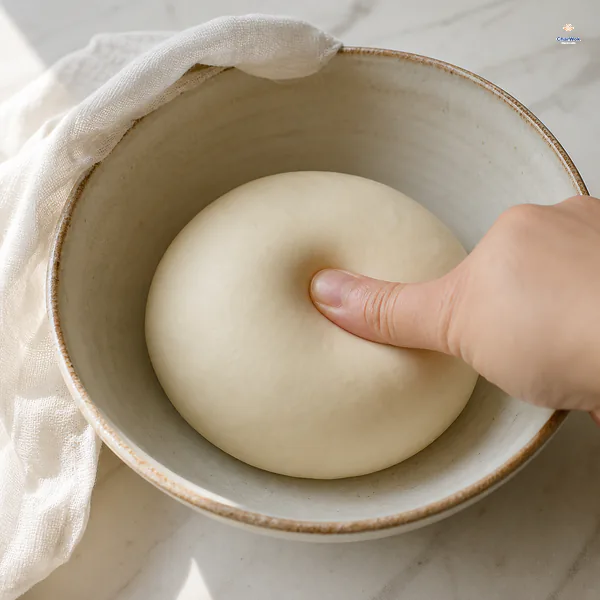
The rested dough is ready when a thumbprint returns slowly; if it springs back at once, cover it and wait another 15 minutes.
While the dough rests, make the filling. Timing the two together is the whole game.
The filling: stir in one direction, add chives last
Here is the part most recipes under-explain. When you beat liquid into ground meat and stir it persistently in a single direction, you are unwinding and aligning the muscle proteins (chiefly myosin) so they form a sticky network that traps water. Done right, the meat holds onto the 6 tablespoons of liquid you add and releases it only when you bite, which is what people mean when they call a dumpling "juicy." Stirred halfheartedly, or in alternating directions, the network never forms and the liquid leaks into the pan as gray soup. For a deeper look at this across many fillings, see the dumpling fillings guide.
- Season the pork first. Put the ground pork in a bowl with the salt, sesame oil, and your chosen pepper. Do not add the liquid yet.
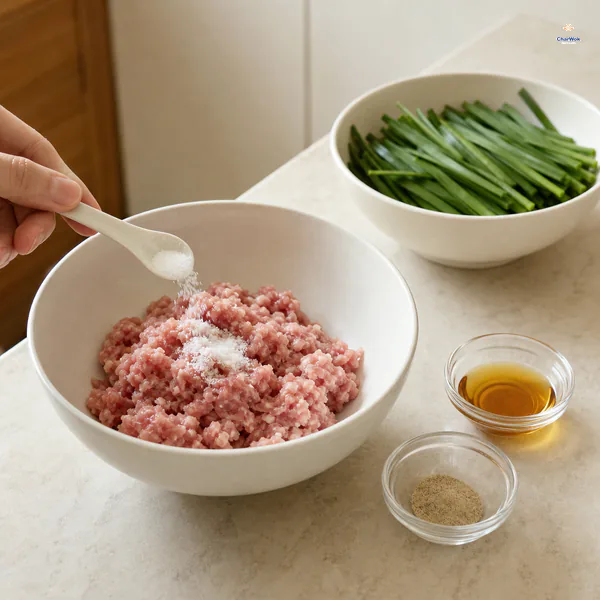
Season the pork first with salt, toasted sesame oil and one chosen ground spice; do not add the liquid or chives yet.
- Beat in the liquid, one direction. Add the water or stock in three pours, stirring briskly and consistently in one direction (clockwise or counterclockwise, your call, just do not switch). After each addition, keep stirring until that pour disappears into the meat before adding the next.
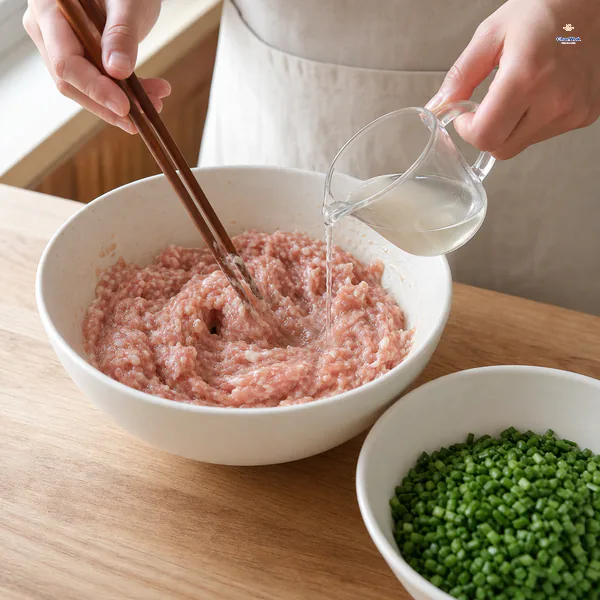
Beat in the 90 milliliters of water or unsalted stock in three additions, stirring in one direction until each addition is completely absorbed.
- Stop when it is sticky. The mixture should look lighter in color, slightly fluffy, and tacky enough to cling to your spatula and stretch when you lift it. That stretch is the protein network. If yours still looks wet and loose, keep stirring another minute.
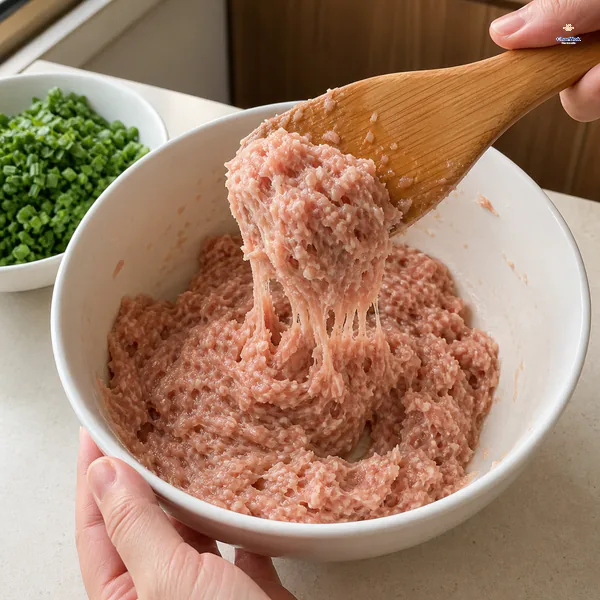
Stop when the pork looks lighter and fluffy and clings in a tacky stretch; if liquid still pools, keep stirring before adding anything else.
- Fold in the chives at the very end. Add the chopped chives and fold just to distribute. Do not over-mix, and do not let the finished filling sit at room temperature for hours, because the salt will pull water out of the chives. If you are not folding right away, keep the meat and the chives in separate bowls in the fridge and combine at assembly.
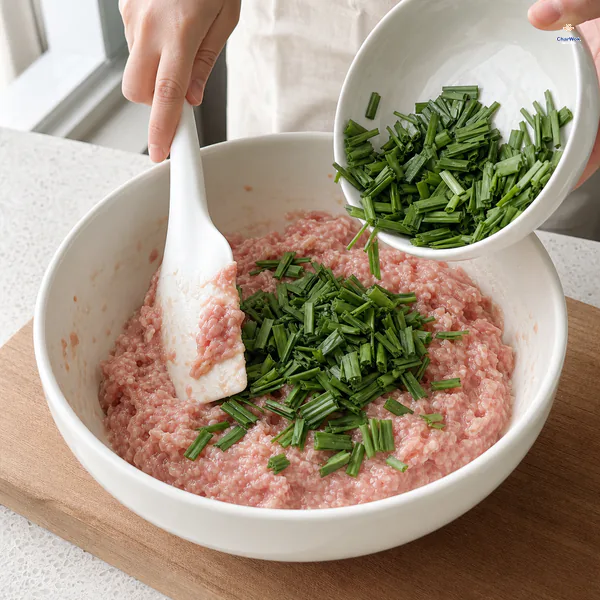
Add the finely chopped flat garlic chives last and fold only until evenly distributed; if wrapping is delayed, keep the filling cold.
A drop of oil coating the chives before they meet the meat is an old trick to slow that weeping. I skip it for chive fillings because the flavor is cleaner without, but if your kitchen is warm or you are assembling slowly, toss the chopped chives with a half-teaspoon of neutral oil first.
Rolling and folding
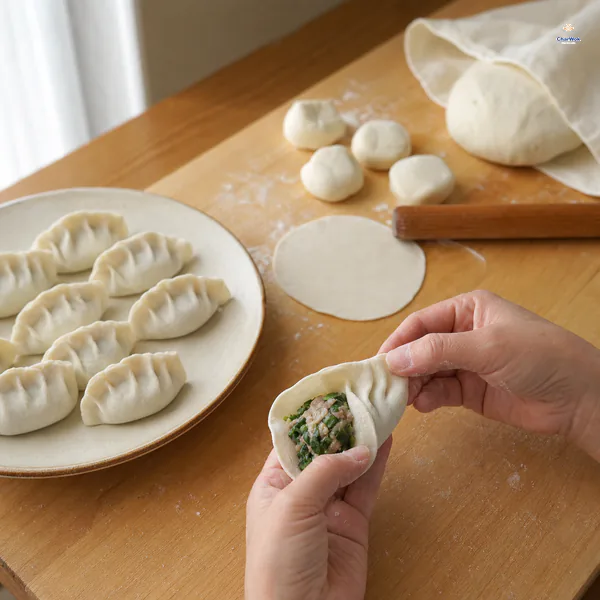
Divide the dough into three ropes and cut each into 10 pieces; roll each wrapper to about 8 centimeters with a thin rim and slightly thicker center, add a rounded tablespoon of filling and press the seam firmly without water.
Divide the dough into three pieces and work one at a time, keeping the others covered. A dry skin on the dough is what causes torn wrappers. Roll each piece into a rope and cut it into 10 equal pieces. Flatten a piece with your palm, then roll it out, rotating the disc a quarter turn between each pass so it stays round. Aim for a wrapper about 8 cm (just over 3 inches) across, thinner at the rim than in the center. The thicker center keeps the filling from bursting through during cooking.
Spoon a rounded tablespoon of filling onto each wrapper, then fold and seal however you like. The half-moon pleat is the default, but there are many ways to fold a dumpling, and none of them changes how it cooks. Press firmly along the seam and check that no chive piece is poking out, or the dumpling will open in the pan.
Using frozen wrappers? Thaw them in the fridge, then run a wet finger around the edge of each one before folding. Homemade dough seals on its own moisture, but bought wrappers need help. The pork and napa cabbage dumpling uses the same approach if you want a second filling to compare against.
Pan-frying: color, steam, crisp
The three-stage skillet method is the whole technique of a potsticker, and understanding each stage is what saves you from pale or torn bottoms. Stage one browns the wrapper in oil so it can brown and later crisp. Stage two steams the tops and cooks the filling through with a splash of water under a lid. Stage three boils that water off and re-crisps the now-cooked bottom. Skip or rush any stage and the texture collapses.
- Color the bottoms. Heat a 12-inch skillet over high heat and add about a tablespoon of neutral oil. Arrange the dumplings snugly, flat side down. Leave them to fry undisturbed until you can lift one and see a deep gold underside, roughly 2 minutes. If your pan is small, fry in two batches rather than crowding, since crowded dumplings steam instead of brown.
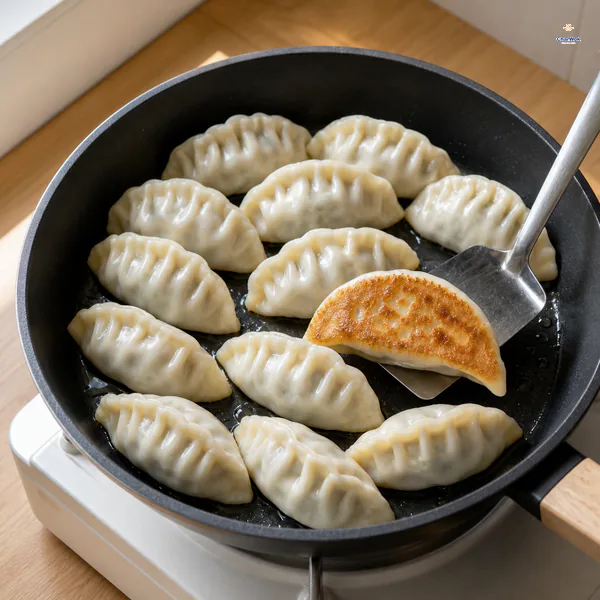
Heat about one tablespoon of neutral oil in a 12-inch skillet, arrange the dumplings flat-side down and leave them undisturbed over high heat for about 2 minutes until deeply golden.
- Steam under a lid. Pour in cold water to come up about one-third of the dumplings' height. It will hiss violently. Cover immediately and keep the heat high so the water maintains a rolling boil. Cook until the water is gone, about 5 to 7 minutes. This is when the filling cooks and the tops soften.
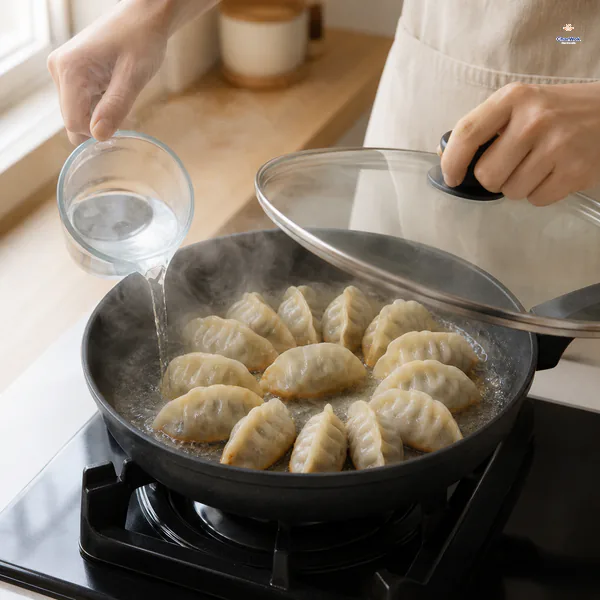
Pour in cold water to reach about one-third of the dumplings' height, cover immediately and keep the heat high for 5 to 7 minutes until the water is gone.
- Crisp the bottoms again. Once the water has fully evaporated, uncover and let the dumplings fry in their residual oil for about 20 seconds more. This is the step people skip, and skipping it is why you get gummy bottoms. The pan should sound dry and crackly, not wet, when you tilt it.
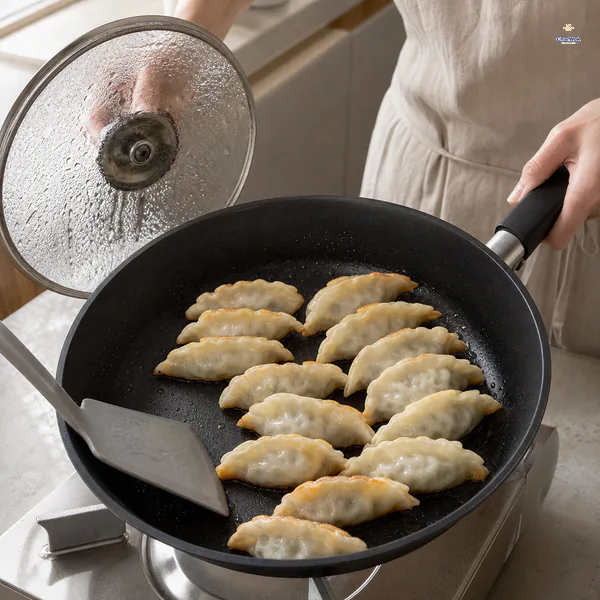
When the loud bubbling changes to a dry crackle, uncover and fry for about 20 seconds in the residual oil to reset the crisp bottoms.
- Loosen and plate. Run a thin spatula under the dumplings to release them, and serve bottoms up so the crust shows. Eat them plain or with chili oil and black rice vinegar.
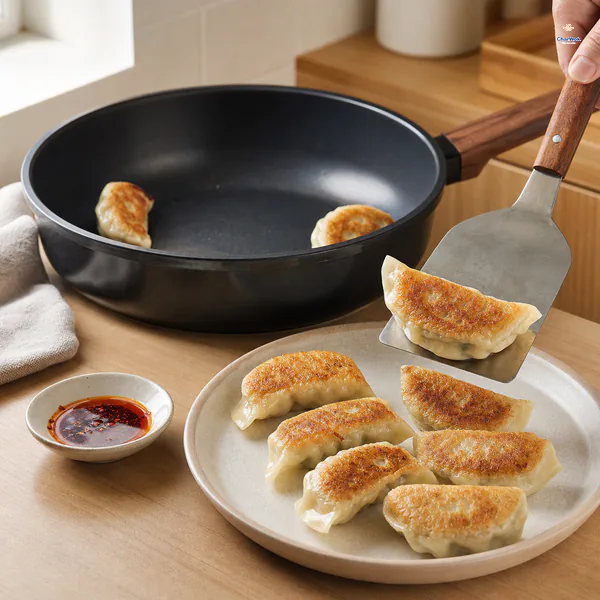
Loosen the dumplings with a thin spatula and plate them golden-side up; serve immediately with optional chili oil and black rice vinegar.
The same staged method underlies every potsticker in this family. The chicken potstickers with a crispy flour skirt push the idea further with a starch slurry that fuses into a lace web across the pan, a beautiful next step once this basic version is reliable.
When things go wrong
- The dough is too sticky to roll. It is under-rested, not under-floured. Cover it and wait another 20 minutes; the gluten will relax and the surface will dry. Dusting with flour is a patch, resting is the fix.
- Wrappers tear as you fold. Either the dough dried out (you left a piece uncovered too long) or you rolled the center too thin. Patch small tears by pressing a damp scrap of dough over the hole. Discard a wrapper that is torn all the way through; it will leak filling into the pan.
- The bottoms are pale and soft. You did not brown them long enough in stage one, or the heat was too low. The oil should shimmer and the first dumpling you peek at should be genuinely golden before you add water. Pale at this stage means pale at the end.
- The dumplings stick and tear when you lift them. The water did not fully boil off before the final crisp, or you skipped the final 20 seconds. Listen for dry crackling, not sizzling steam, before you try to release them. A thin metal spatula works better than silicone here.
- The filling is dry and crumbly. The pork was too lean, or you did not stir long enough to build the protein network. Next time buy pork with visible fat and beat the liquid in until the meat is visibly sticky and stretchy.
- The filling wept green water while it sat. You mixed the chives in too early. Combine meat and chives only when you are ready to fold, or hold them separately in the fridge.
- Raw chive taste dominates. Chive is meant to be assertive, but if it reads as harsh, your pieces may be too large. Chop to roughly rice-grain size.
Variations and what to serve alongside
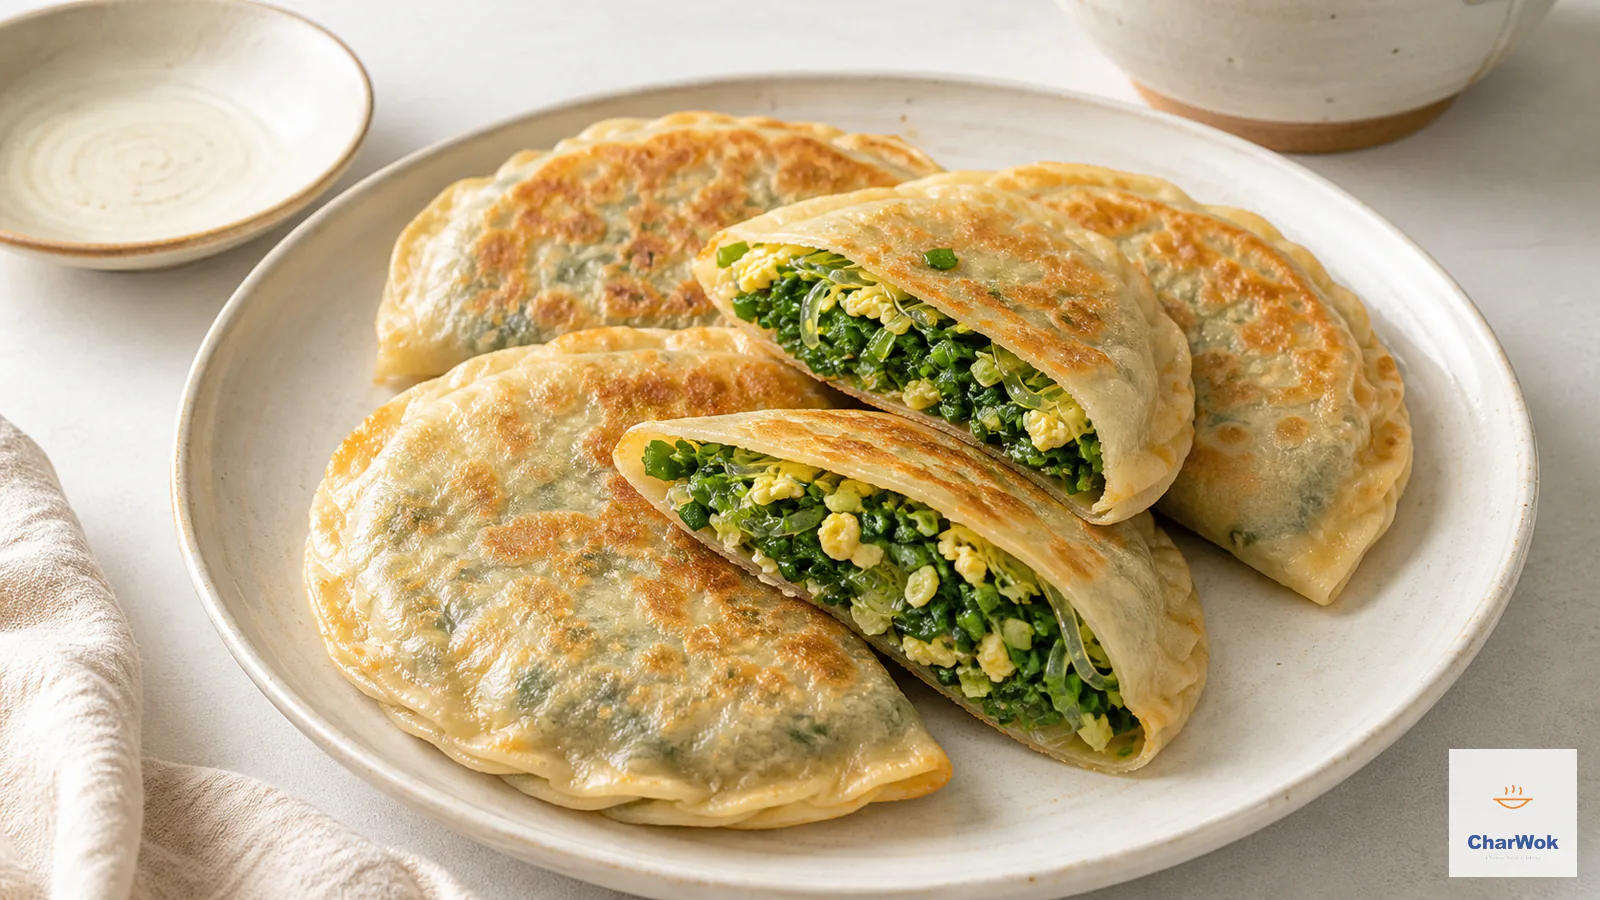
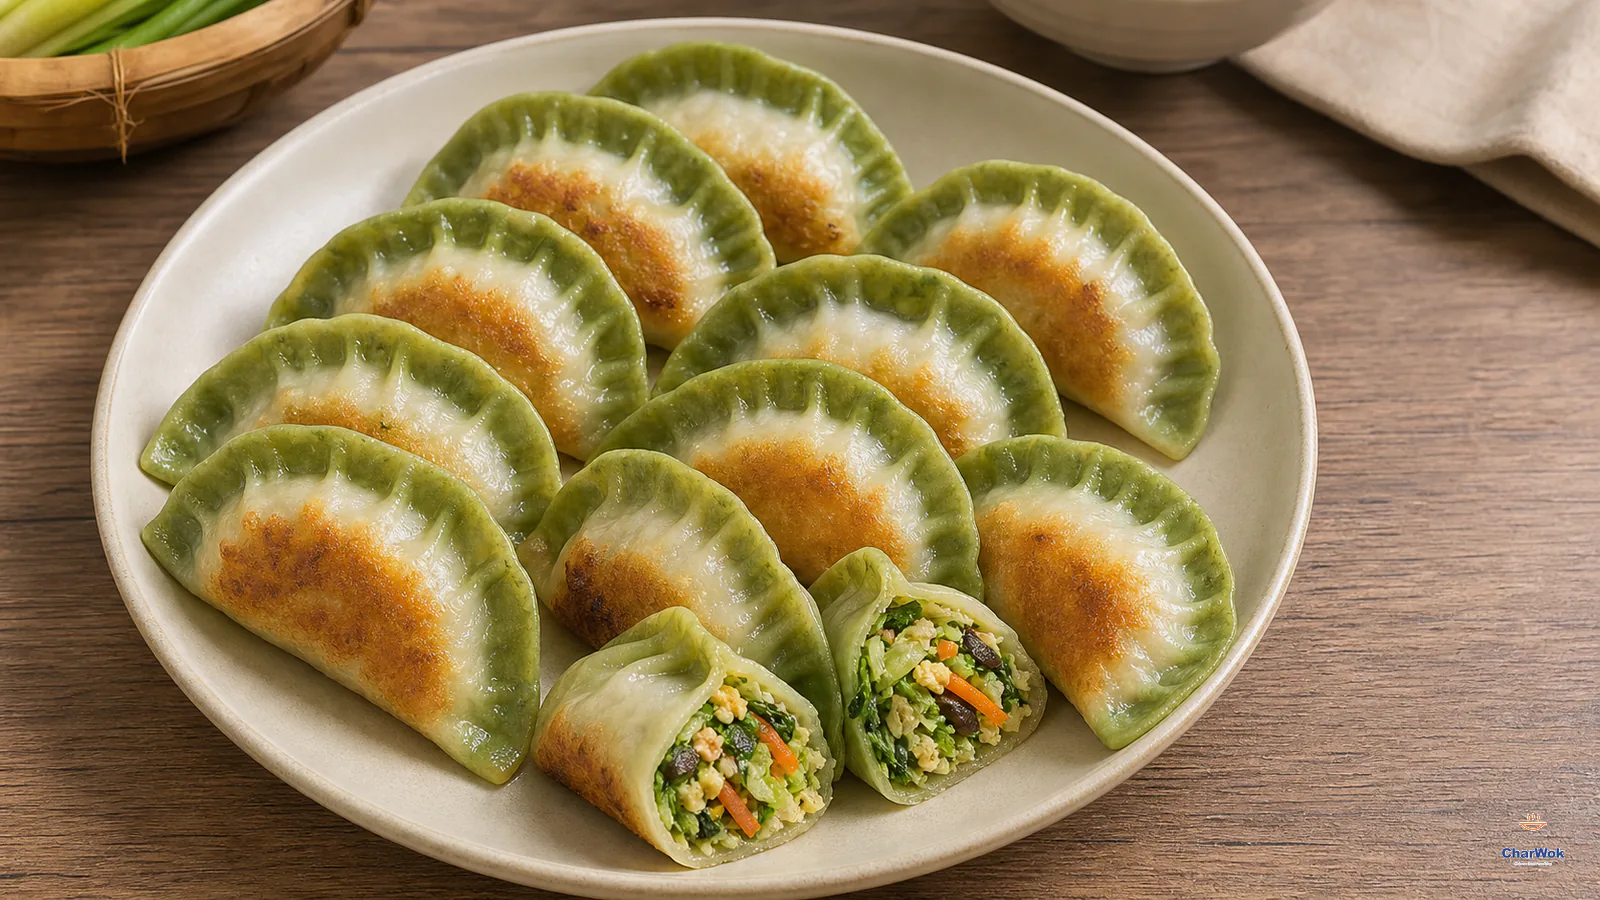
The pan-fried method is filling-agnostic. Once the technique is in your hands, the same dough and skillet routine works for a vegetarian potsticker, a kimchi dumpling with a fermented kick, or a saucy Sichuan Zhong dumpling dressed in chili oil after cooking. If you want to stay in the pork-and-chive orbit, chive pockets (jiu cai he zi) use the same filling in a pan-fried flatbread and are the best way to use up leftover chives.
For a full potsticker spread, I serve them with a quick dumpling dipping sauce (soy, vinegar, a little sugar, chili oil to taste) and a bowl of hot and sour soup, which has the acidity and warmth to balance the rich, crusty dumplings. A plate of cold smashed cucumber in garlic and vinegar gives the meal something crunchy and bright.
Storage and reheating
Assembled but uncooked dumplings freeze beautifully. Arrange them in a single layer on a parchment-lined tray, freeze solid, then transfer to a bag. Cook them straight from frozen (do not thaw), adding about 2 extra minutes to the covered steaming stage and a touch more water so the pan does not run dry before the filling is hot through. The dough gets slightly less tender after freezing, but the crust is if anything better because the longer cook deepens the color.
Already-cooked potstickers reheat best back in a dry skillet over medium heat to re-crisp the bottom, then a tablespoon of water and a lid for a minute to warm the filling. Microwaving turns the prized crust sodden; only do it if you do not care about texture. Leftover filling keeps two days in the fridge and is excellent folded into the chive and egg stir-fry the next morning. A larger pan-fried format with a similar filling-but-bread logic is sheng jian bao, if you want to take the idea toward a mealier, yeast-raised bun.
Frequently asked questions
Can I use regular supermarket chives? You can, but the result is a different, milder dumpling. Round hollow chives and thin Western chives lack the flat-leaf garlic chive's pungency. If that is all you have, add a small minced garlic clove to the filling to recover some of the bite.
Do I need to rest the dough that long? Yes, the rest is doing real work. Two short kneads separated by rests build a smoother, more elastic dough than one long knead, because gluten forms during the waiting, not the working. Cutting the rest short is the most common reason the wrappers fight you.
Why stir the meat in only one direction? It lines up the muscle proteins so they trap the liquid you add. Reversing direction tangles and breaks that network, and the filling ends up loose and wet rather than springy and juicy.
Can I cook these from frozen? Yes, straight from frozen with no thawing. Add a little more water and a couple extra minutes under the lid so the center heats through before the water boils off.
My bottoms stuck and tore. Is the pan ruined? No. Soak the pan in warm water to lift the stuck dough, then re-season if it is carbon steel. The dumplings are still edible; serve them broken-side up and call them deconstructed.
The whole dish comes down to two judgments: rest the dough long enough that it rolls thin, and let the skillet water boil fully away before the final crisp. Get those two and the rest takes care of itself. The chive filling is sharp enough to stand up to the dark crust, and once the staged pan-fry is second nature, every other potsticker in your repertoire gets easier.