A dumpling fold has two jobs that pull against each other: trap a wet filling inside, and stay closed through a rolling boil. Most home cooks I have watched struggle not because their hands are clumsy but because they treat folding as decoration. It is not. The pleats are a closure mechanism, and once you understand what each pleat is doing, the pretty shapes arrive on their own.
I will say the unfashionable thing up front: for a Tuesday-night boiled dumpling, the plain half-moon fold is the right answer. The fanned, standing pleat that Instagram loves is for pan-fried dumplings where the shape actually sits in the pan and crisps. I will teach you both, and tell you exactly when each one pays off.
At a glance: Aim for five to eight pleats on a standing dumpling, about 1 teaspoon (8 to 10 g) of filling per wrapper for your first attempts, and seal wet-on-wet dough only. The make-or-break detail is pressing out every pocket of air before the final crimp, because trapped air is what splits a dumpling open in the pot.
What a fold is really doing
Two physics problems sit inside every dumpling. The first is steam pressure: as the filling heats, the water inside it turns to vapor and the wrapper has to hold that pressure or burst. The second is dough hydration: a flour-and-water wrapper only welds to itself if both surfaces are equally wet. Flour the rim, or let it dry out, and the seal becomes a fault line.
Every fold in this guide is a way of stacking dough over dough so the seal runs along a longer path than a single flat press. A longer seal has more surface area in contact, and more contact means a stronger weld once the starch gelatinizes in the heat. That is why a pleated dumpling survives a boil and a flat-sealed one often does not. If you want the full backstory on the dough itself, my overview of Chinese jiaozi walks through flour choice and hydration in detail.
Wrappers: the one decision that decides everything
I am going to be blunt. Store-bought round wrappers, the kind in the refrigerated case labeled "gyoza" or "dumpling," are a fine product, and they are the reason most people give up on anything beyond the half-moon. They are dry and stiff by design, because shelf stability demands low moisture. You can wet the rim with a finger dipped in water and they will seal for a pan-fry. But try to pleat them into a standing fan and they will crack along every crease.
Fresh, hand-rolled wrappers have a pliable, yielding feel and enough give to drape across your cupped palm without splitting. Their surfaces grip each other and fuse with no added water at all. If you are going to spend an evening learning folds, make the dough. My homemade wrapper method uses just flour and water and rests the dough so the gluten relaxes; relaxed dough is the difference between a wrapper that stretches and one that fights you.
What you need in front of you
Ingredients at a glance
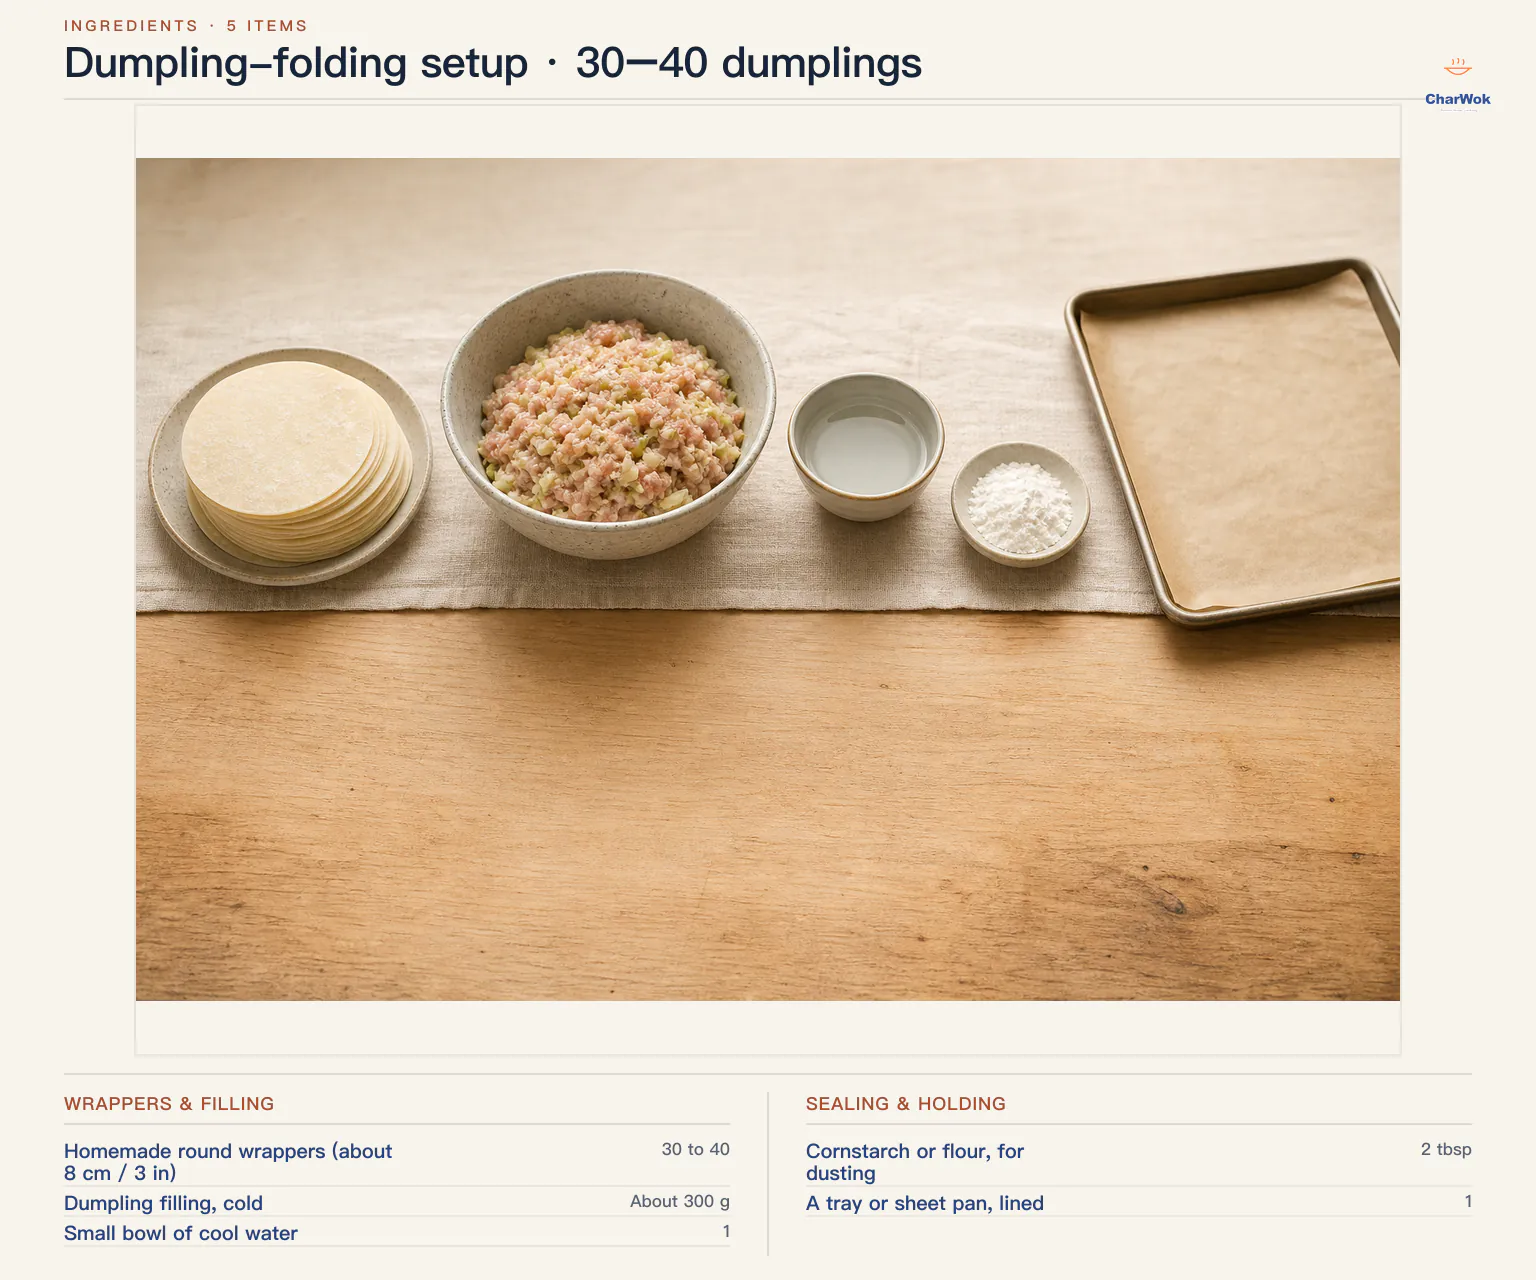
| Item | Amount | Notes / substitute |
|---|---|---|
| Homemade round wrappers (about 8 cm / 3 in) | 30 to 40 | Store-bought rounds work for half-moon and simple pleats only; wet the rim |
| Dumpling filling, cold | About 300 g | Plan on roughly 8 to 10 g per wrapper, so 300 g fills about 30 to 40; chilled filling is easier to portion and seals better. A classic pork and napa cabbage filling scales to match the wrapper count you make |
| Small bowl of cool water | 1 | Only needed for store-bought wrappers, or if your dough has dried out |
| Cornstarch or flour, for dusting | 2 tbsp | Use sparingly; excess flour on the rim is the number-one cause of failed seals |
| A tray or sheet pan, lined | 1 | Parchment or a light flour dusting; cover finished dumplings with a damp towel so they do not skin over |
Two folds to learn first
I am not going to dump ten folds on you and walk away, the way most tutorials do. Two folds cover ninety percent of what you will actually cook: the half-moon and the standing pleat. Master these and the fancier variations are just rhythm changes on the same motion.
The half-moon (start here)
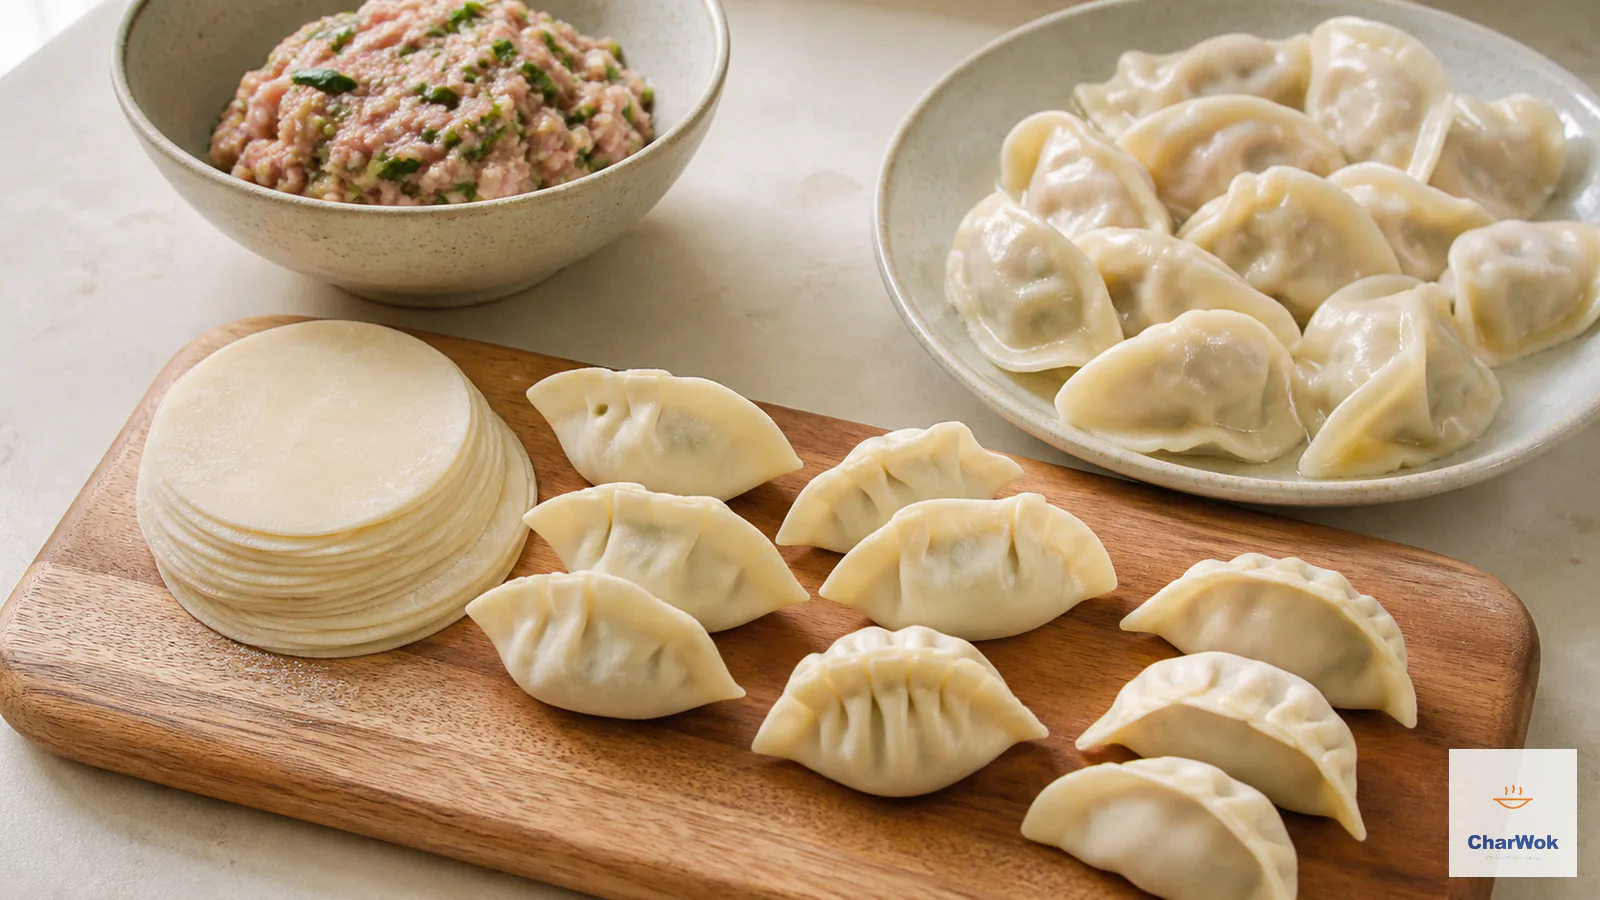
- Hold a wrapper in your non-dominant hand, cupped slightly into a shallow bowl shape. The cupping does real work: it lowers the center of the filling so it stays put when you close the top.
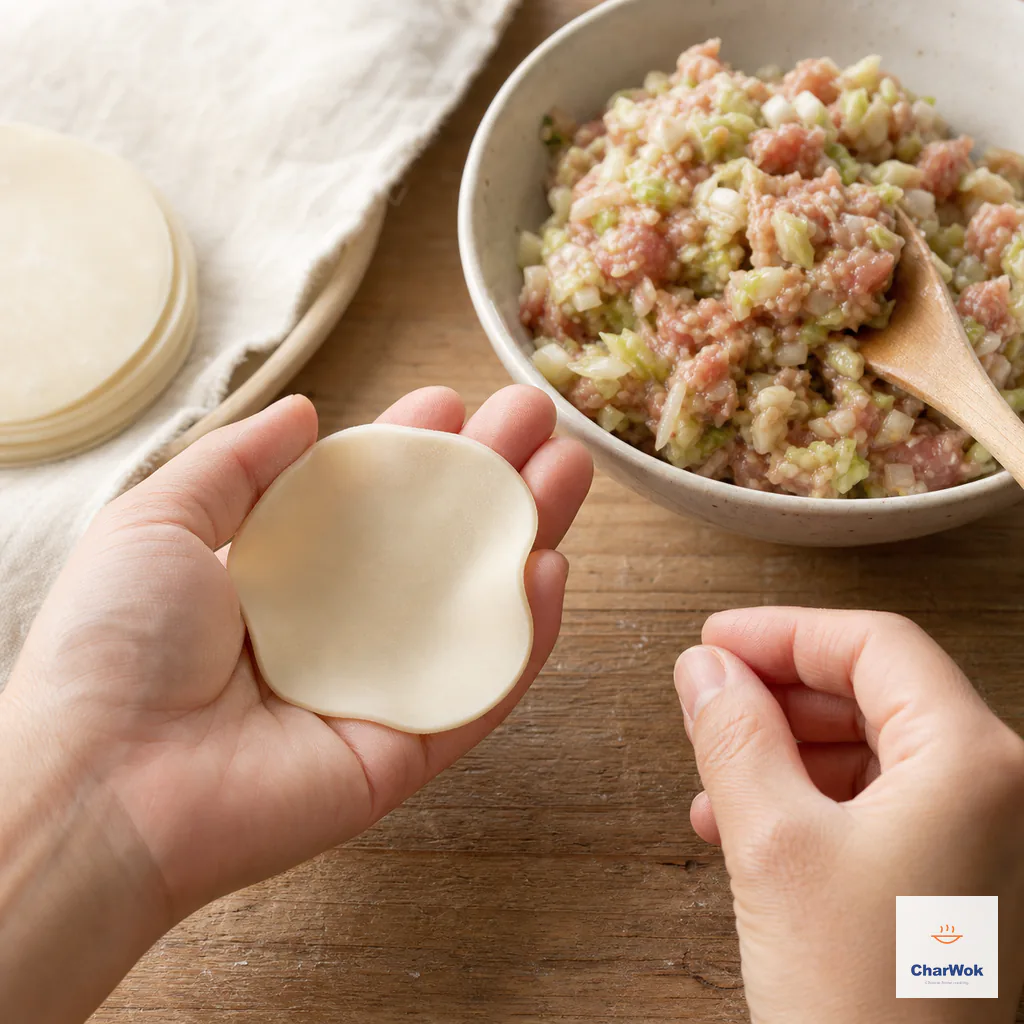
Cup the wrapper so its lowered centre holds the filling away from the rim.
- Spoon about 1 teaspoon (8 g) of filling into the center. Resist the urge to overfill. A dumpling that is bursting before it is closed is a dumpling that will burst in the pot.
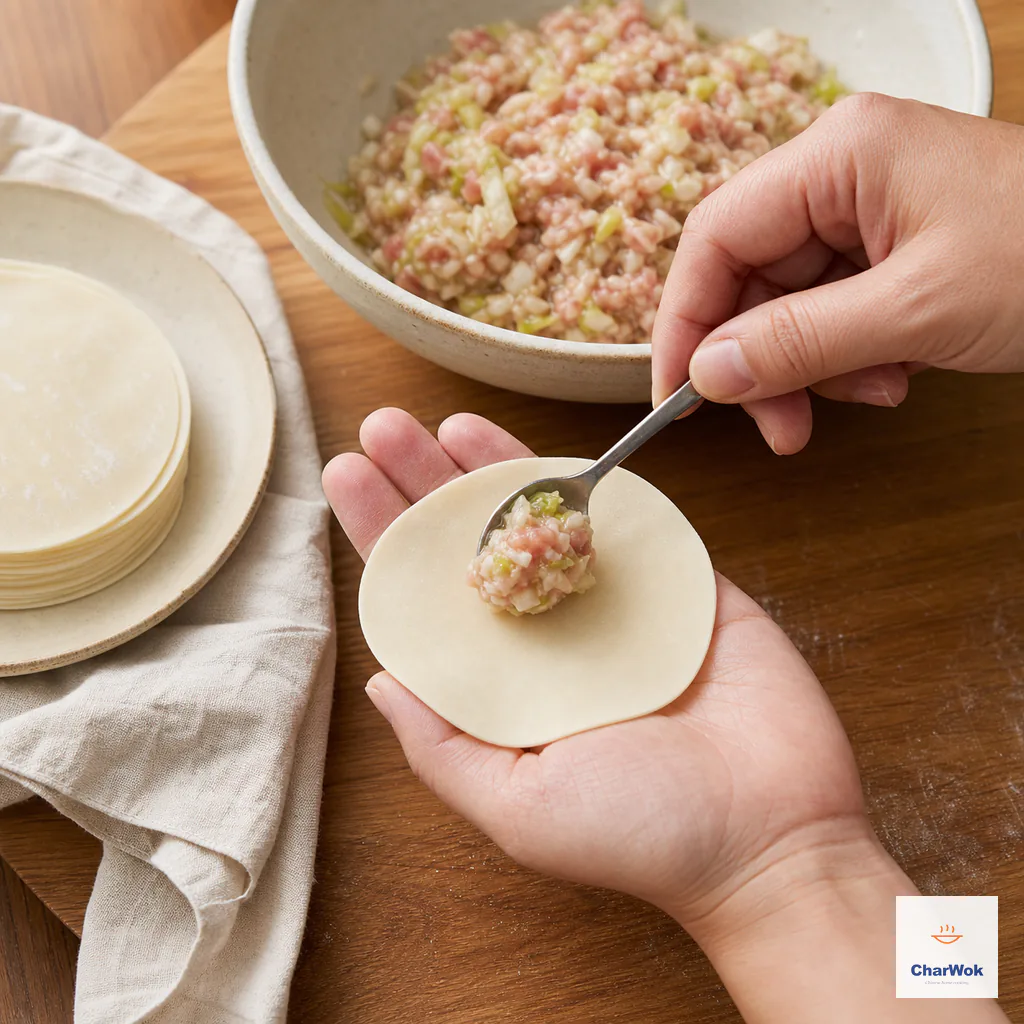
Start with about 8 grams of filling and keep every part of the sealing rim clean.
- For a store-bought wrapper, paint a thin band of water along the outer edge where the seal will form. For a fresh wrapper, skip this; the dough is wet enough.
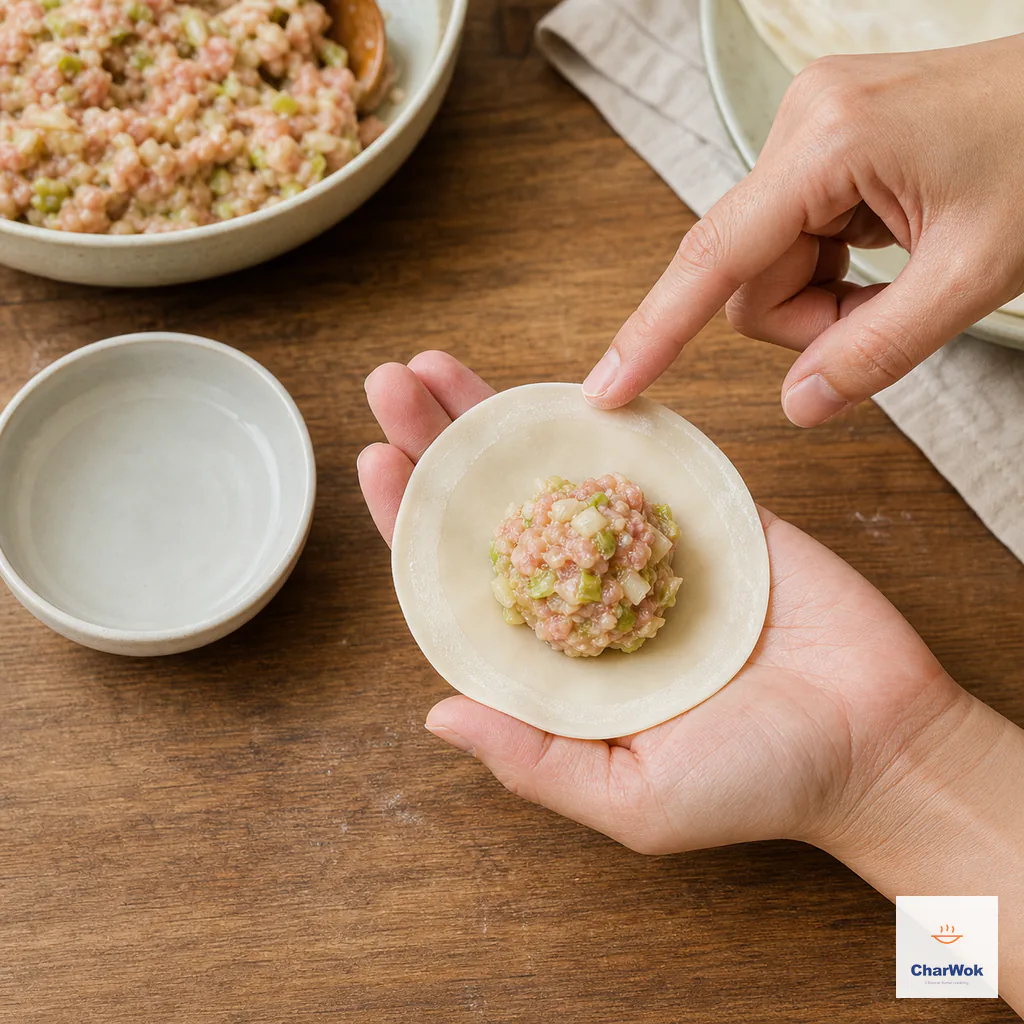
Wet only a dry store-bought wrapper; fresh pliable dough should seal without added water.
- Fold the wrapper in half over the filling to make a half-moon. Do not press yet. First, use a thumb to nudge any air pockets out toward the open edge.
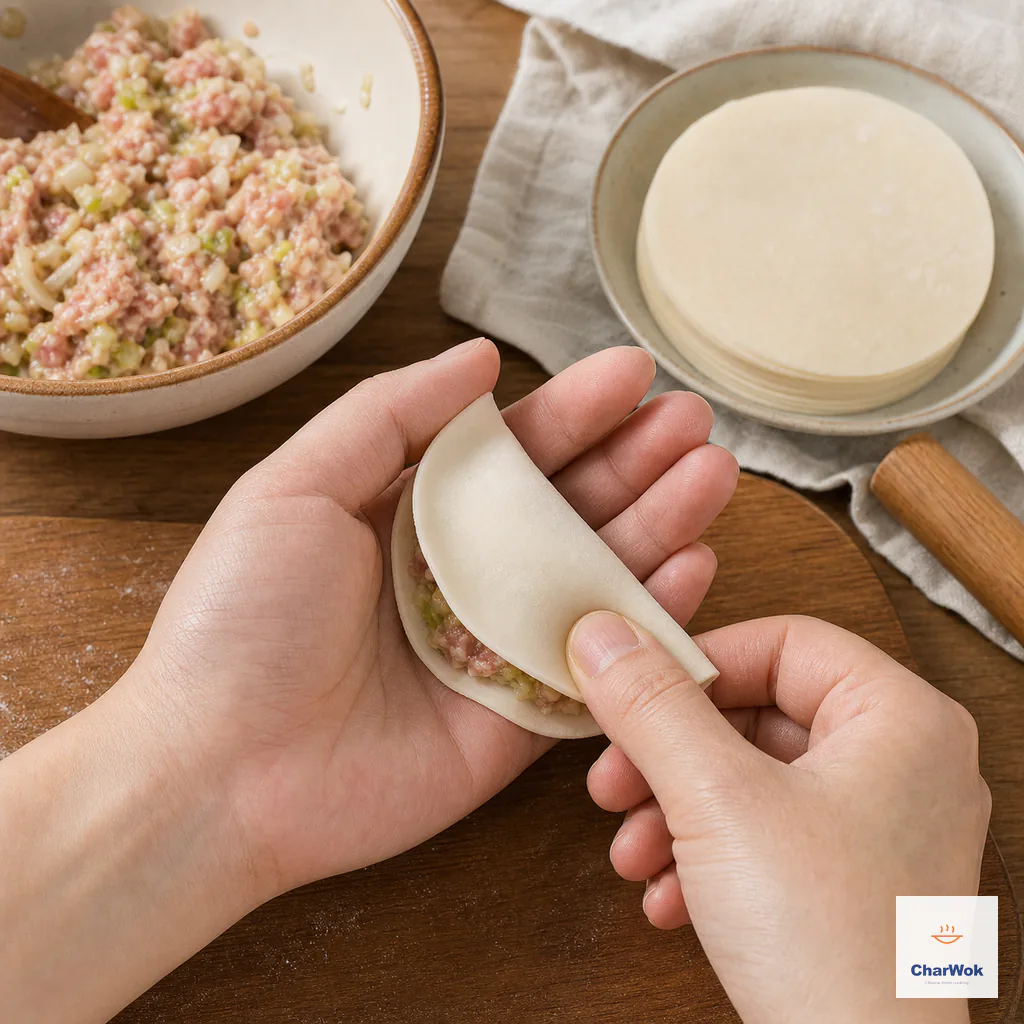
Fold first but leave the edge open until every trapped air pocket has been pushed out.
- Pinch the top center shut, then press outward along both edges to the corners. Press firmly enough that you feel the dough layers merge into one.
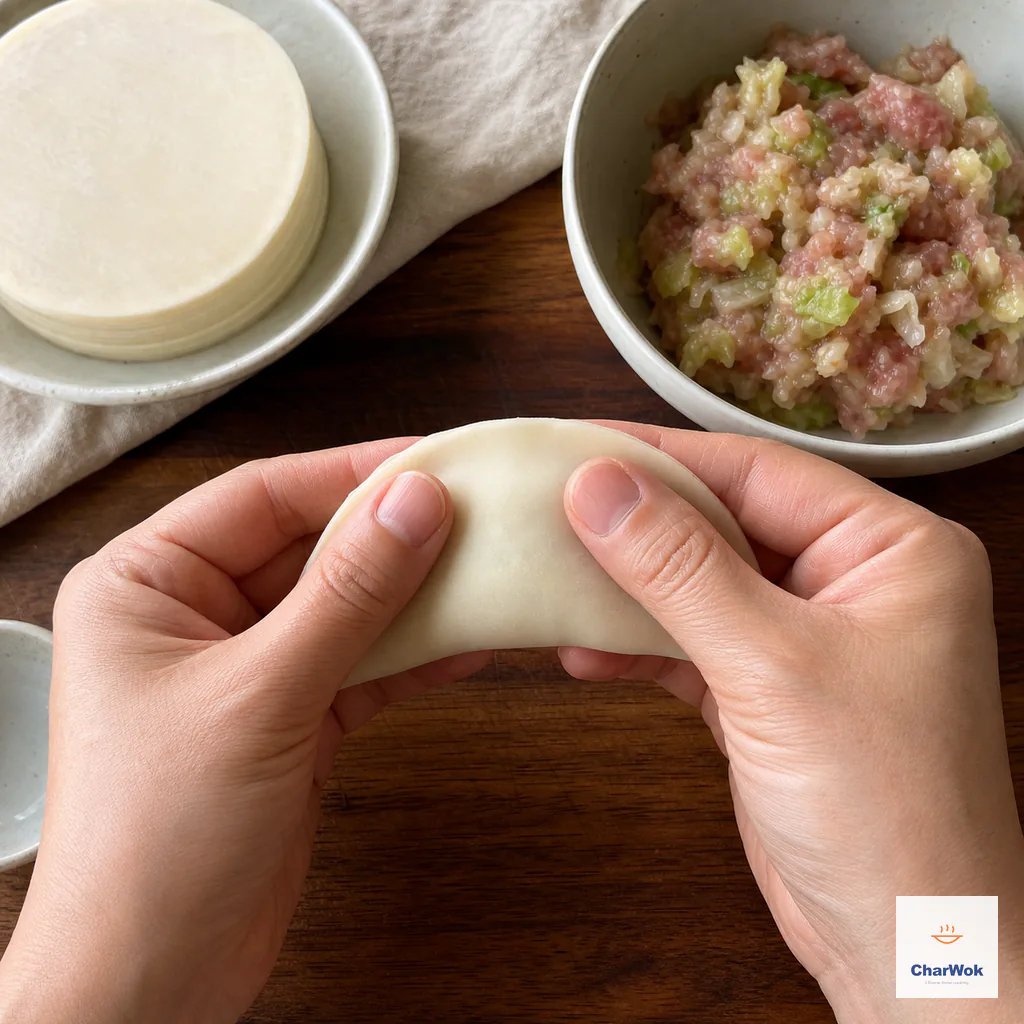
Pinch the centre, then work outward until the two dough layers feel welded into one.
- Set the dumpling on the tray with the flat side down and the straight seam facing up, whether you plan to pan-fry or boil. Do not let finished dumplings touch each other.
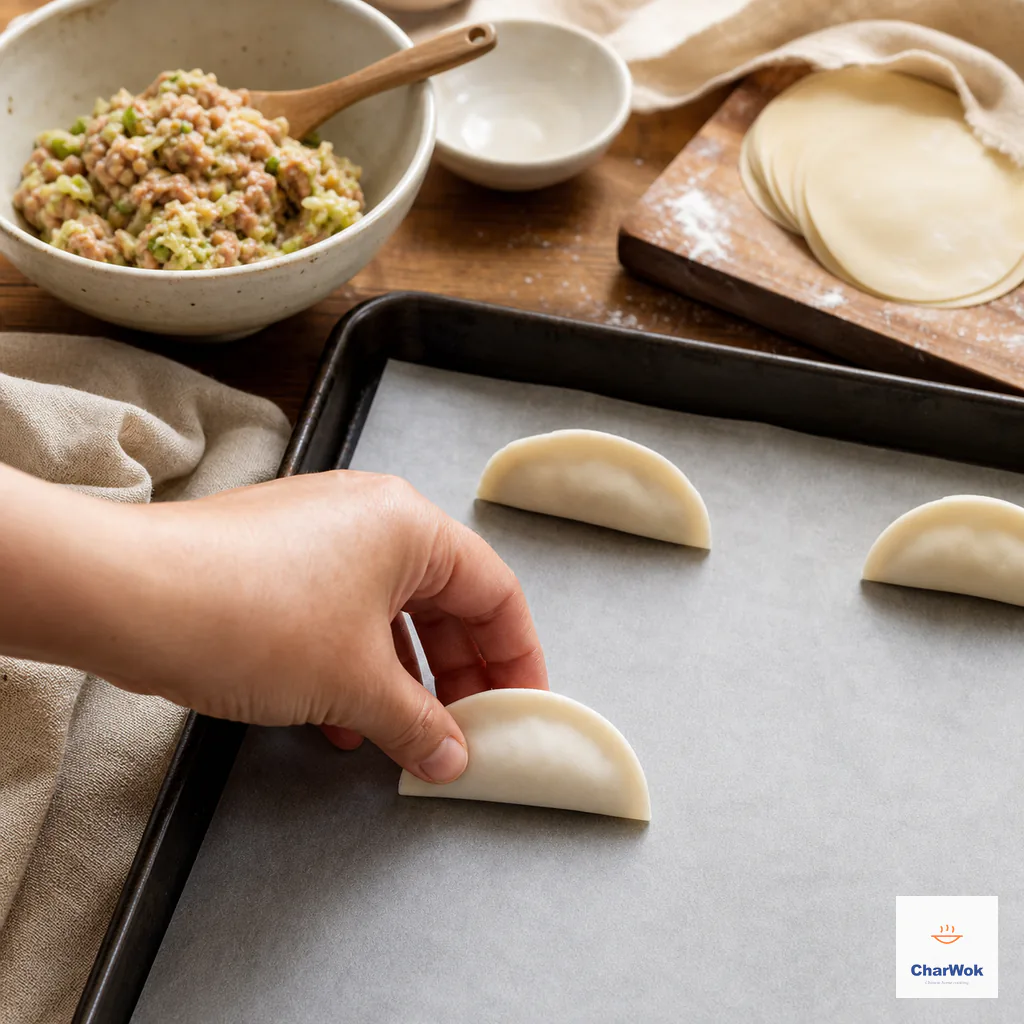
Keep finished dumplings upright, spaced apart and covered so their surfaces do not dry.
This fold is bombproof and it is the one I use for boiled dumplings every time. Boiling roughs up the surface anyway, so there is no point spending pleats on a dumpling that will look rumpled in three minutes.
The standing pleat (the one you actually want to show off)
- Cup a fresh wrapper in your hand and place a slightly rounded teaspoon of filling in the center, pushed a little toward your palm and away from the edge that will pleat.
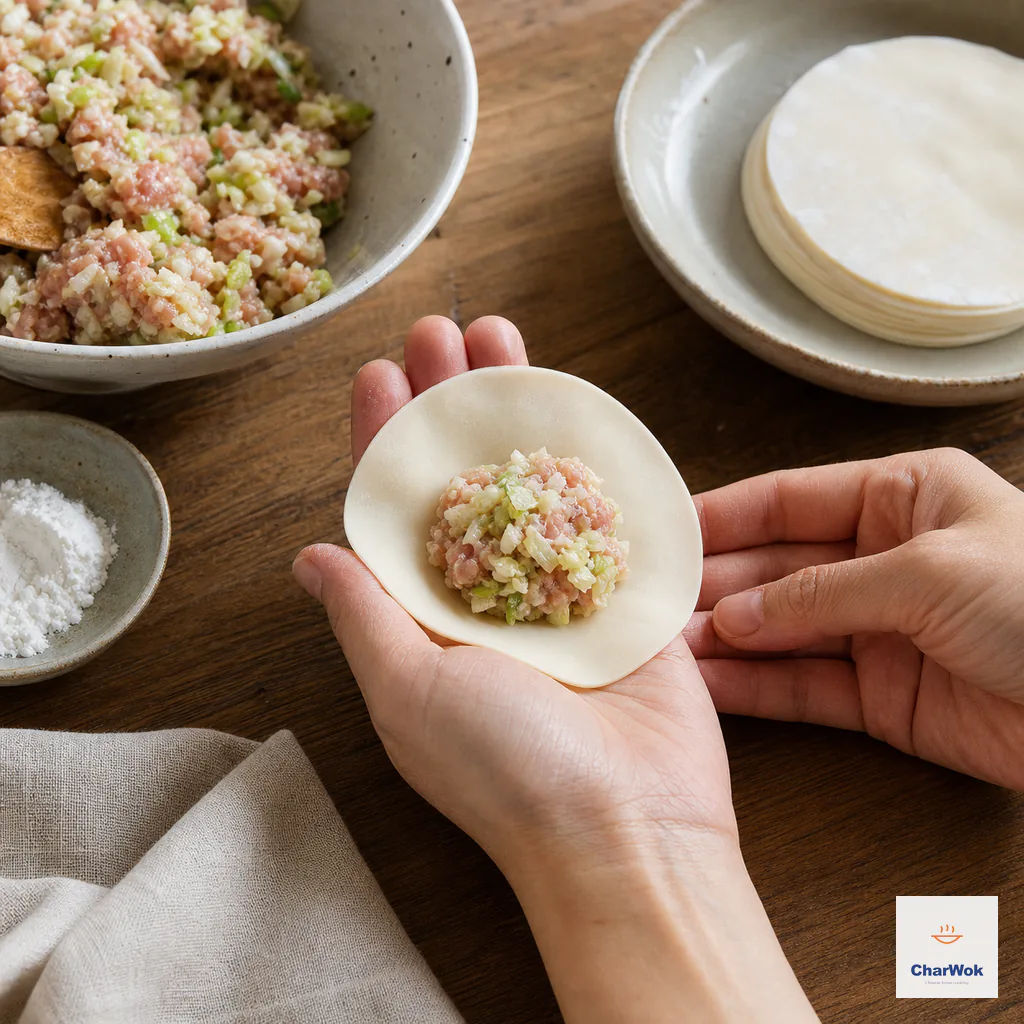
Shift the filling toward the palm to leave the far edge clear for the standing pleat.
- With your free hand, pick up the far edge of the wrapper and fold it toward you over the filling, but do not seal. You are creating a hinge along the top.
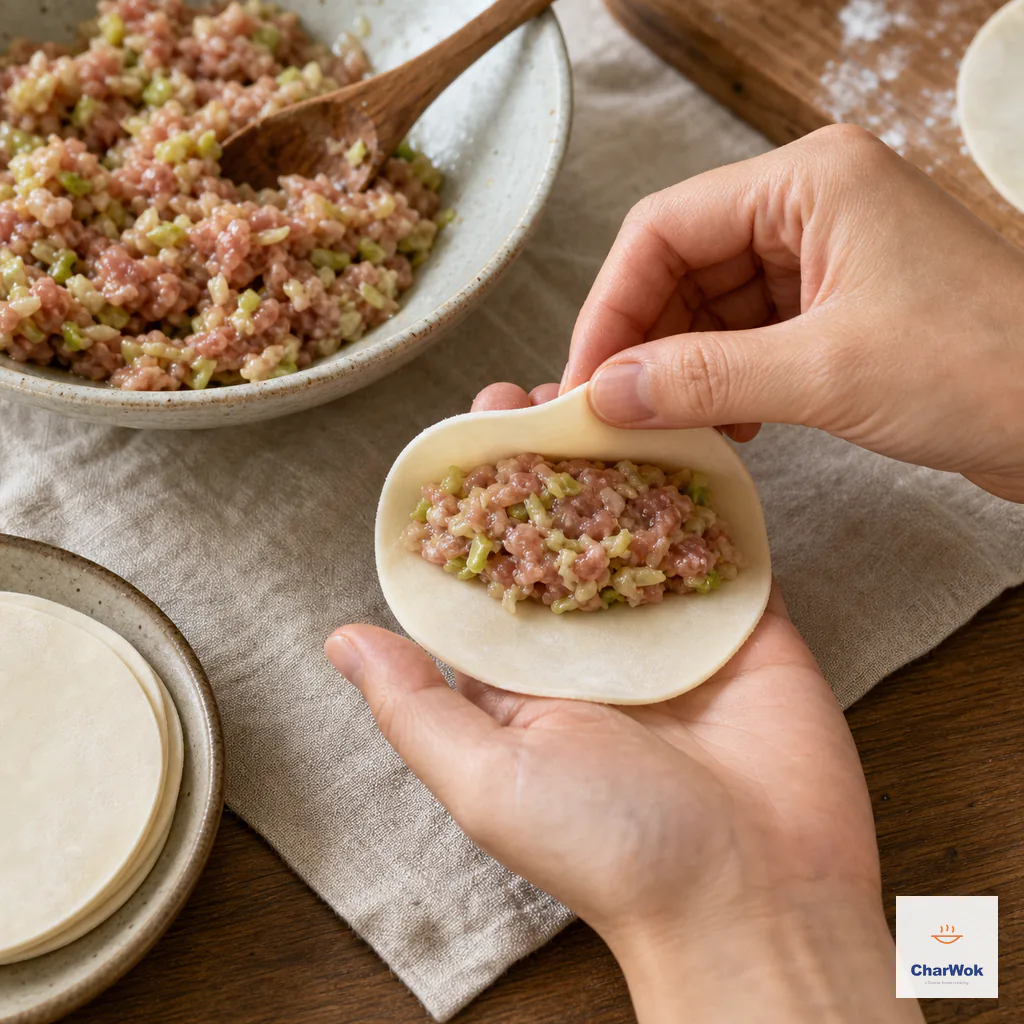
Bring the far edge toward you, but keep both edges separate until the first anchor is made.
- Anchor the seal at the left end with a firm pinch. This anchor is what the rest of the pleats push against, so make it solid.
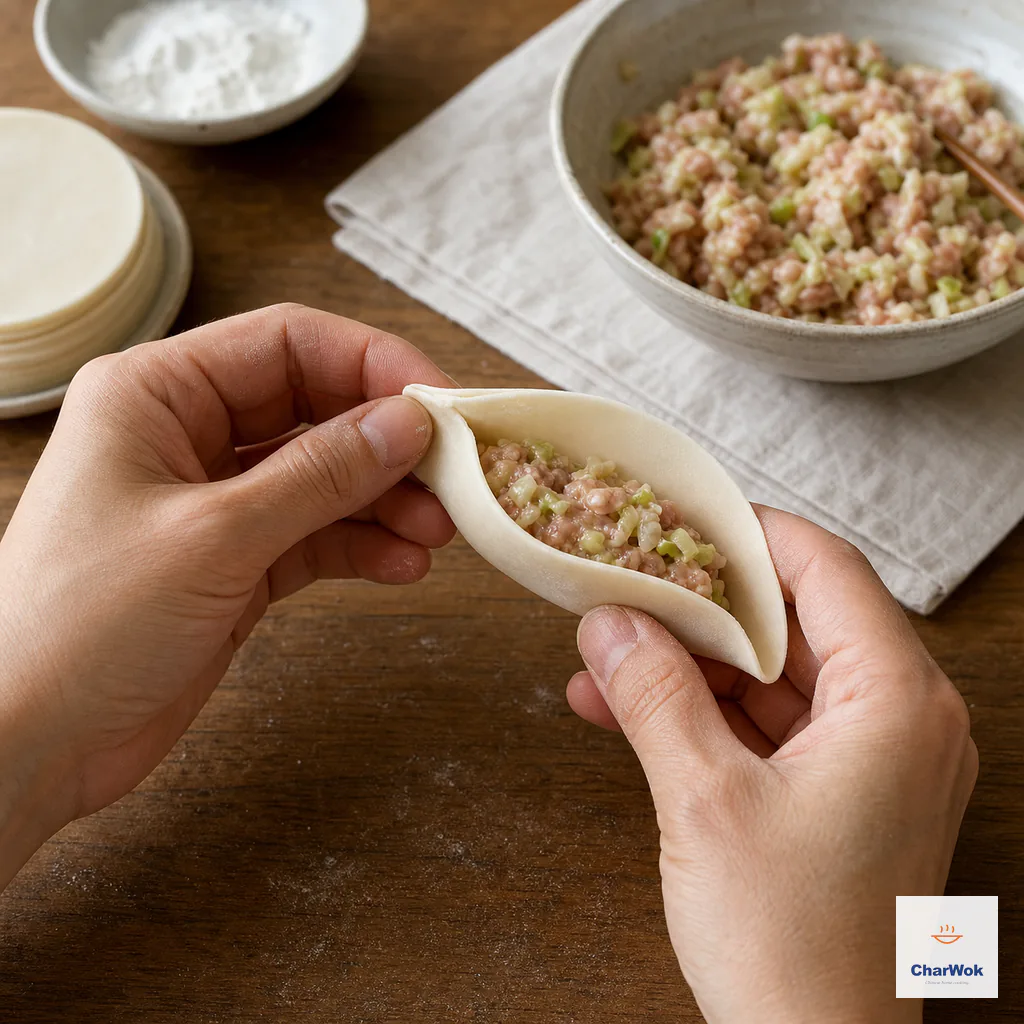
Make one firm left-corner anchor for every following pleat to push against.
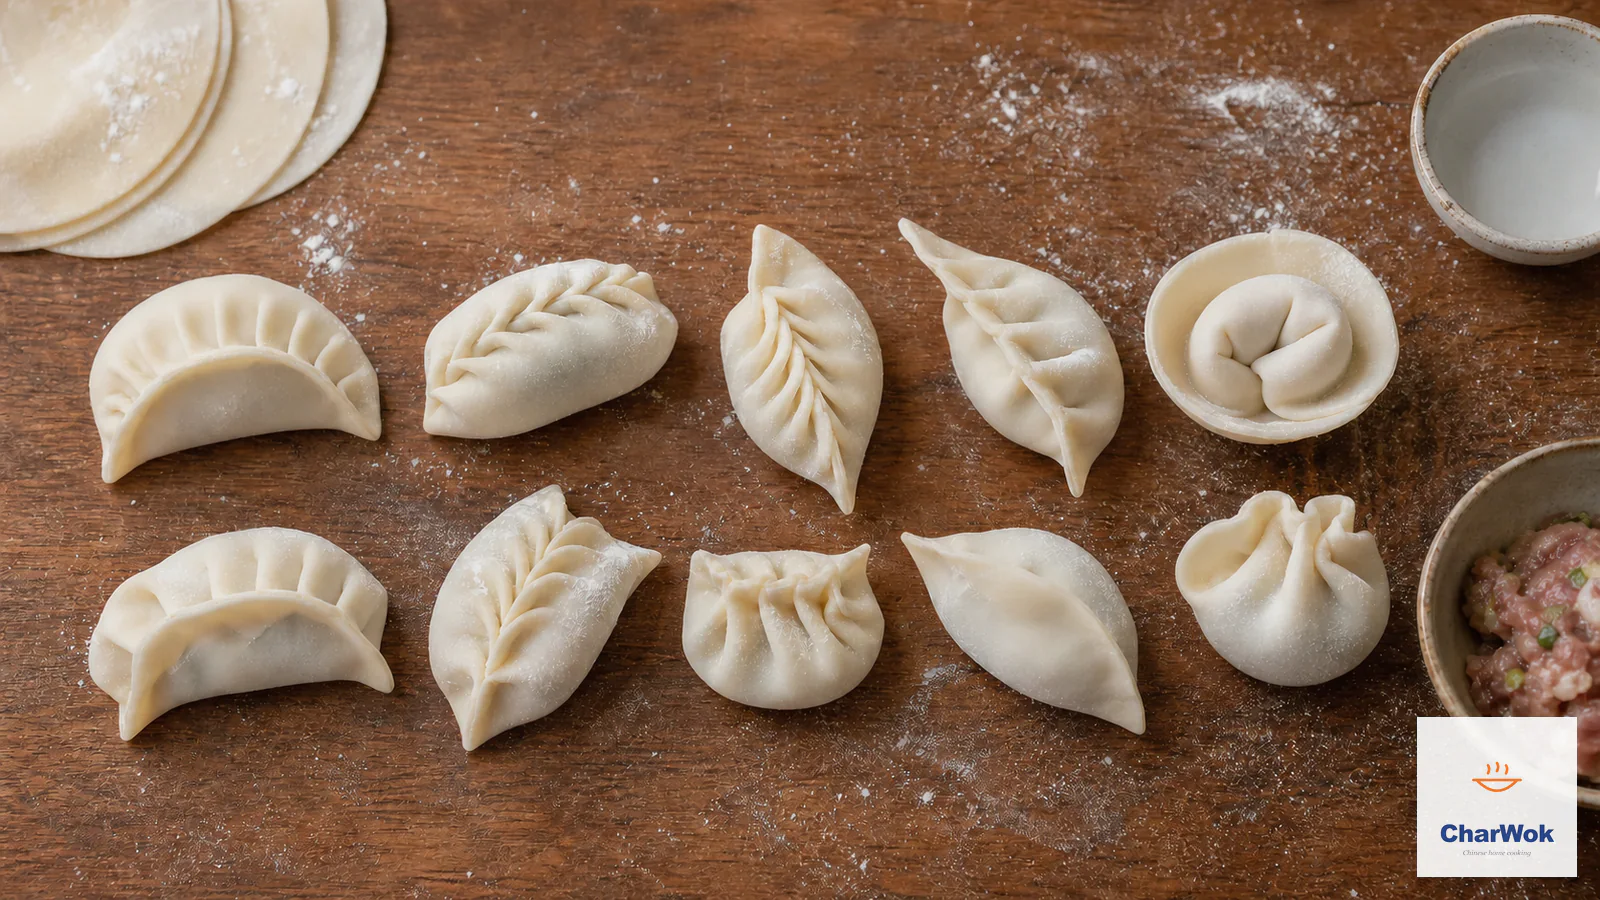
- Working left to right, use your thumb to push a small fold of the near (bottom) edge of dough inward and upward, then press it into the top edge with your index finger. That is one pleat. Each pleat should overlap the previous one by about half its width.
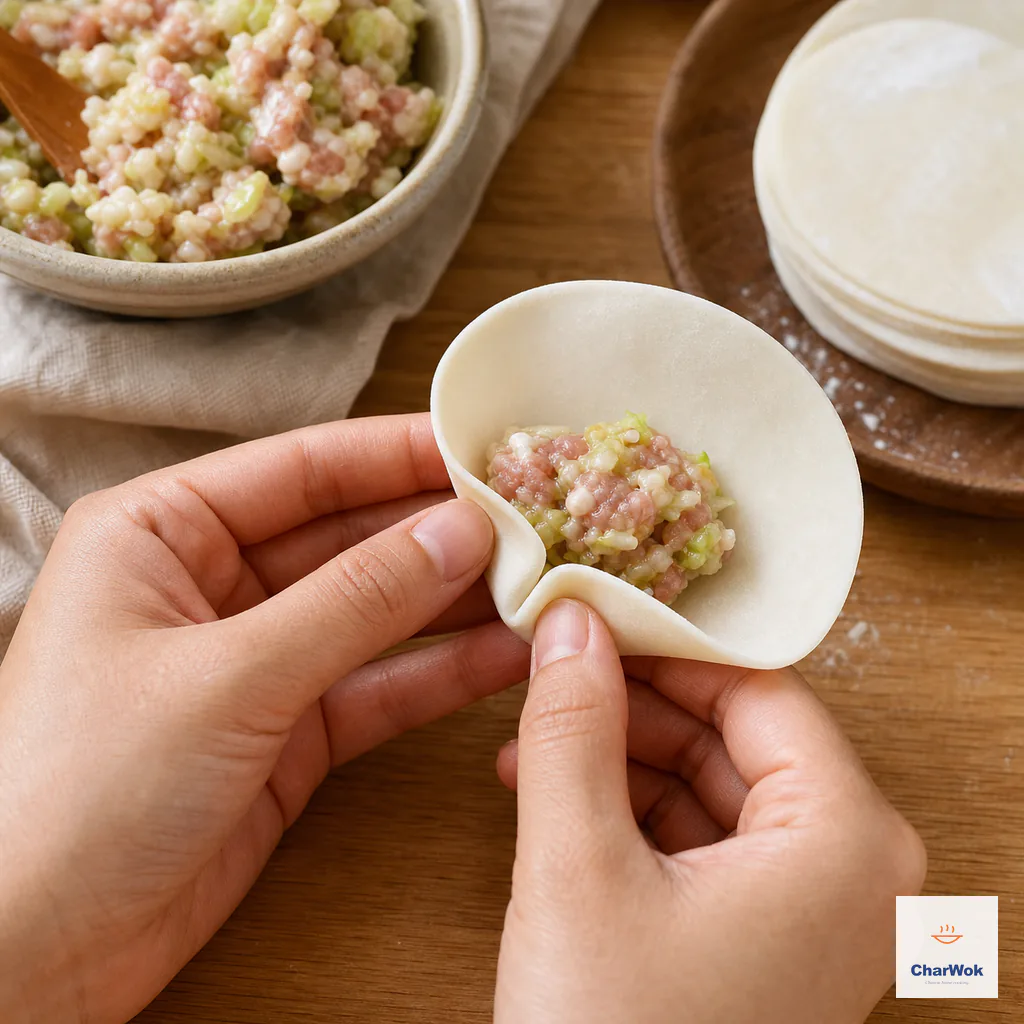
Fold only the near edge upward and press it into the smooth far edge to form one pleat.
- Keep the rhythm: push, fold up, press. Aim for five to eight pleats across a standard wrapper. That is enough overlap to build a wall that stands; cram in more and the dough crowds, the pleats shrink to thin slivers, and the wrapper tears.
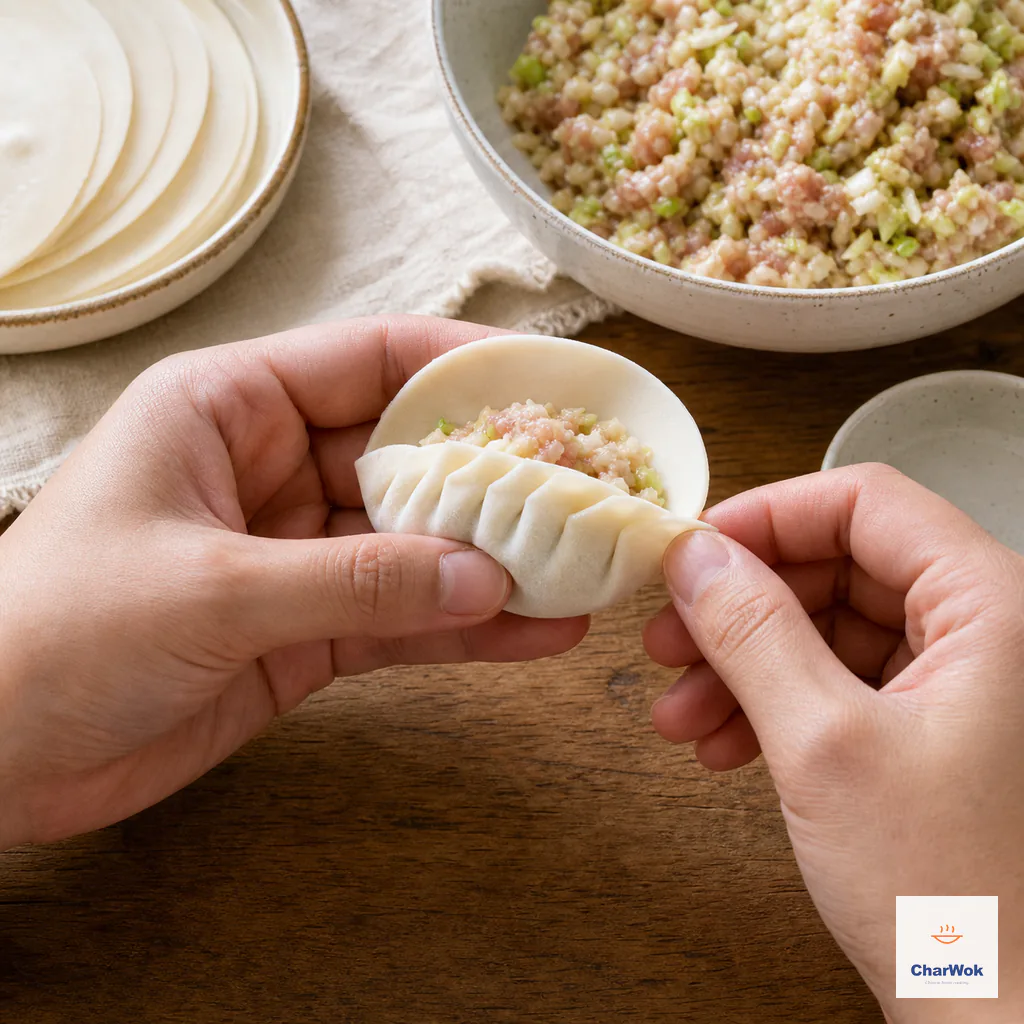
Repeat push, fold and press until five to eight pleats overlap by about half their width.
- When you reach the right end, give the final corner a firm pinch and then run your thumb along the entire sealed edge one more time to weld everything together.
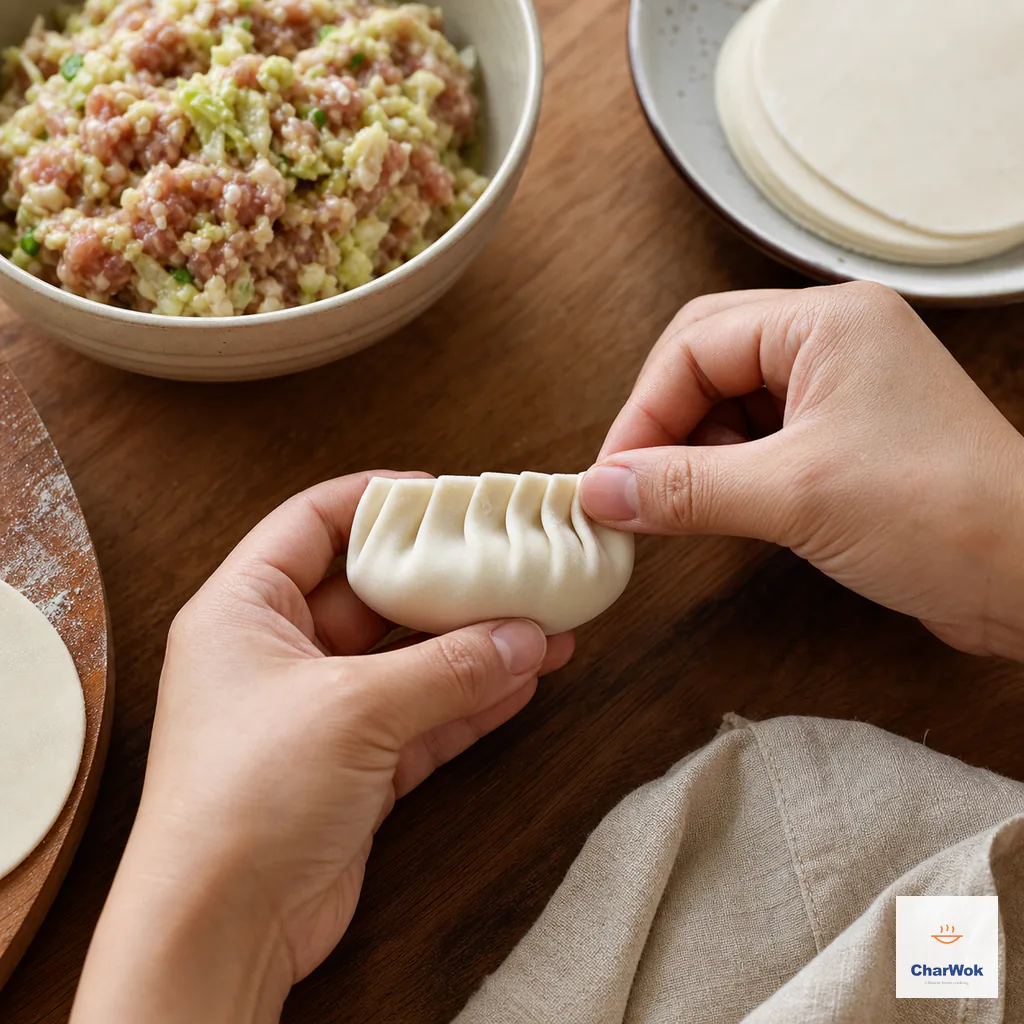
Pinch the last corner firmly, then press along the entire seam once more to close every gap.
- Stand the dumpling upright on the tray, resting on its flat base with the pleated seam running along the top edge. Press the base gently so it sits upright. This is the shape that fries into the lacquered, pleated potsticker you see in restaurant windows.
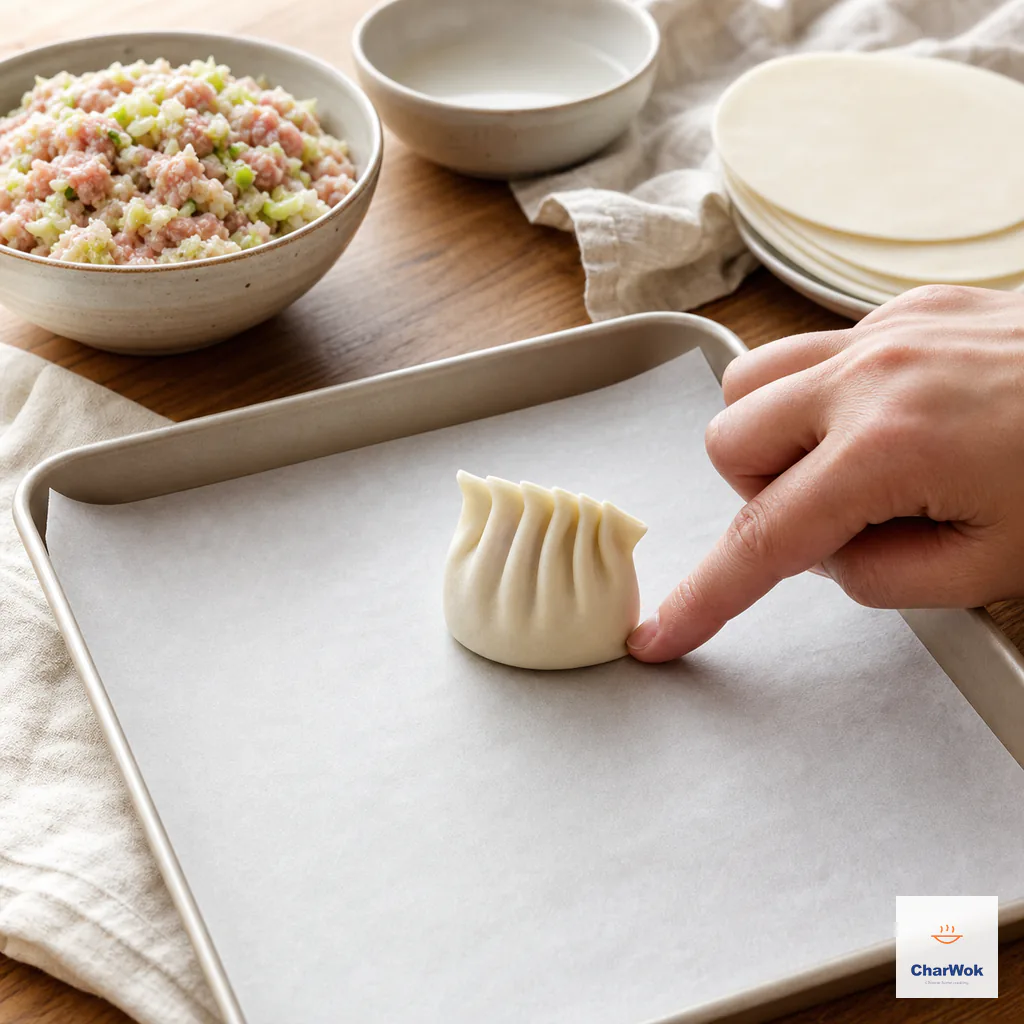
Set the broad base flat and press gently until the pleated wall stands upright on the tray.
The reason this fold stands up is mechanical, not cosmetic. By always folding the bottom edge up into the top, you build a wall of overlapping dough on one side and leave the other side smooth. The dumpling ends up shaped like a half-pipe, and the pleated wall holds it vertical. If your dumplings slump, you are folding the top edge down instead of the bottom edge up.
When a fold fails (and the fix)
This is the section I wish someone had handed me the first time I ended up with a pot of loose meat and floating skins.
- The dumpling splits open while boiling. Almost always trapped air. The vapor has nowhere to go and blows out the weakest pleat. Press air out toward the open edge before the final crimp. The second cause is an overfilled dumpling; cut back to a level teaspoon.
- The seal opens on one side after cooking. You floured the rim, or the dough dried while you worked. Brush the rim with a drop of water and re-seal; going forward, keep unused wrappers under a damp towel.
- Pleats crack along the crease. You are using a dry, store-bought wrapper for a fold that needs stretch. Either switch to fresh dough or fall back to the half-moon. Cracks will not heal in the pan.
- The dumpling will not stand up. Check your pleat direction. The folds must come from the bottom edge and press into the top. Reverse it and you get a flat puddle of a dumpling.
- Filling leaks out the top while folding. The filling is too wet or too hot. Chill it for 20 minutes; cold fat holds its shape and stays off the rim. A weeping rim will not seal no matter how hard you press.
- The bottoms stick to the tray. Excess flour on the base turns to paste as the dough sweats. Dust the tray lightly, not the dumpling. Parchment is even safer.
Match the fold to the cooking method
The fold is not independent of how you cook. Boiling is violent; the dumpling tumbles in rolling water and the surface takes a beating. Use the half-moon or a simple edge pleat and do not waste effort. Steaming is gentle and the shape survives intact, so this is where a pretty pleat is worth it. See my steamed dumpling method for how to set them up in the basket without sticking.
Pan-frying rewards the standing pleat twice over: the shape sits flat in the pan for an even crust, and the pleated wall stays soft and translucent up top. This is the technique behind proper potstickers with a crispy skirt, where a thin starch slurry fries into a lace web between the dumplings. The general rules for boiling, steaming, and pan-frying are in my three-way cooking guide.
Variations worth the extra effort
Once the two core folds are muscle memory, a few directions open up. None of them require new technique, just a different rhythm.
- Long edge pleat (the "big belly" fold). Instead of folding the wrapper in half, pleat only one side across the full diameter, leaving the other side smooth and gently curved. The dumpling sits like a fat crescent and is the classic shape for soup dumplings, where the smooth belly holds the broth.
- Quarter-turn square fold. Lift four points of the wrapper up to a single center point and pinch the four seams. This is the shape used for some vegan dumplings and is surprisingly easy; it just requires a slightly thicker dough at the center.
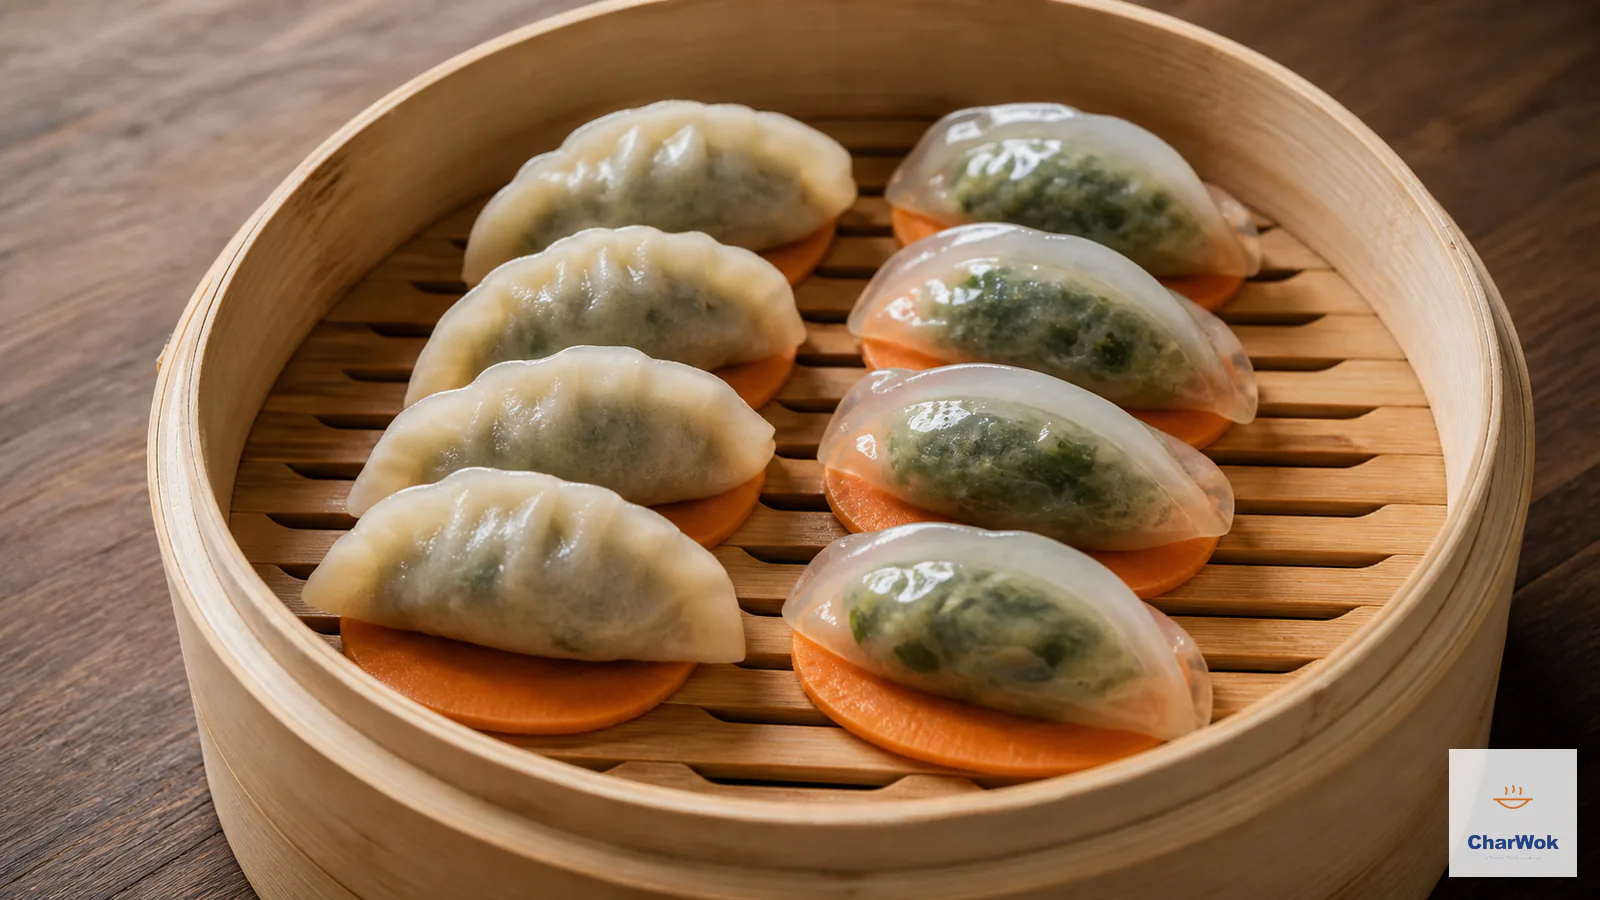
- Colored doughs. Vegetable juices tint the wrappers without changing the fold. A turmeric or spinach dough turns a tray of standing pleats into a centerpiece; the method is in my naturally colored dumpling guide.
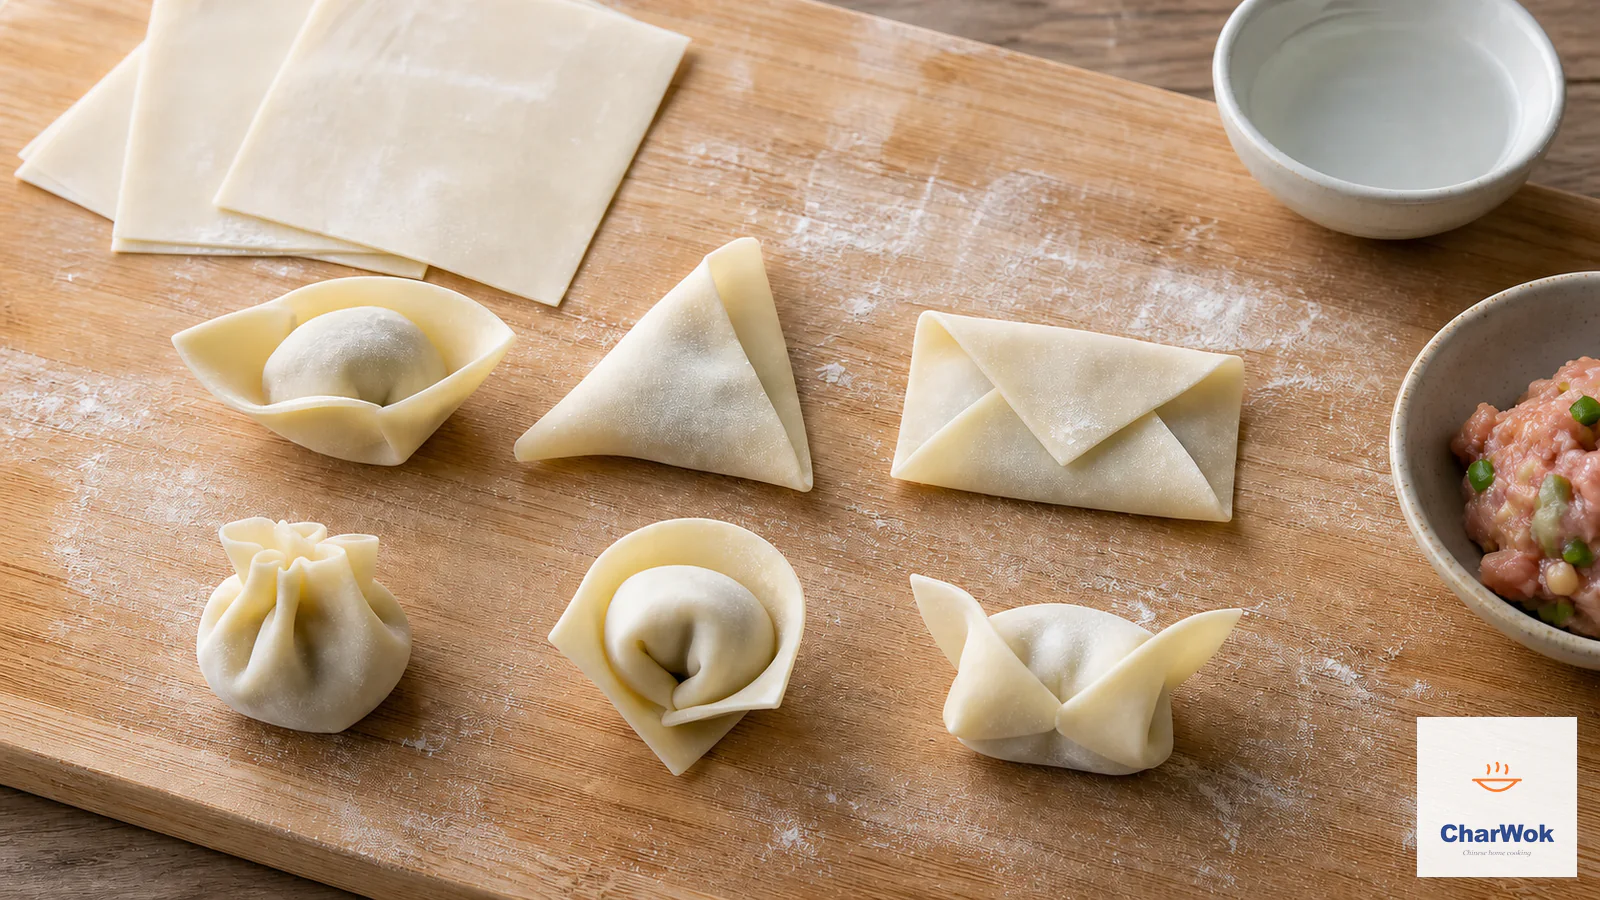
- The simple wonton fold. Wonton wrappers are square and thinner, so the logic is different. If you are branching out, the six wonton folds are a good next step.
Sauces and what to put on the table with them
A folded dumpling is only as good as what you dip it in, and the classic black vinegar, soy, chili oil, and sesame oil combination exists because the acidity and heat cut through the richness of a pork filling. I keep a roster of six dumpling sauces that cover everything from a clean ginger-vinegar dip to a numbing Sichuan oil.
If you are turning this into a full meal, dumplings pair well with a crisp vegetable that resets the palate. A simple smashed cucumber salad or a plate of blanched greens alongside makes the richness of a long dumpling session bearable. For a bigger spread, the roundup of dumpling recipes pulls together fillings and styles from across the regions.
Freezing and reheating
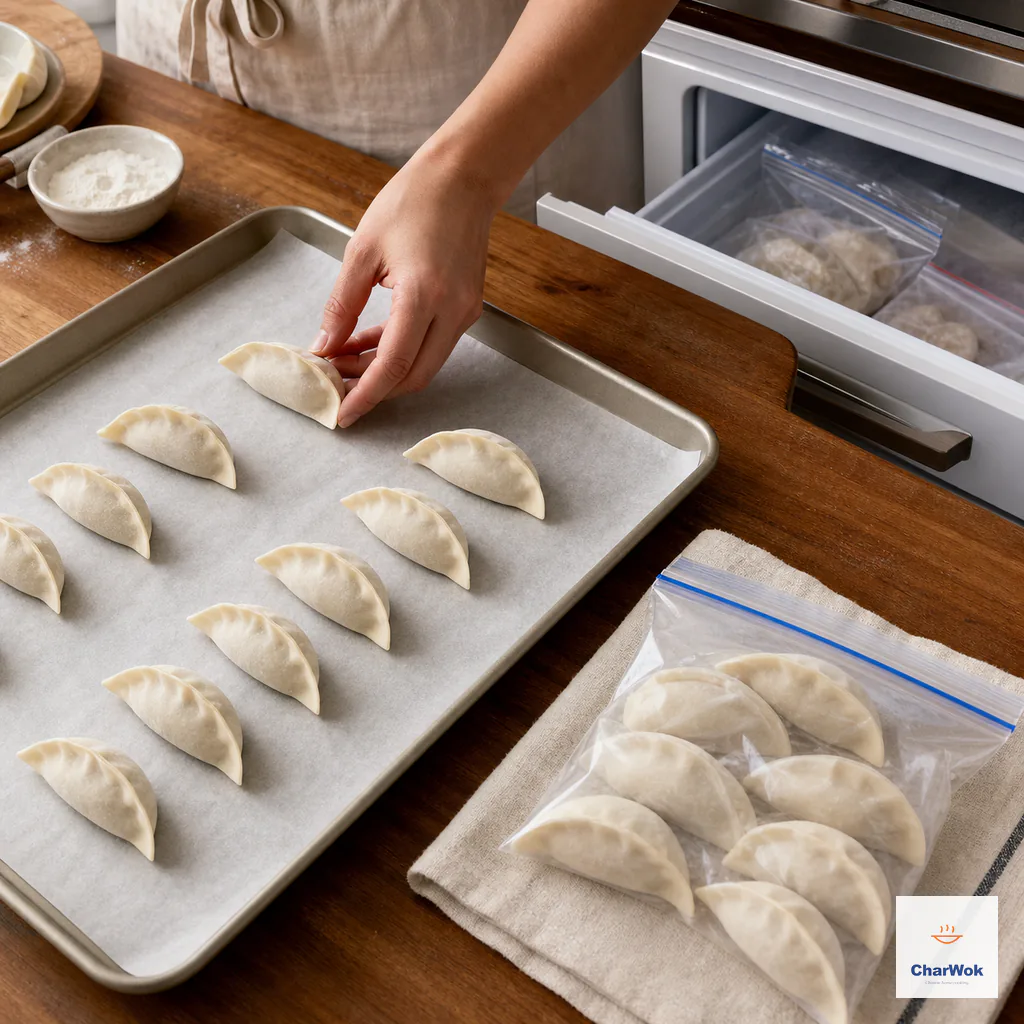
Freeze raw dumplings without touching until hard, then bag them and cook straight from frozen.
Homemade dumplings freeze better than they cook fresh, in my experience, because the dough has time to fully hydrate before you use it. Freeze raw dumplings spaced apart on a sheet pan first; only once they are hard as stone should you tip them into an airtight bag for storage. They keep for two to three months.
Drop them into the pot or pan still frozen; thawing only turns the surface gummy. Boiling needs no adjustment. Pan-frying needs an extra tablespoon of water and one more minute covered. For steaming, add about two minutes to the usual time. The one thing that does not survive freezing well is a delicate pleat on a thin wrapper, which can crack along the creases, so freeze the half-moon and the simple standing pleat with confidence and save the fancier folds for fresh.
A few questions I get asked
The same handful of questions come up in every class I teach. Quick answers below.
Do I really need to make my own wrappers?
For the half-moon and any boiled dumpling, no, store-bought is perfectly fine and I use it on weeknights. For standing pleats, pan-fried showpiece dumplings, or anything you want to photograph, yes. Dry wrappers crack along the pleats and will not give you the translucent, soft top that fresh dough does.
How much filling is too much?
Start at one level teaspoon, about 8 grams, per wrapper. When you can close a dumpling without filling squeezing into the seam, add more in small increments. A seam contaminated with fat will not weld shut, no matter how hard you press.
Why do my dumplings burst when I boil them?
Trapped air is the usual suspect. Steam builds pressure inside and blows out the weakest pleat. Always push air pockets toward the open edge before the final crimp. The second cause is water that boils so hard it hurls the dumplings against the pot. The classic fix is the 点水 (add-water) method: keep the water at a rolling boil, but the moment it threatens to spill over, splash in a quarter cup of cold water to knock it back. Repeat two or three times. The brief cool-downs settle the pot without giving up the rolling boil the wrappers need to cook through.
Can I fold them a day ahead?
Yes, with care. Arrange them on a parchment-lined tray so they do not touch, cover tightly so they cannot dry out, and refrigerate for up to a day. The dough will weep a little starch and the tray will get sticky, so cook them the next day rather than letting them sit longer. Beyond 24 hours, freeze them instead.
Where to go from here
The fold is the last physical skill in the dumpling chain, and once it is in your hands the whole project becomes relaxing. If you started with good dough and a sound filling, the folds above will close cleanly on the first try. If they did not, reread the troubleshooting section; the failure mode you hit is on that list, and the fix is usually one small habit, not more practice.