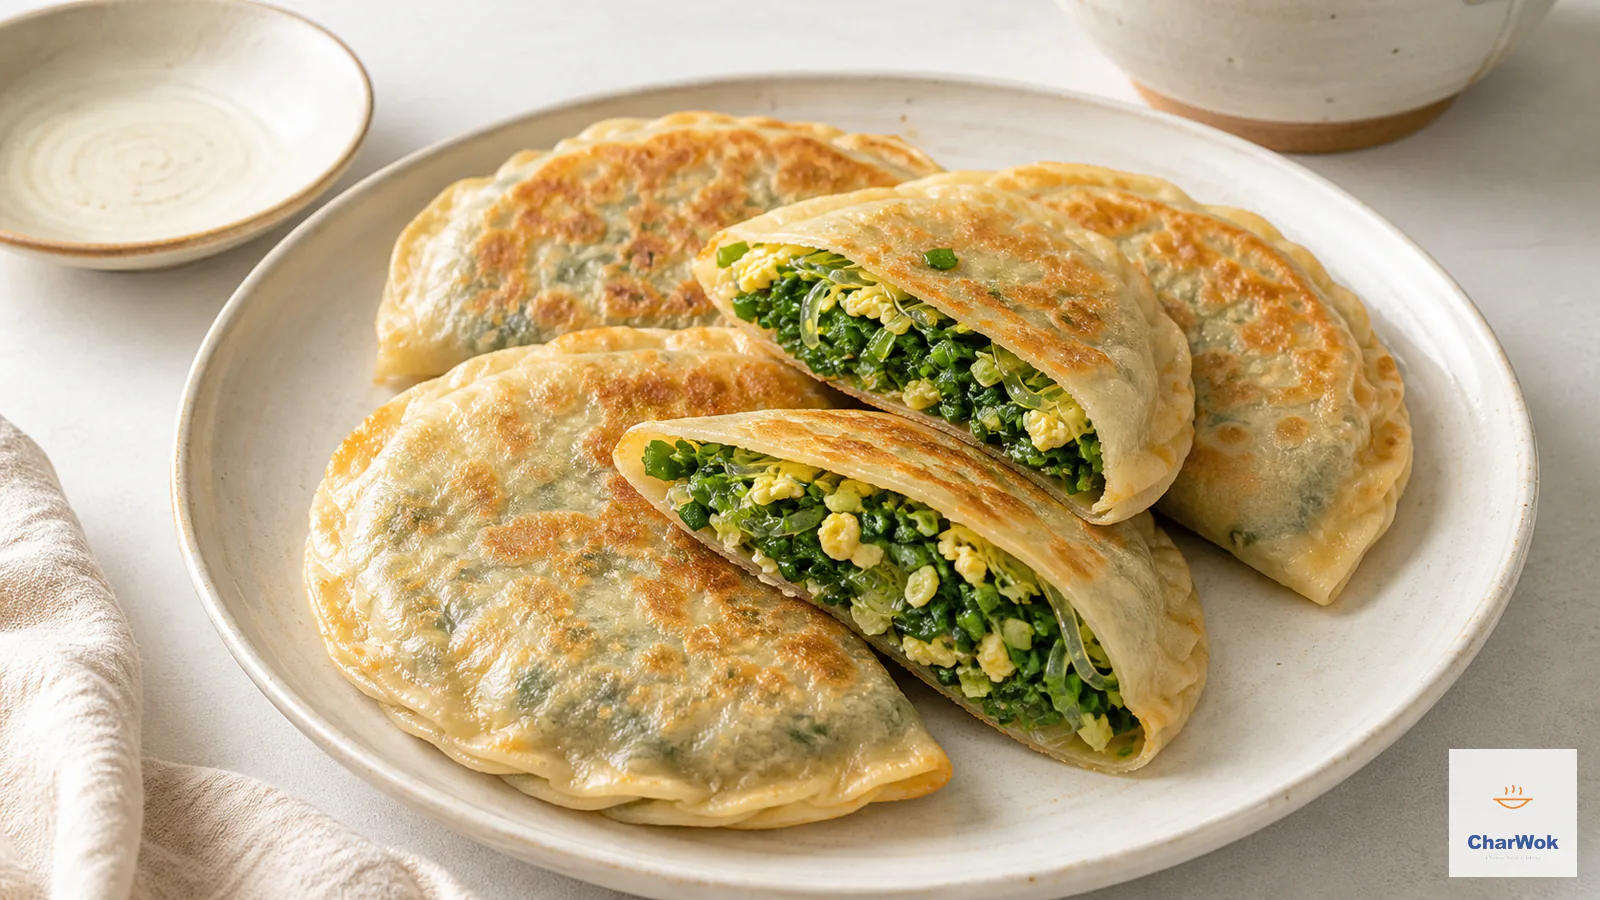
Of all the stuffed-flour things a northern Chinese kitchen turns out, the chive pocket is the one that most rewards a patient hand and punishes a rushed one. One bite and you know immediately whether the cook understood the dough: a wrapper that cracks open at the seam, or turns leathery after a minute off the heat, tells you the water was wrong. Get it right and you have a half-moon that is crisp on the outside, tender inside, and so full of garlic-chive aroma that the whole apartment smells like a Saturday morning in a Shandong home.
I made these badly for years. My first pockets leaked, my dough tore when I rolled it thin, and more than once I ended up frying what amounted to scrambled eggs with chive shards stuck to the pan. What finally fixed it was understanding one idea: the dough here is not regular dumpling dough. It is a hot-water dough, and hot water changes everything about how the flour behaves.
At a glance. Hot-water dough (3 cups flour to 1 cup near-boiling water), rested 15 minutes, rolled to about 15 cm / 6 in. Filling of chives, scrambled egg, and optional mung-bean vermicelli. Pan-fry covered on the first side for roughly 5 minutes, uncovered on the second for 2. The single biggest decision is the water temperature for the dough, not the filling.
Why hot water, and what it does to the flour
Most of the dumplings you know use cold or room-temperature water. The chive pocket does not. Pouring water just off the boil over the flour does something specific and measurable: it gelatinizes a portion of the starch on the surface of the flour granules before any kneading begins. Those swollen, sticky starch granules lock together, and the result is a dough that is softer, more pliable, and noticeably less chewy than a cold-water dough of identical ingredients.
That softness is exactly what you want here. A chive pocket wrapper is large and rolled thin, then folded over a generous mound of filling. A stiff, elastic dough would fight you on the rolling and spring back at the edges; a hot-water dough stretches obediently and seals without resistance. It also cooks faster in the pan, because the starch is already partly cooked, which matters when the filling is vegetarian and you do not need to drive raw pork to a safe internal temperature the way you would with pork and chive dumplings.
If you have only ever made classic cold-water dumpling wrappers, expect this dough to feel different under your hands: tackier at first, more yielding once it rests, and almost impossible to overwork into toughness. That is the starch doing its job.
The chives are the point
Chinese chives, sometimes labeled garlic chives, are flat-leafed and dark green, with a flavor closer to garlic than to the grassy chives you scatter over a baked potato. They are the whole reason this filling needs almost no seasoning. Treat them as a vegetable, not a garnish, and buy more than you think you need: once trimmed and chopped, a fat bunch cooks down to a surprisingly modest volume.
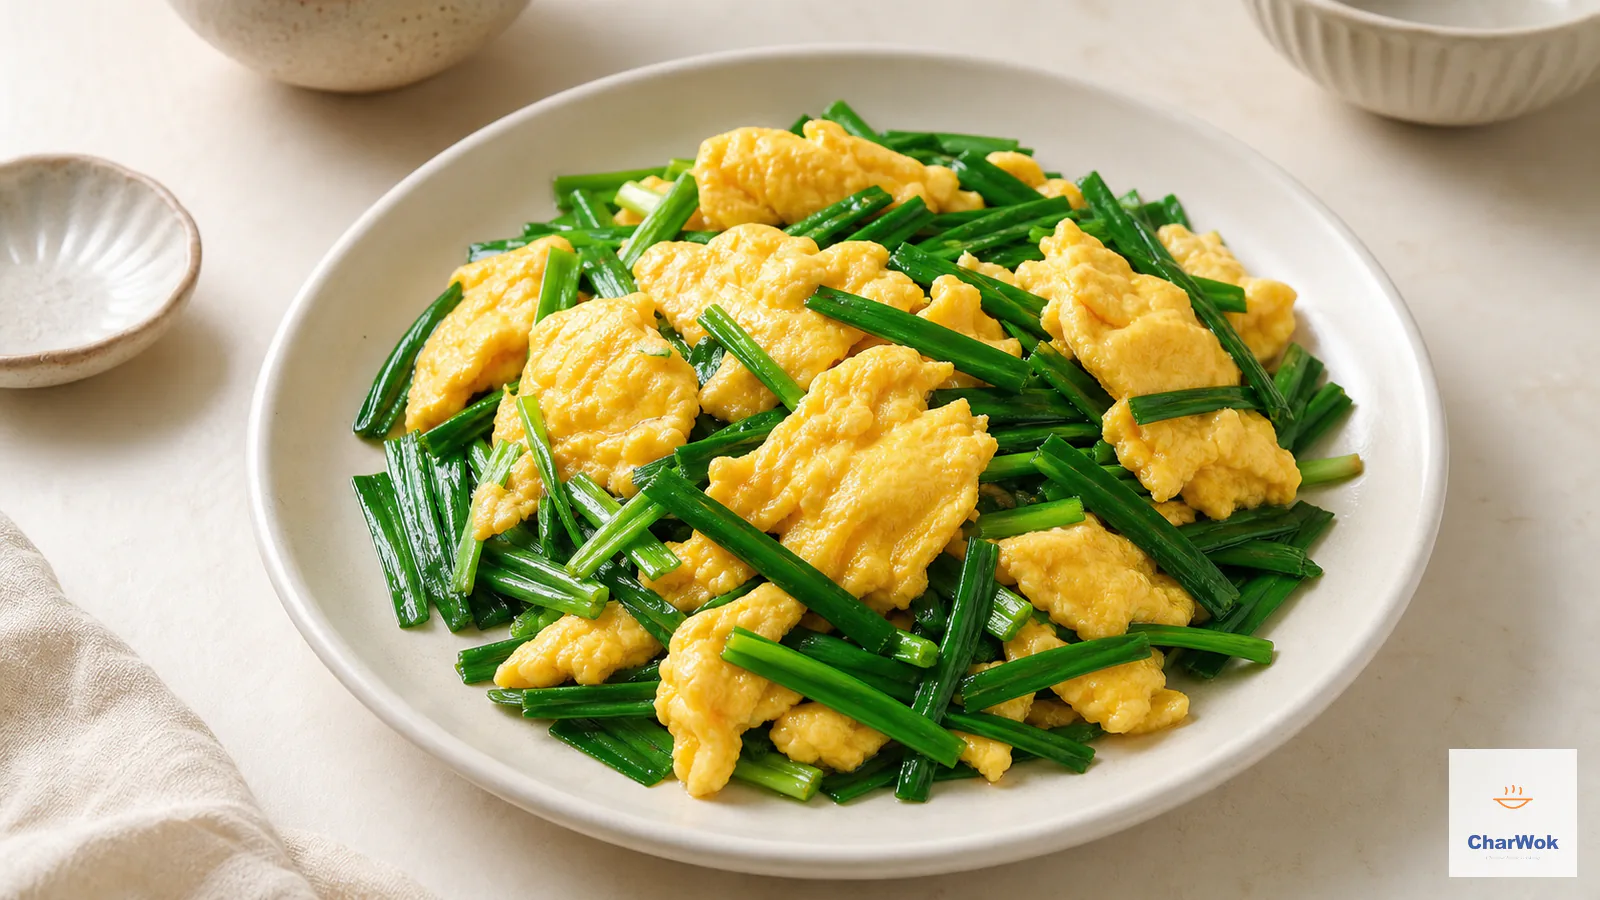
The same ingredient stars in simpler dishes like chive and egg stir-fry, and it pairs naturally with anything rich or eggy. If your market is out, the closest spring substitute is wild garlic, which shares the same garlicky-allium character. Regular chives will not carry this filling; the flavor is too mild and too thin.
What you need
Ingredients at a glance
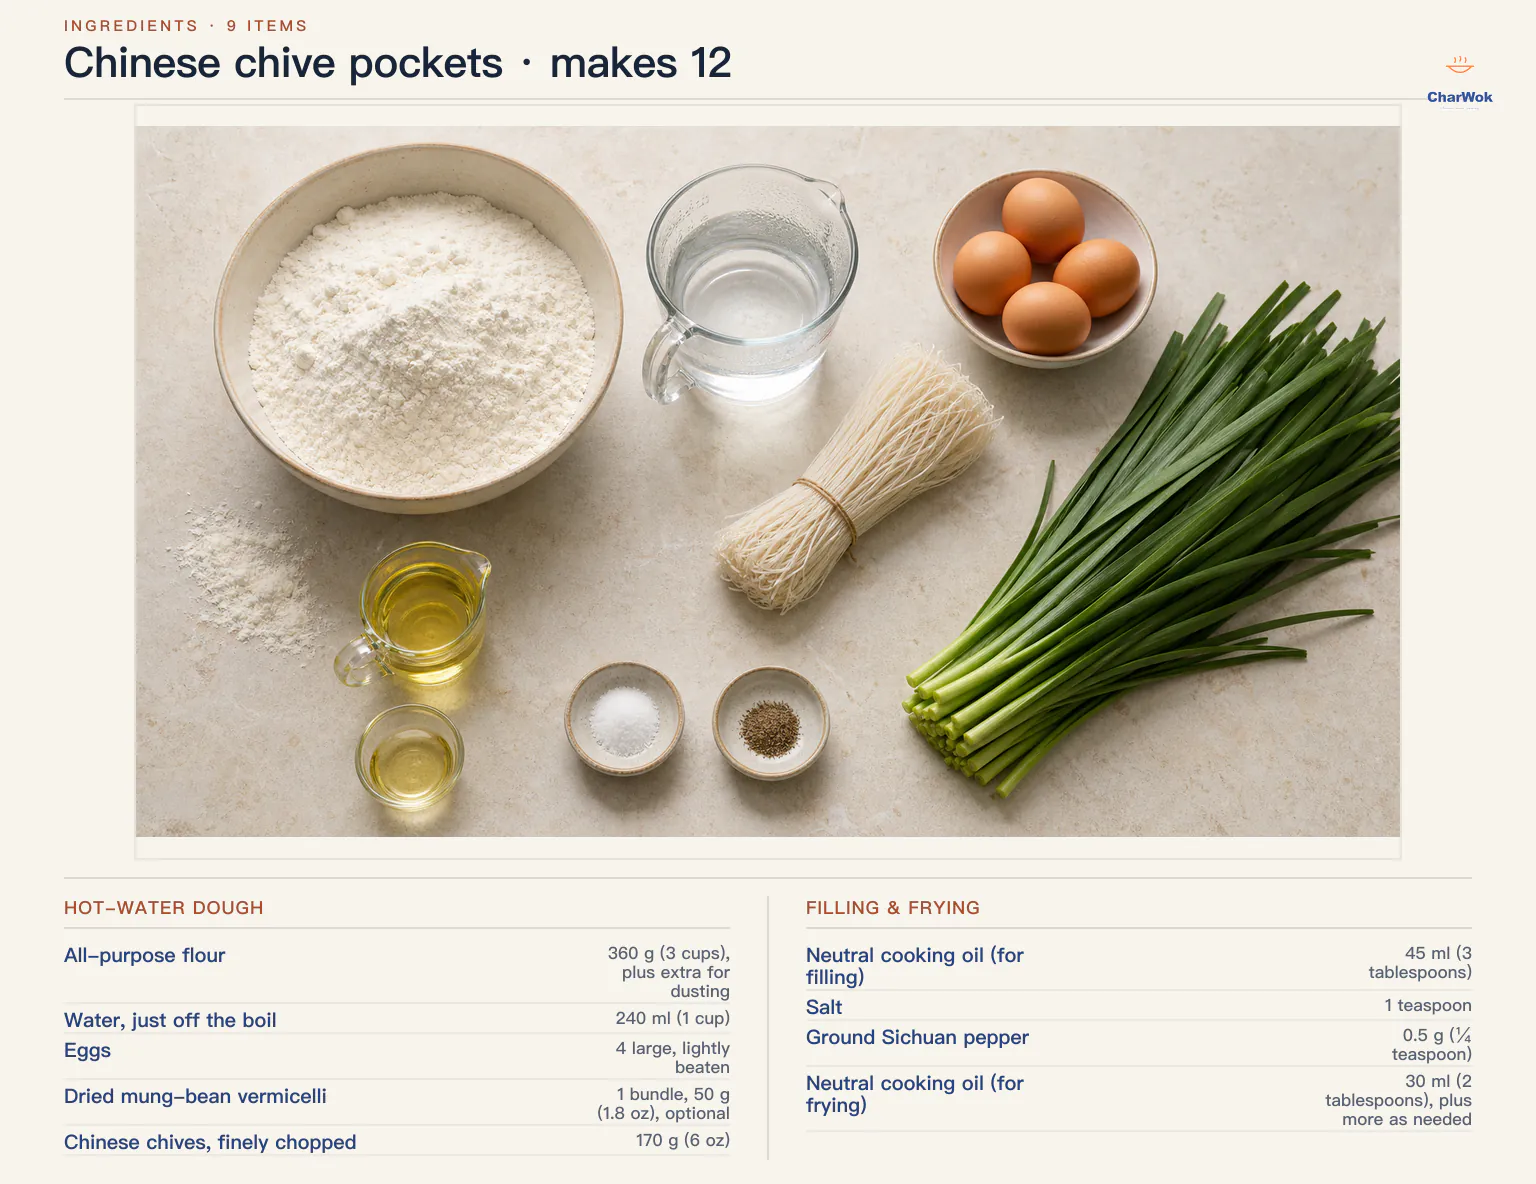
This makes 12 pockets. The dough and filling ratios are matched so you will not end up with a pile of leftover one or the other, which is the most common point of failure in any dumpling or pocket session.
| Ingredient | Amount | Notes / substitute |
|---|---|---|
| All-purpose flour | 360 g (3 cups), plus extra for dusting | Plain AP flour. Do not use bread flour, which tightens the dough. |
| Water, just off the boil | 240 ml (1 cup) | Pour while still steaming. Aim for roughly 80°C / 180°F or above. |
| Eggs | 4 large, lightly beaten | Scrambled loose, then chopped. |
| Dried mung-bean vermicelli | 1 bundle, 50 g (1.8 oz), optional | Soaks up moisture, adds bounce. Skip and add an extra egg plus more chives if unavailable. |
| Chinese chives, finely chopped | 170 g (6 oz) | Garlic chives. Wild garlic is the best spring substitute. |
| Neutral cooking oil (for filling) | 45 ml (3 tablespoons) | Canola, grapeseed, or refined peanut. Used to scramble the eggs. |
| Salt | 1 teaspoon | Adjust to taste; the filling should taste distinctly seasoned raw-cook-adjusted. |
| Ground Sichuan pepper | 0.5 g (¼ teaspoon) | Or five-spice powder, or ground white pepper. Toasted and ground fresh is far more aromatic; see the notes on grinding Sichuan pepper correctly. |
| Neutral cooking oil (for frying) | 30 ml (2 tablespoons), plus more as needed | About 1 tablespoon per batch in a 12-inch skillet. |
How to make the dough
- Combine flour and hot water fast. Put the flour in a heatproof bowl and pour the just-boiled water over it while stirring with chopsticks or a fork. Work quickly. Hot water evaporates fast, and any flour left dry at this stage will not incorporate evenly later. Stop when you have a shaggy mass of small lumps.
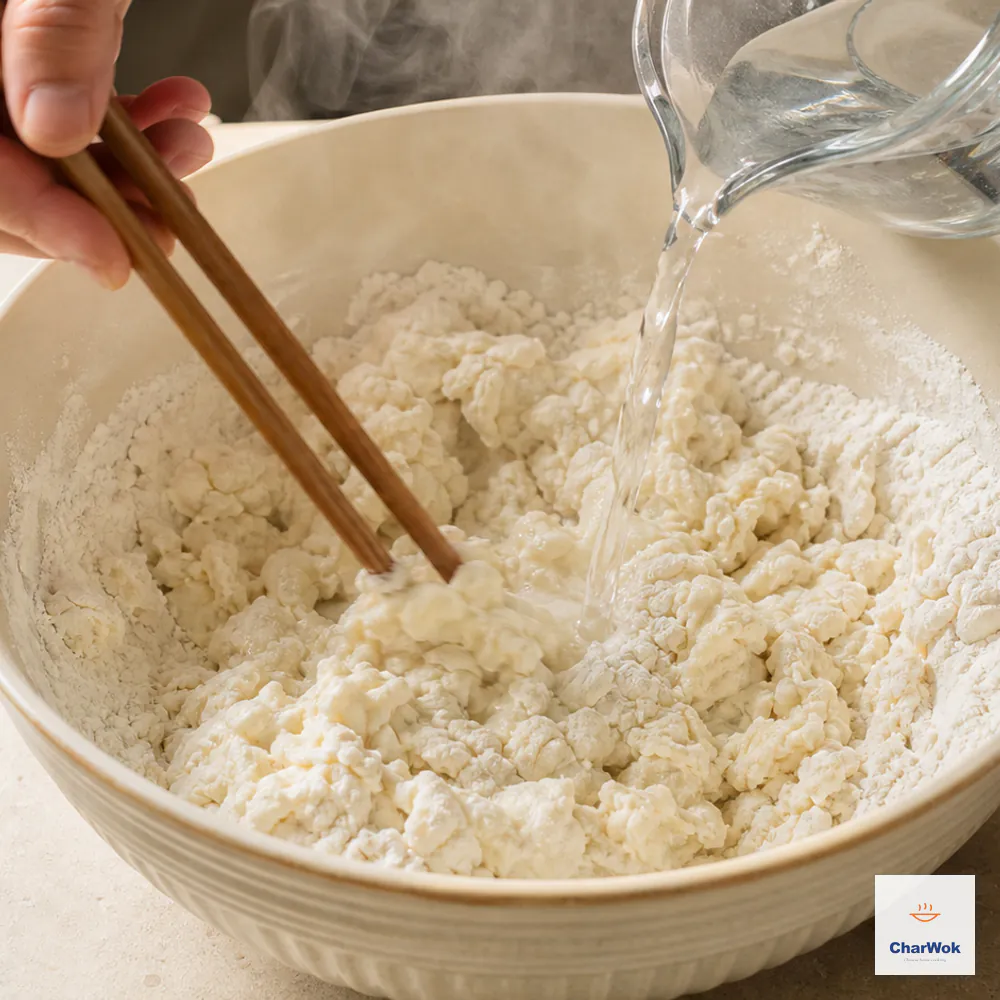
Pour the just-boiled water while stirring quickly, stopping when the flour has become a shaggy mass of small moist lumps
- Knead as soon as you can touch it. The moment the dough is cool enough to handle, knead it into a soft, smooth ball. Do not wait for it to go cold; a hot-water dough is easiest to bring together while it is still warm. A stand mixer with a dough hook on low for about 8 minutes works too.
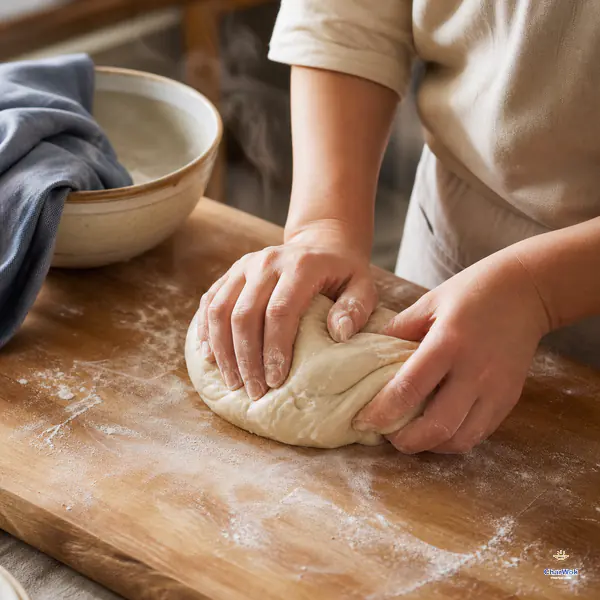
As soon as the dough is cool enough to touch, knead while it is still warm until soft and smooth; do not wait for it to become cold and stiff.
- Rest, tightly covered, for 15 minutes. Wrap the dough closely in cling film so no skin forms. The rest lets the gluten relax and the moisture even out, which is what lets you roll it thin without tearing. Use this window to make the filling.
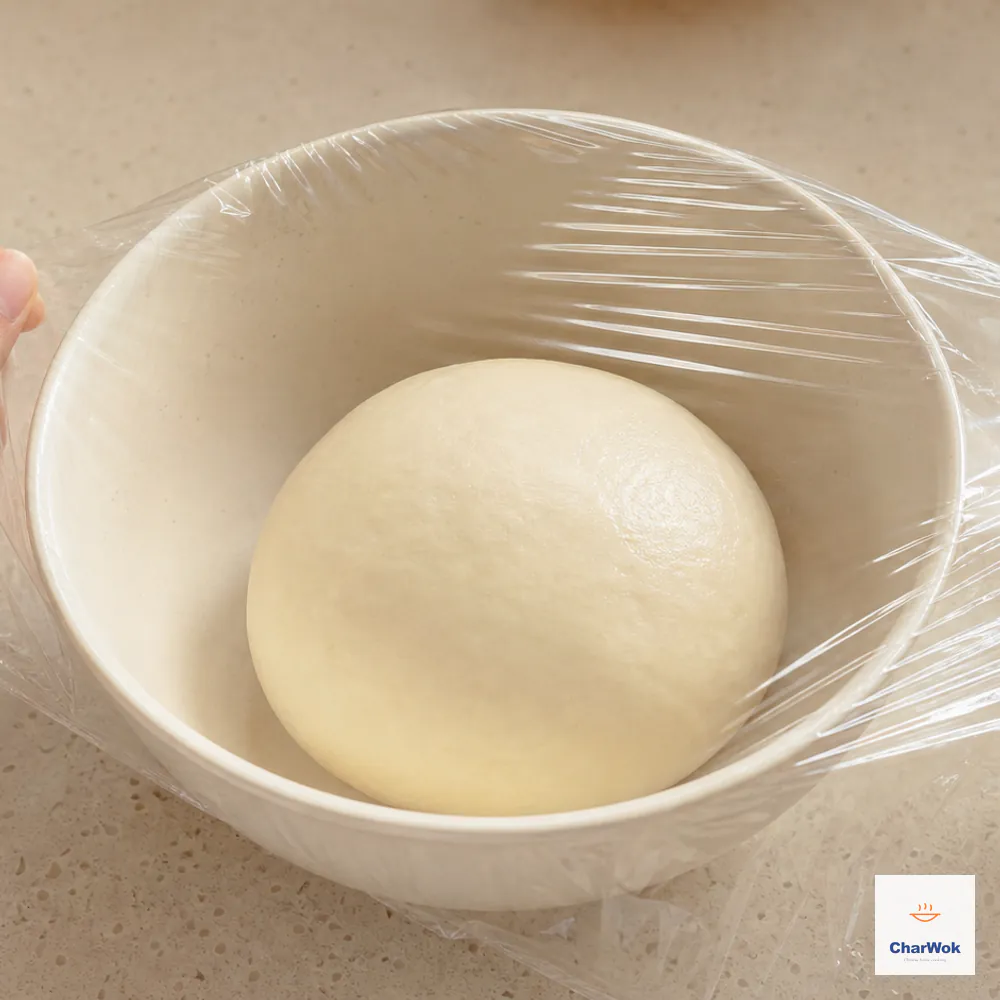
Cover the smooth dough closely so no dry skin forms, then rest it for 15 minutes while preparing the filling
One honest note: the exact flour-to-water ratio shifts a little depending on your flour brand and how you scoop. If the dough feels dry and cracks at the edges when you knead, wet your hand and work in a teaspoon of water. If it is sticky after the rest, dust with flour rather than adding more dry flour to the bowl. The principles behind a good filling-and-dough balance apply here too.
Building the filling
- Scramble the eggs loose, then chop. Heat the oil over high heat until it shimmers, pour in the beaten eggs, and stir just until they set into soft curds. Take them out while still a little glossy; they will keep cooking from residual heat. Once cooled, chop into small pieces. Overcooked eggs turn rubbery inside the pocket.
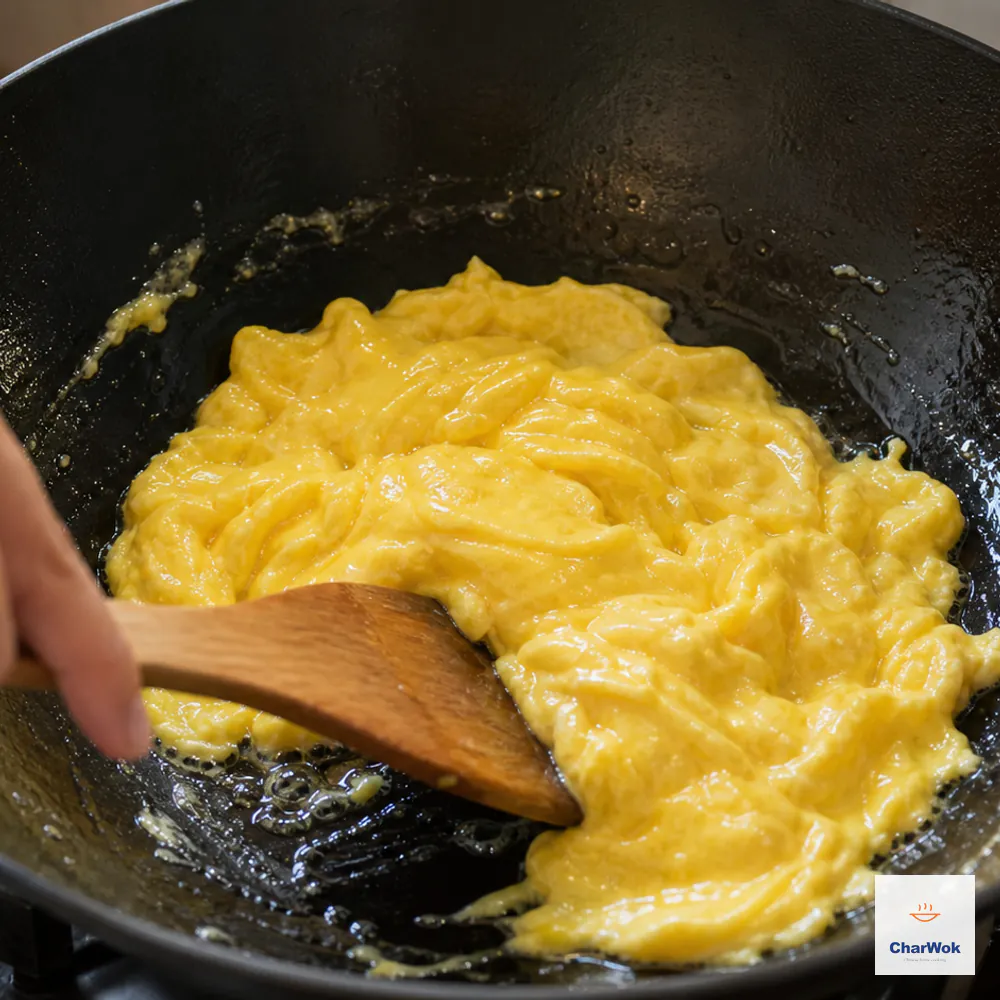
Scramble the four eggs only until soft and just set, then remove, cool slightly, and chop rather than cooking them dry
- Soak the vermicelli, then chop fine. Drop the dried bundle into hot water for about 5 minutes until pliable, rinse under cold water to stop the softening, and chop the strands into short bits. Vermicelli has little flavor of its own, but it absorbs the chive juices that would otherwise weep into the wrapper and turn the bottom soggy. That moisture control is its real job.
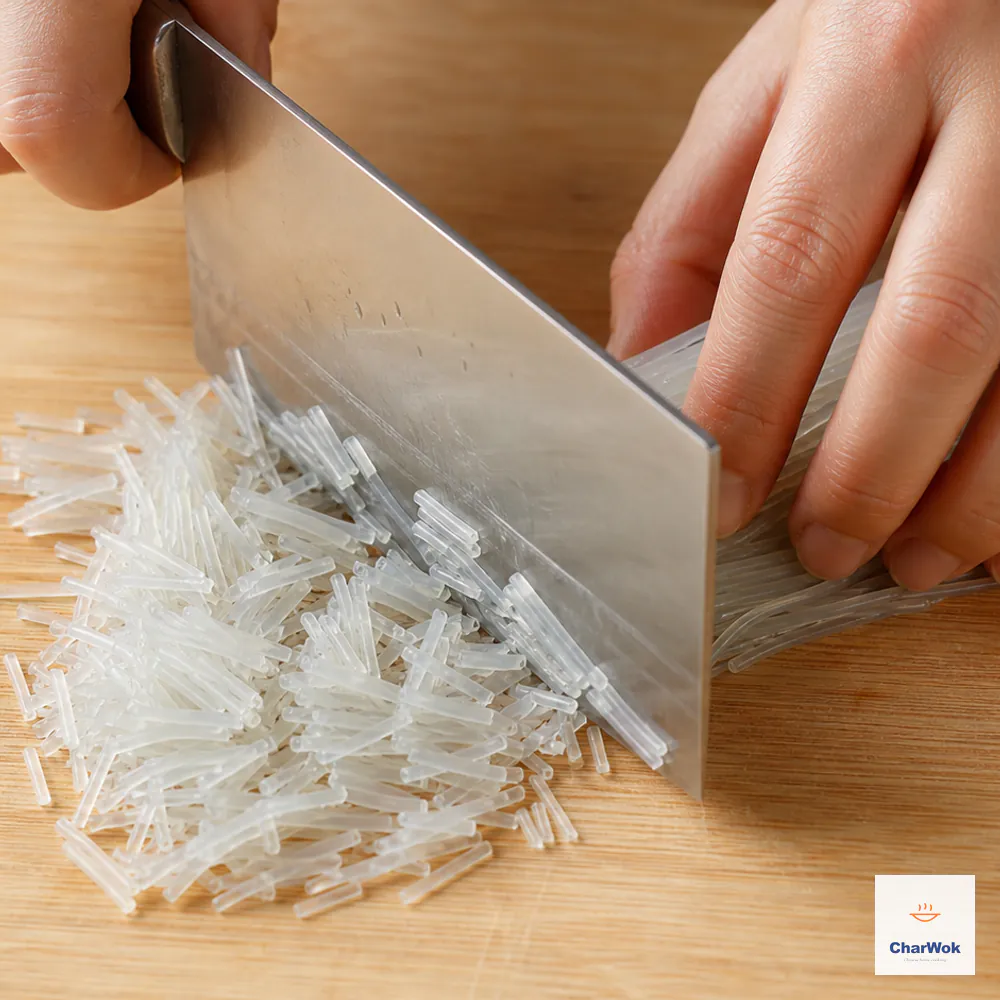
Soak the vermicelli for 5 minutes, rinse and drain it well, then chop the strands short so they cannot pierce the wrappers
- Mix everything at the last minute. Combine the chopped chives, vermicelli, eggs, salt, and Sichuan pepper in a bowl. Salt draws water out of cut chives, so do this step close to assembly, not an hour ahead. A light toss with chopsticks is enough; aggressive mixing bruises the chives and turns the filling wet.
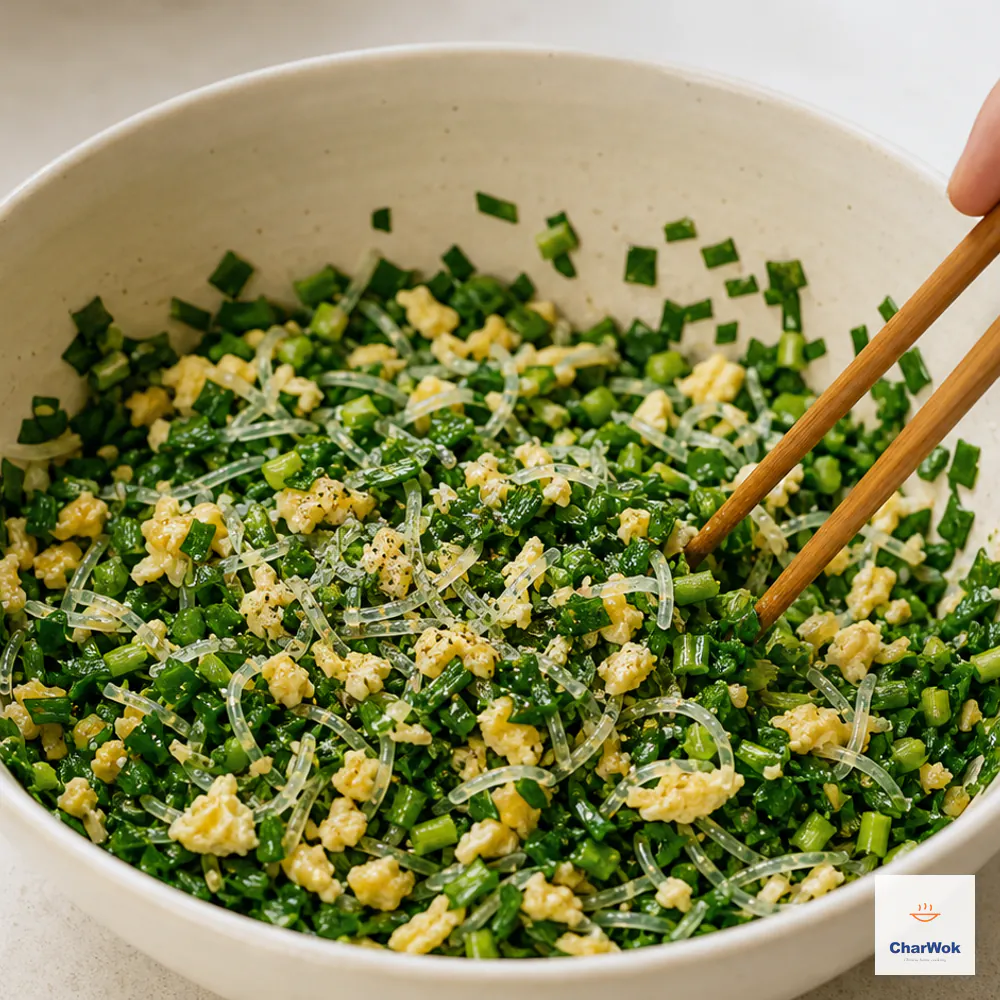
Toss the chives, egg, vermicelli, salt, and Sichuan pepper together only when the wrappers are ready, then fill immediately before the chives weep
Rolling and shaping the pockets
- Divide into 12 even pieces. Roll the dough into a log, then cut it into 12 equal portions. Even sizing matters more than you think: uneven pieces cook at uneven rates, and the small ones burn before the large ones crisp.
- Roll each to about 15 cm / 6 in. Dust the surface and pin lightly. Roll each piece into a thin round, thinner at the edge than the center. A thicker center prevents tearing when you load the filling; a thinner edge keeps the seal from becoming a doughy ridge.
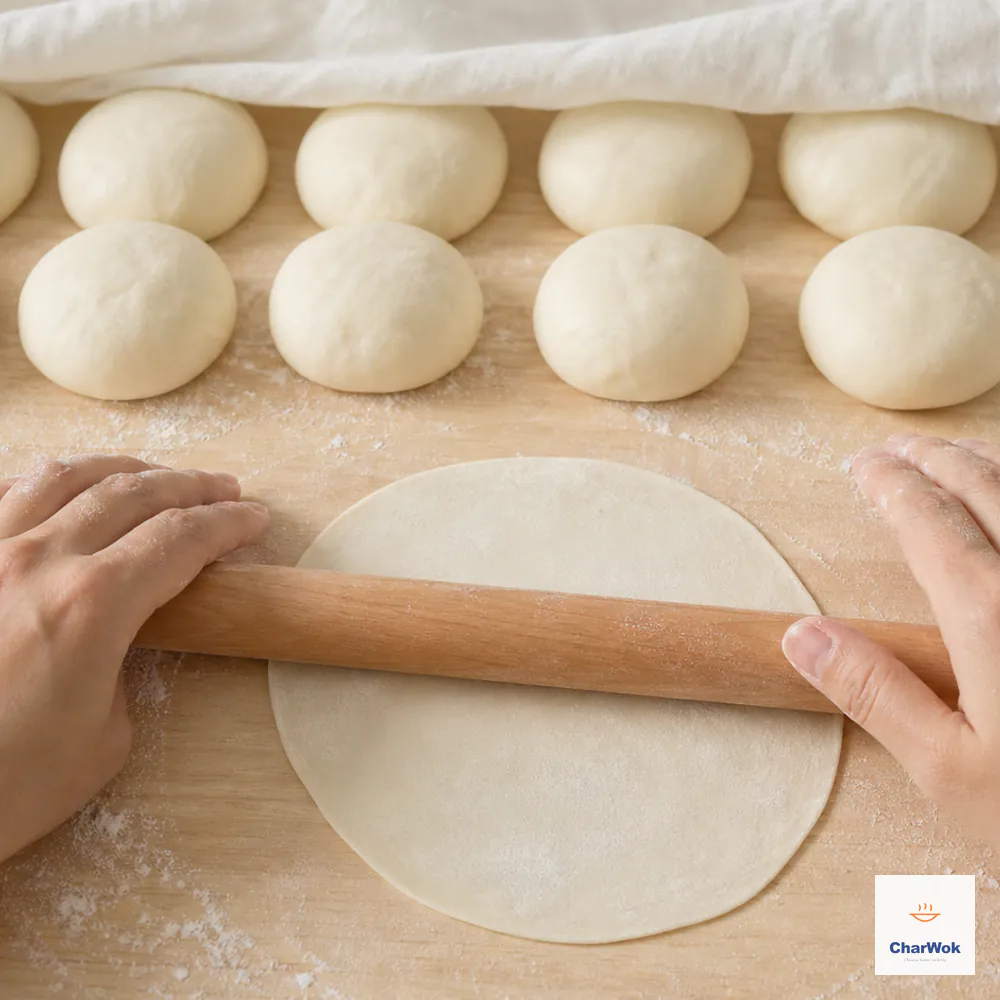
Divide the dough evenly into 12, then roll each piece to about 15 cm with a slightly thicker centre and thinner rim
- Fill, fold, and press the seam shut. Put a generous mound of filling on one half of the round, fold the other half over to make a half-moon, and pinch the curved edge firmly between thumb and forefinger. Press out the air as you seal, because trapped air expands in the pan and splits the pocket open.
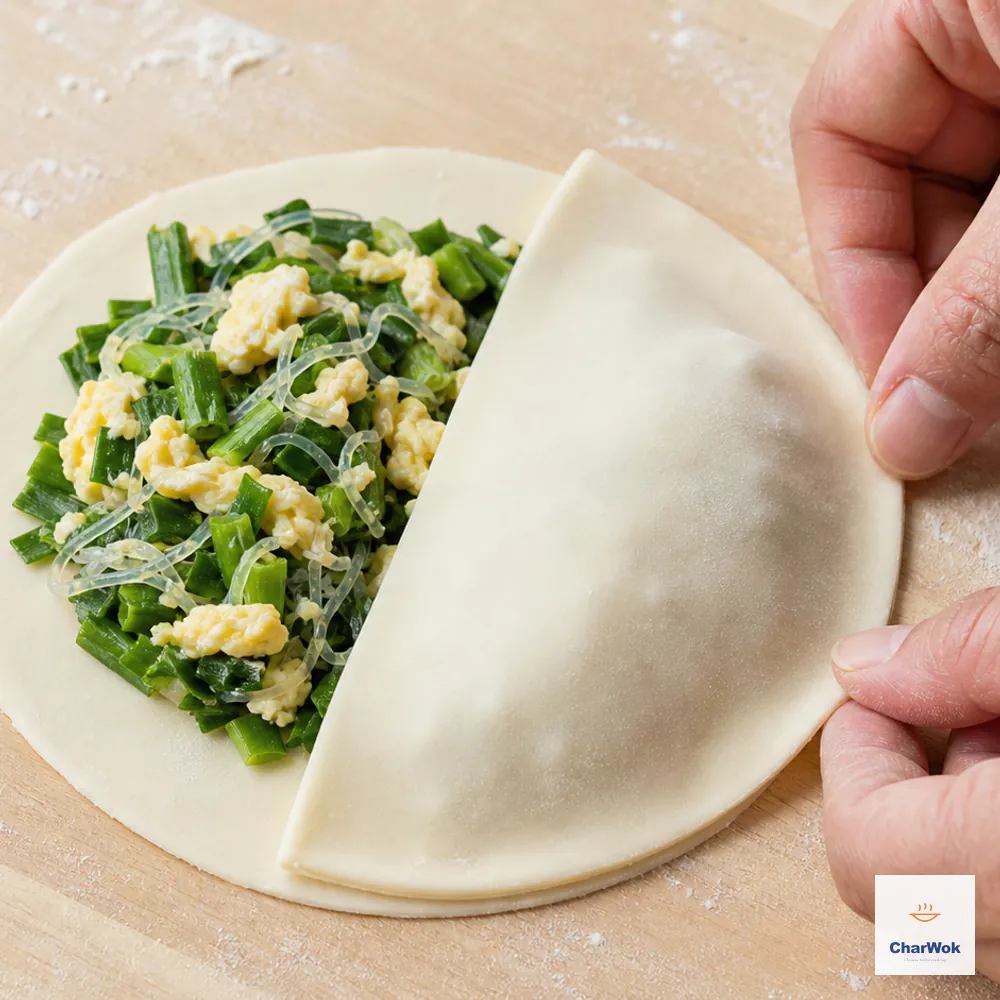
Fill one half without overloading, fold into a half-moon, press out trapped air, and pinch the curved seam firmly shut
A plain pressed seam is completely fine and is how most home cooks do it. If you want a decorative standing edge, the rolled-pleat method shown among the ways to fold dumplings works on these pockets too, but it is decoration, not structure. Do not reach for store-bought commercial dumpling wrappers as a shortcut. They are too small and too thin for a pocket this size, and the dough is the wrong type; you will end up with something closer to a pan-fried vegetarian dumpling than a chive pocket.
Pan-frying without steaming them to death
- Fry in two batches. Add about 1 tablespoon of oil to a large skillet, preferably heavy-bottomed, over medium heat. Lay in six pockets with a little space between them.
- Cover for the first side. Put a lid on. The trapped heat cooks the top of the wrapper and warms the filling through while the bottom browns. Wait until the underside is a deep golden brown, roughly 5 minutes, then flip.
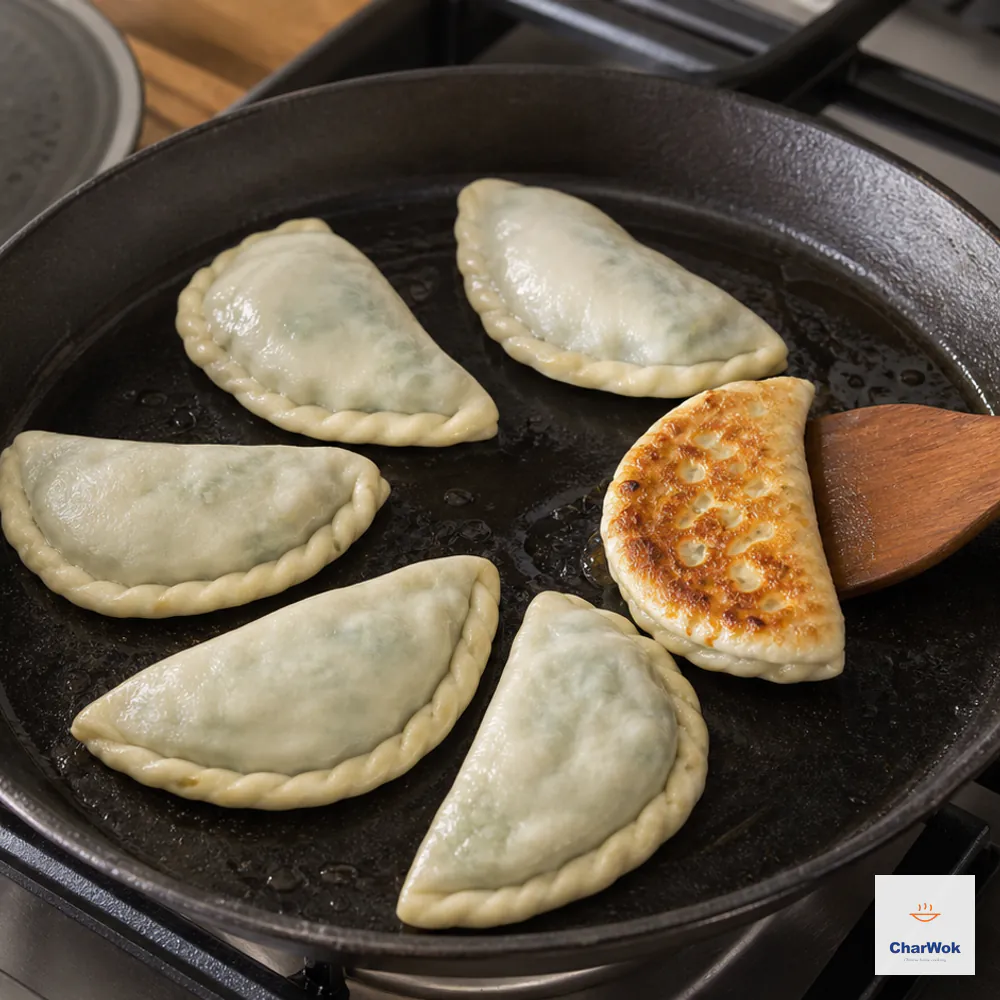
Fry six at a time over medium heat with the lid on until the first side is deeply golden, then flip and finish the second side uncovered
- Finish the second side uncovered. Cook another 2 minutes or so, without the lid, until that side is golden too. The lid comes off here so the surface crisps instead of steaming soft.
These cook faster than a raw-meat dumpling because the dough is partly pre-cooked by the hot water and the filling is already essentially done. That is also why the covered-uncovered sequence is reversed compared to a meat potsticker, where you typically add water and steam first. If you want a side-by-side on the timing differences, the breakdown of how to cook dumplings three ways is useful background. Serve hot, with chili oil on the side or one of the classic dumpling dipping sauces.
When things go wrong
This is the section I wish someone had handed me the first ten times I made these.
- The dough tears when you roll it. It has not rested long enough, or the water was not hot enough. Rest another 10 minutes under cling film. If it still tears, the water probably cooled below 80°C / 180°F before it hit the flour, and you made a lukewarm-water dough by accident.
- The pockets split open in the pan. Either the seam was not pressed fully shut, or air was trapped inside. Press firmly and squeeze air out as you fold. A too-thin edge also contributes; leave a little more dough at the rim.
- The filling weeps and the bottom goes soggy. You salted the chives too far in advance, or skipped the vermicelli. Mix the filling close to assembly, and if you omitted the noodles, add an extra egg to bind the moisture.
- One side is pale, the other is dark. Your heat is uneven or the pan is crowded. Use a heavy skillet, leave space between pockets, and rotate the pan if your burner has a hot spot.
- The wrapper turns hard after cooling. This is the signature failure of a dough made with too-cold water. Cold-water doughs set up firm as they cool. Hot-water dough stays tender at room temperature, which is the whole reason the technique exists.
Variations and what to serve alongside
The classic filling is vegetarian, and it is the version I would make first. After that, the pocket takes well to small additions. A handful of soaked, finely chopped dried shrimp adds umami depth. A little minced cooked pork or shrimp turns it into a heartier main, closer in spirit to a stuffed xian bing meat pie than a vegetarian snack. Keep additions cooked and cooled before they go in, so you are not introducing raw moisture.
For a meal, pair the pockets with a light soup. A simple tofu omelet on the side rounds out a vegetarian spread, and a bowl of congee makes a weekday breakfast of it. If you are cooking for a mixed table, set these next to a meat option and let people assemble their own plates; the allium punch of the chive pocket holds its own against bolder dishes.
Make-ahead and freezing
- Freeze uncooked, on a tray first. Lay the assembled pockets in a single layer on a lightly floured tray and freeze until solid, then transfer to an airtight bag for up to three months. Freezing them flat first prevents them from freezing into a single stuck-together lump.
- Cook from frozen, with a steam step. Do not thaw. Start the pockets covered in the oiled pan as usual, but add about 120 ml (½ cup) of water with the first side and clamp the lid on. The steam drives heat into a frozen center while the bottom browns; flip and finish uncovered once the water has evaporated and the first side is golden.
Cooked leftovers reheat best in a dry skillet over low heat, covered for a minute to warm the filling through and then uncovered to re-crisp the wrapper. A microwave will turn the once-crisp skin gummy, and there is no rescuing it after that.
A few questions I get asked
The most common confusion is about the dough, so I will be blunt: yes, the water really does need to be hot, and no, room-temperature water is not a workable substitute if you want the right texture. Beyond that, here are the questions that come up most.
Can I use cold water instead? You can, but you will get a different, chewier wrapper that hardens as it cools. Hot water is what makes a chive pocket tender at room temperature. If you prefer the chewier result, that is closer to a scallion pancake or scallion-pancake texture than a chive pocket.
Do I have to use the vermicelli? No. The noodles are mainly there to soak up moisture and add a little bounce. Skip them and add an extra egg plus a bit more chive to keep the volume and texture balanced.
Can I bake or air-fry these instead of pan-frying? Pan-frying gives the authentic crisp-tender contrast. An air fryer at about 190°C / 375°F for 10 to 12 minutes, flipping once, will brown them, but the skin dries out more and loses some of the softness that defines a good pocket.
Why is my filling bland? Two usual causes: not enough salt, or the Sichuan pepper was stale. Ground Sichuan pepper loses its aroma within weeks; toast whole peppercorns and grind them fresh for real flavor, or substitute five-spice or white pepper.
For an entirely plant-based version built on the same idea, the approach behind vegan dumplings adapts cleanly: swap the eggs for crumbled firm tofu pressed dry and seasoned well, and use the same hot-water dough.
Where this fits
The chive pocket belongs to the broad northern Chinese family of stuffed wheaten foods, alongside pan-fried buns, meat pies, and the many shapes of folded dough. It sits comfortably in a lineup of the best-known Chinese dumplings as the vegetarian showpiece, the one that proves a filling needs no meat to carry a meal. Make the dough right, salt the chives at the last moment, and the rest takes care of itself.