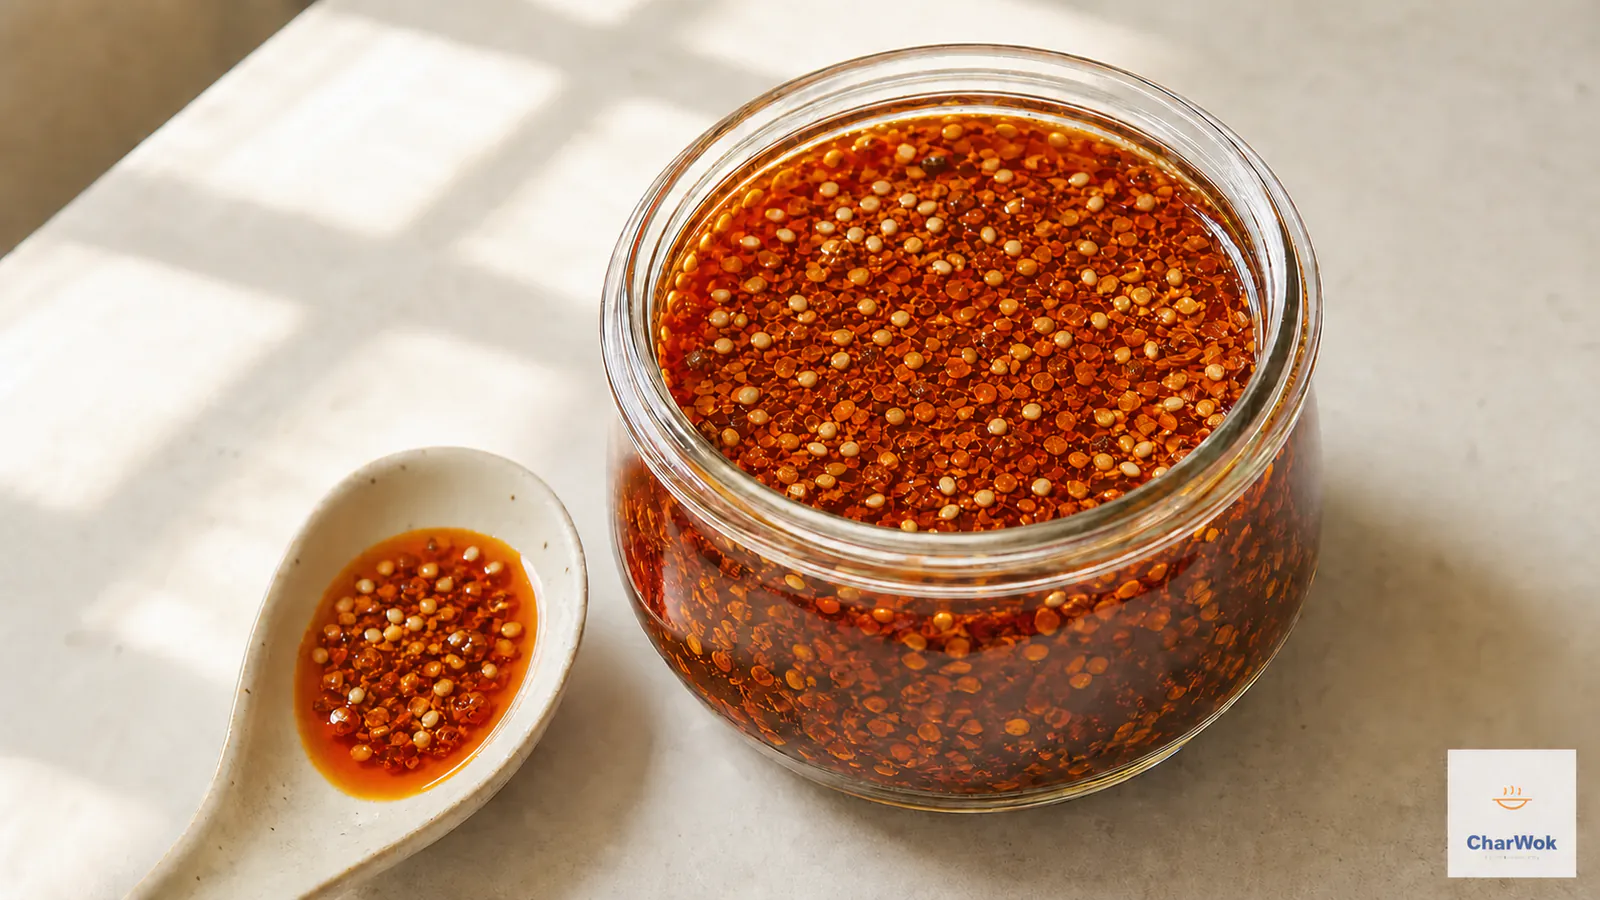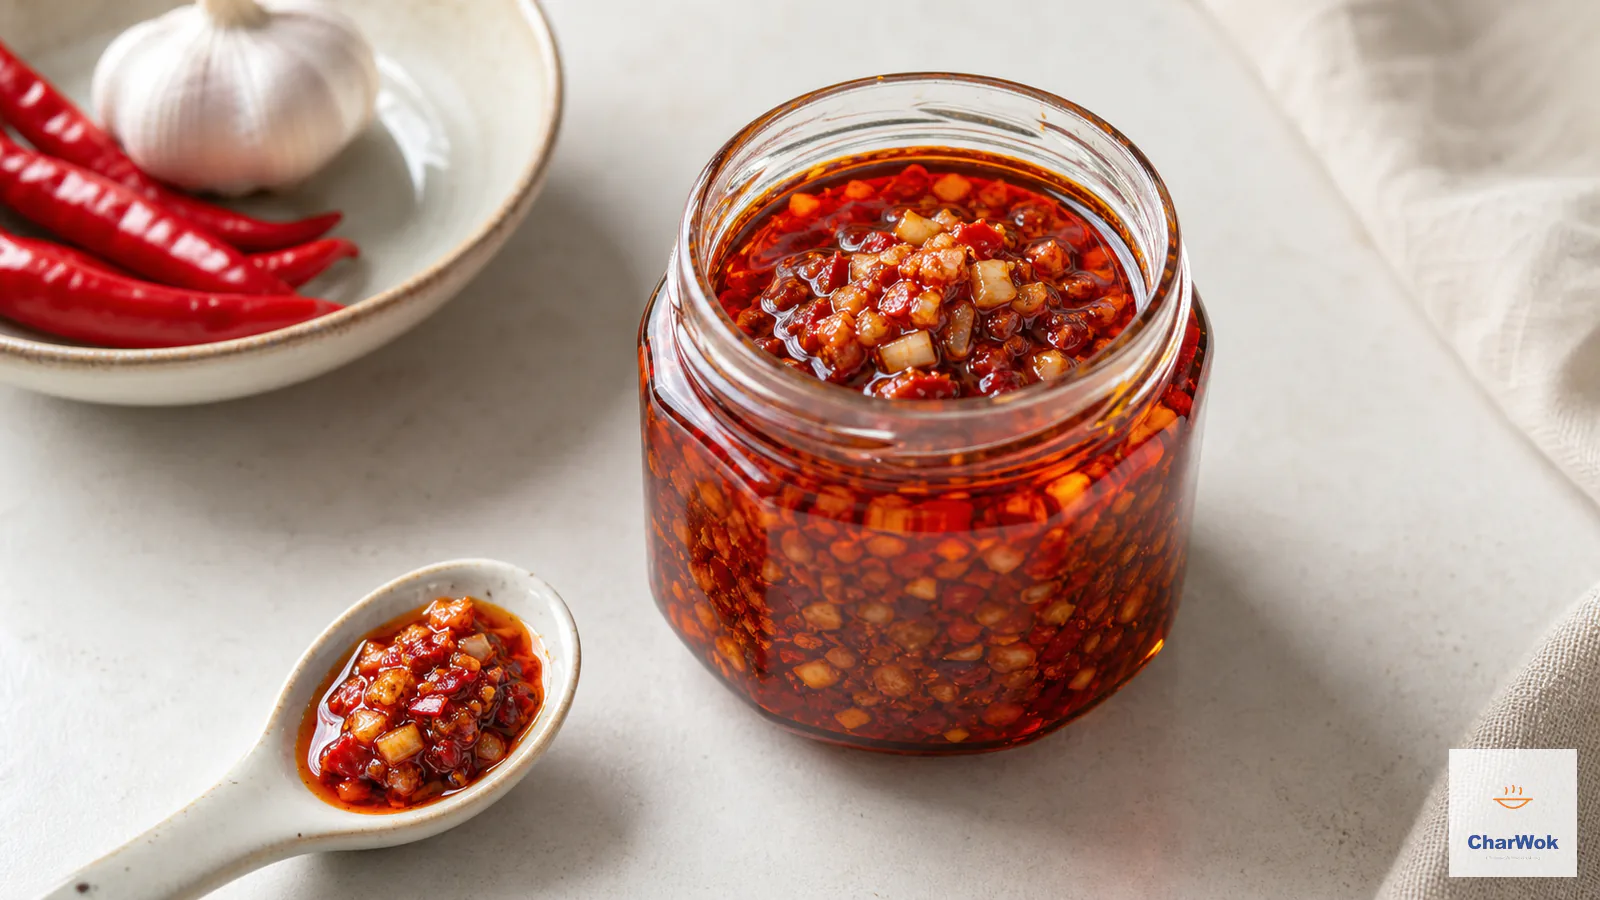
The first time a friend handed me a jar of homemade Chiu Chow chili oil, I almost threw it out. It looked like a jar of wet red mud, the oil sitting in a thin golden layer over a thick slurry of minced chili and garlic. Then I stirred a spoonful into plain rice. That one spoonful ruined every store-bought jar for me. The bottle on the supermarket shelf is mostly oil and salt and regret. The real thing is mostly flesh, fragrant with garlic, faintly sweet, and loud enough to wake up a bowl of plain noodles but built on patience, not violence.
Chiu Chow chili oil (潮州辣椒油) is the chili condiment of the Teochew people, whose homeland sits in the far east of Guangdong province. Teochew cooking is famous for its restraint, its seafood, and a love of pungent, garlicky sauces served on the side. What makes this oil different from every other chili oil in the Chinese pantry is one detail: it is built on fresh chilies, gently fried in oil until their water cooks out. The classic Sichuan-style chili oil pours smoking oil over dried flakes to bloom their color and aroma in seconds. This one takes the opposite approach, a long slow fry that concentrates fresh-chili flavor rather than extracting dried-chili heat.
At a glance: roughly 450 g fresh red chilies to 360 ml neutral oil, fried low and slow for about 25 minutes until the solids shrink and the oil splits clean. Patience builds the texture and keeps the garlic from scorching, but it does not make a fresh garlic-in-oil mixture shelf-stable. Refrigerate promptly, use within 4 days, or freeze portions for longer storage.
What you are actually doing, and why
The long fry removes some moisture and concentrates the fresh-chili flavor, but the visible oil split is a texture cue, not a food-safety test. Oil does not safely preserve fresh garlic or chilies at room temperature, and a home cook cannot verify water activity or acidity by sight. The National Center for Home Food Preservation recommends keeping homemade garlic-in-oil mixtures at 4°C/40°F or colder for no more than 4 days, or freezing them for longer storage. Treat this wetter chili-garlic condiment at least as cautiously.
There is a second reason to go slow, and it is flavor. Garlic burned past light gold turns bitter and acrid, and once it crosses that line there is no rescue. Chilies scorched at the edge go from fruity to flat. Low heat gives you a wide window where everything is golden and fragrant instead of a five-second tightrope between raw and ruined. This is the same logic behind making scallion oil, where patience in the pan is what releases the aromatic into the fat.
Choosing the chilies (this decides the whole jar)
There is no single correct chili for this. There is a correct balance, and that is what most home cooks miss. If you use only one type you will get a one-note oil: all fire and no fruit, or all fruit and no heat.
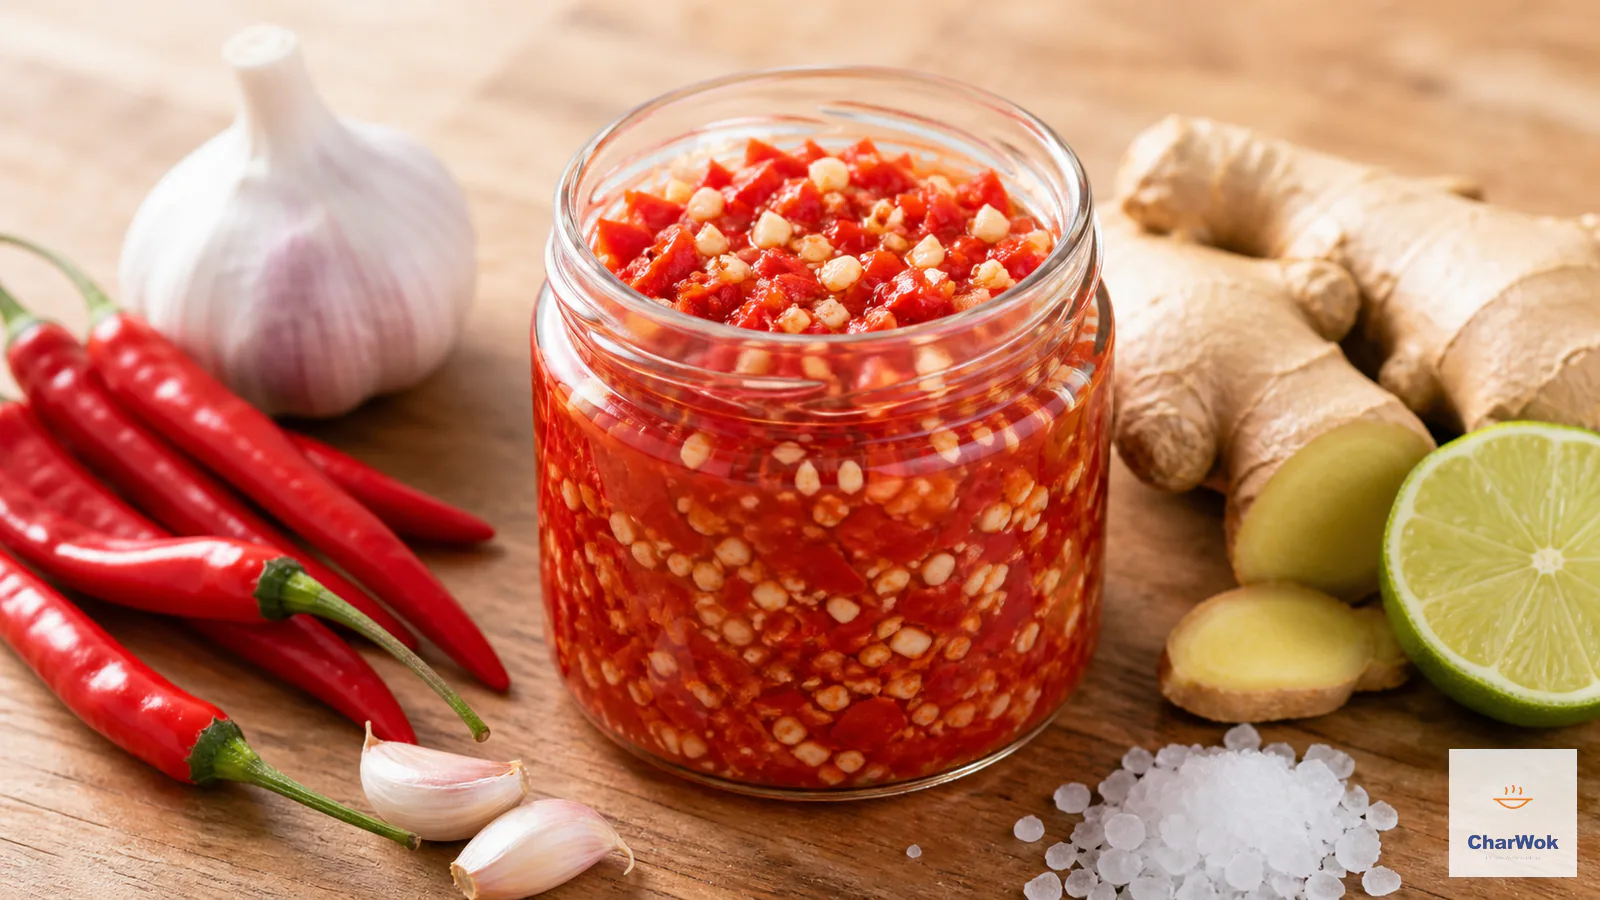
My default split is roughly three parts mild, fleshy red chilies to two parts hot chilies, by weight. For the mild side I like long Dutch red chilies, Fresnos, or ripe red jalapenos. They have thick walls, a slight sweetness, and almost no heat, and the thick flesh is what gives the finished oil that substantial, almost relish-like body. For the hot side I use bird's eye chilies (Thai chilies). They are thin-walled and searing, and a small amount carries the whole batch.
If you cannot find fresh red chilies at all, do not substitute dried. This recipe is defined by fresh flesh. Go buy the chilies first, then make the oil. If you want a jar your kids can eat, drop the hot portion to one part in five, or replace the bird's eye entirely with more Fresno. If you want it punishing, flip the ratio. But keep some mild chilies in there for body, because a jar of only bird's eye is all burn and nothing to chew.
Ingredients
Ingredients at a glance
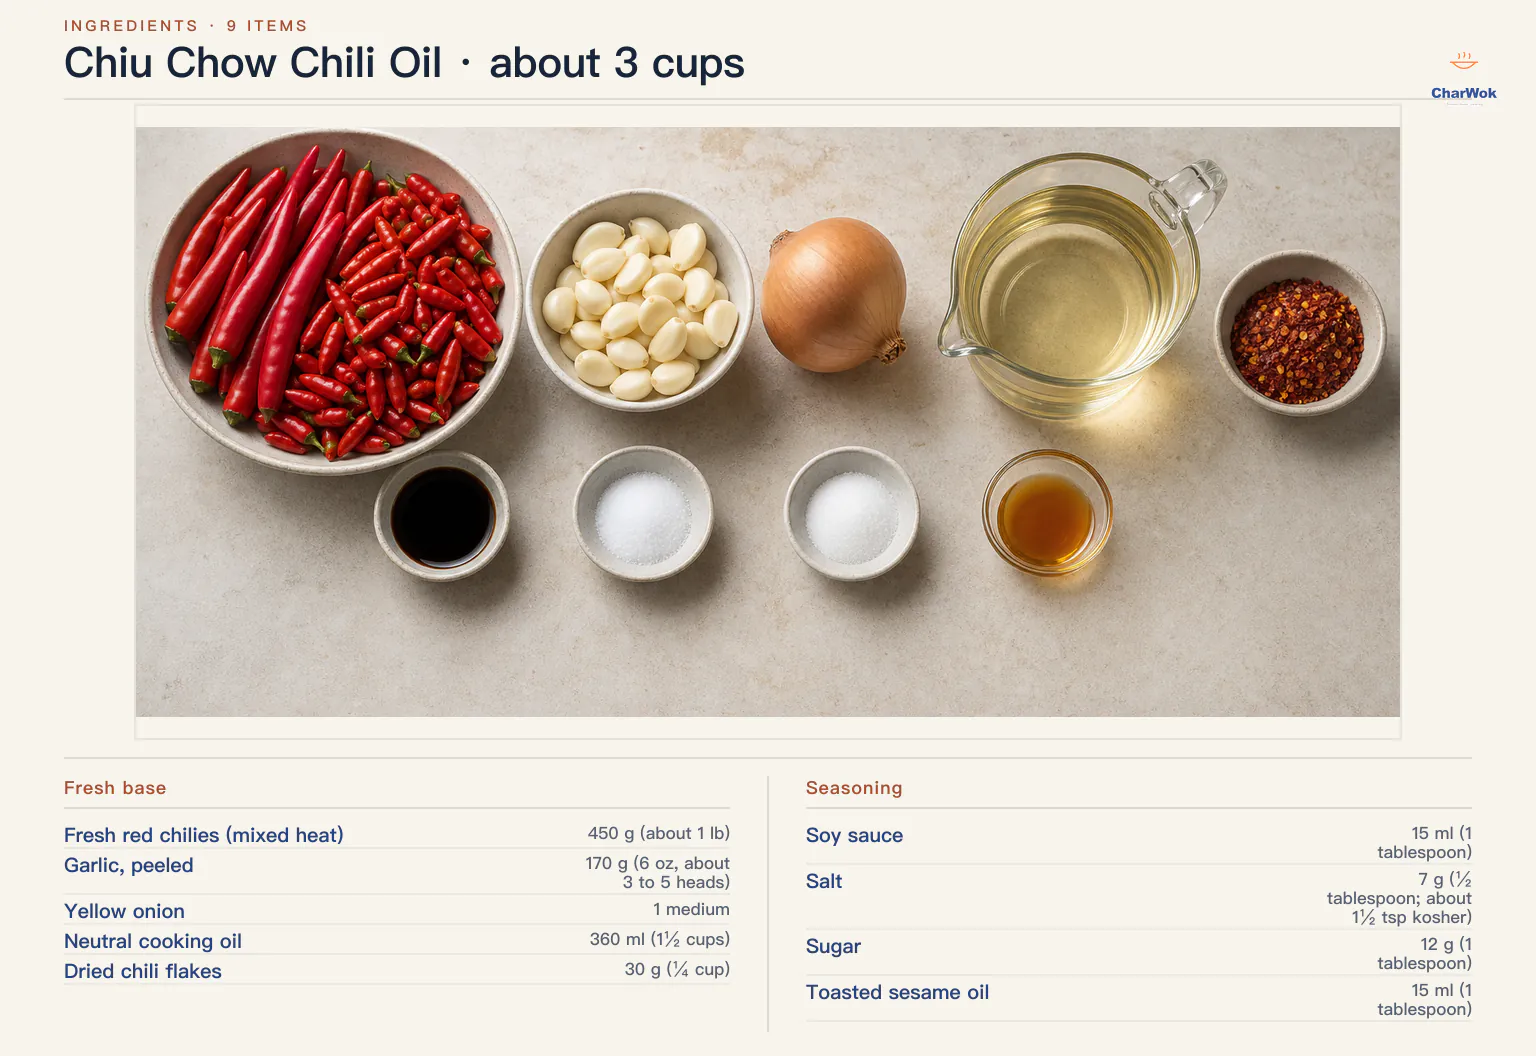
This makes about 3 cups (roughly 700 ml), enough to fill three medium jars. Scale freely; the ratios are what matter, not the totals. A few notes before the table: weigh the chilies and garlic if you can, because "one pound" of chilies means very different things depending on the variety, and garlic heads vary wildly in clove count. Use a neutral oil with a high smoke point. Peanut, canola, sunflower, corn, and grapeseed all work; do not use olive oil or un-toasted sesame oil as the base, because both have strong flavors that fight the chilies and both smoke too low. Toasted sesame oil goes in at the very end as a finishing aroma, never into a hot pan. For the chili flakes, plain dried red pepper flakes are fine; if you want the vivid red color the source is after, seek out er jing tiao or a similar mild bright-red flake.
| Ingredient | Amount | Notes / substitute |
|---|---|---|
| Fresh red chilies (mixed heat) | 450 g (about 1 lb) | 3 parts mild (Fresno / Dutch red / red jalapeno) to 2 parts bird's eye by weight. Adjust to taste. |
| Garlic, peeled | 170 g (6 oz, about 3 to 5 heads) | Peel and weigh; head count is unreliable. Mince to same fineness as the chilies. |
| Yellow onion | 1 medium | Shallot works; it adds a sweeter, more delicate perfume to the oil. |
| Neutral cooking oil | 360 ml (1½ cups) | Peanut, canola, sunflower, corn, or grapeseed. Not olive, not toasted sesame. |
| Dried chili flakes | 30 g (¼ cup) | Plain red pepper flakes, or mild er jing tiao for vivid color without extra heat. |
| Soy sauce | 15 ml (1 tablespoon) | Use a light or all-purpose soy sauce, not dark. It just rounds the umami here. |
| Salt | 7 g (½ tablespoon; about 1½ tsp kosher) | For seasoning, not shelf stability. Use kosher or fine sea salt. |
| Sugar | 12 g (1 tablespoon) | The Teochew signature is a faint sweetness. White sugar or rock sugar both work. |
| Toasted sesame oil | 15 ml (1 tablespoon) | Added off the heat. This is the only place sesame belongs in the recipe. |
Method
Before you start: put on gloves. The capsaicin from a pound of chilies will live on your fingers for a day, and the first time you touch your eye you will understand why I say this every time.
- Prep the chilies. Rinse them under cold water, then dry them thoroughly, every surface, with a towel. Surface water will spit in hot oil and will also extend the cooking time you are trying to control. Pull off and discard the stems. Cut any large chilies into chunks small enough to feed a processor.
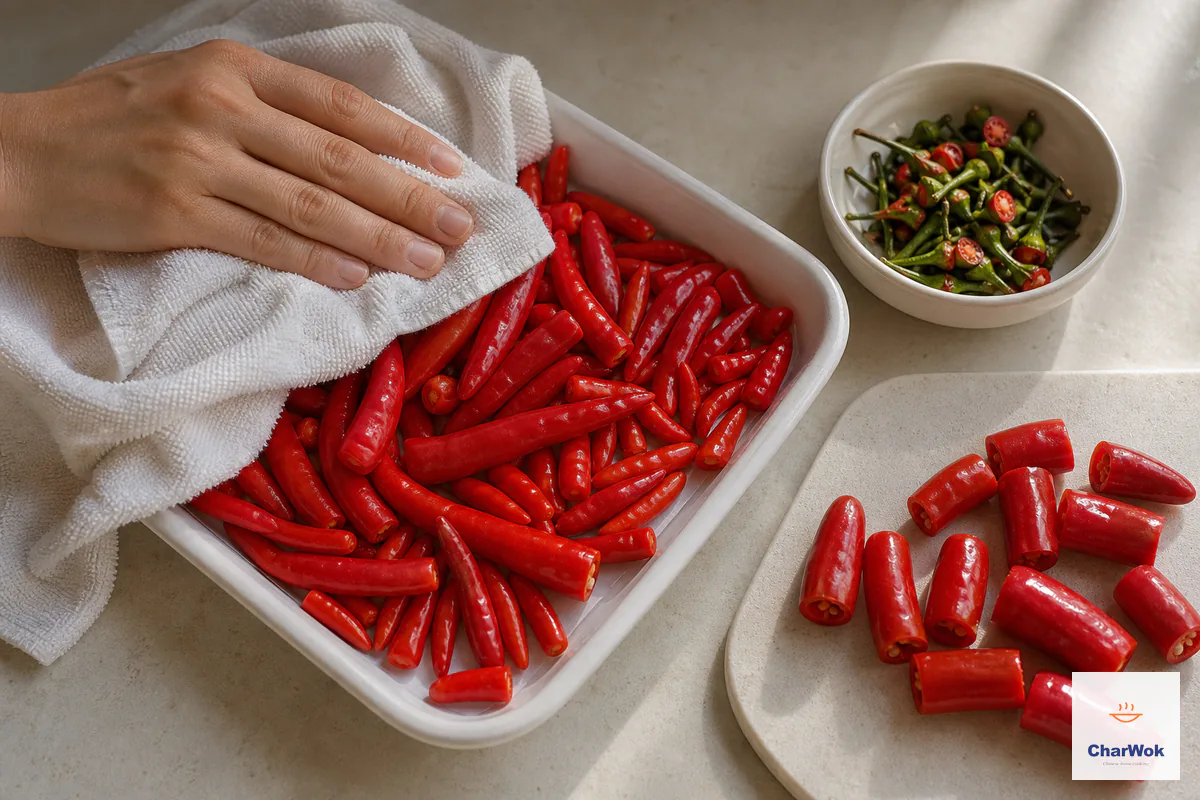
Wash the fresh chilies, dry them completely, then trim away the stems so no water enters the hot oil.
- Chop, do not paste. Pulse the chilies in a food processor in short bursts, scraping down between pulses, until you have fine pieces about the size of coarse breadcrumbs. Stop there. If you run the machine continuously you will puree the chilies into a wet paste that turns gummy and scorches in the pan instead of frying cleanly. You are after texture, not smoothness.
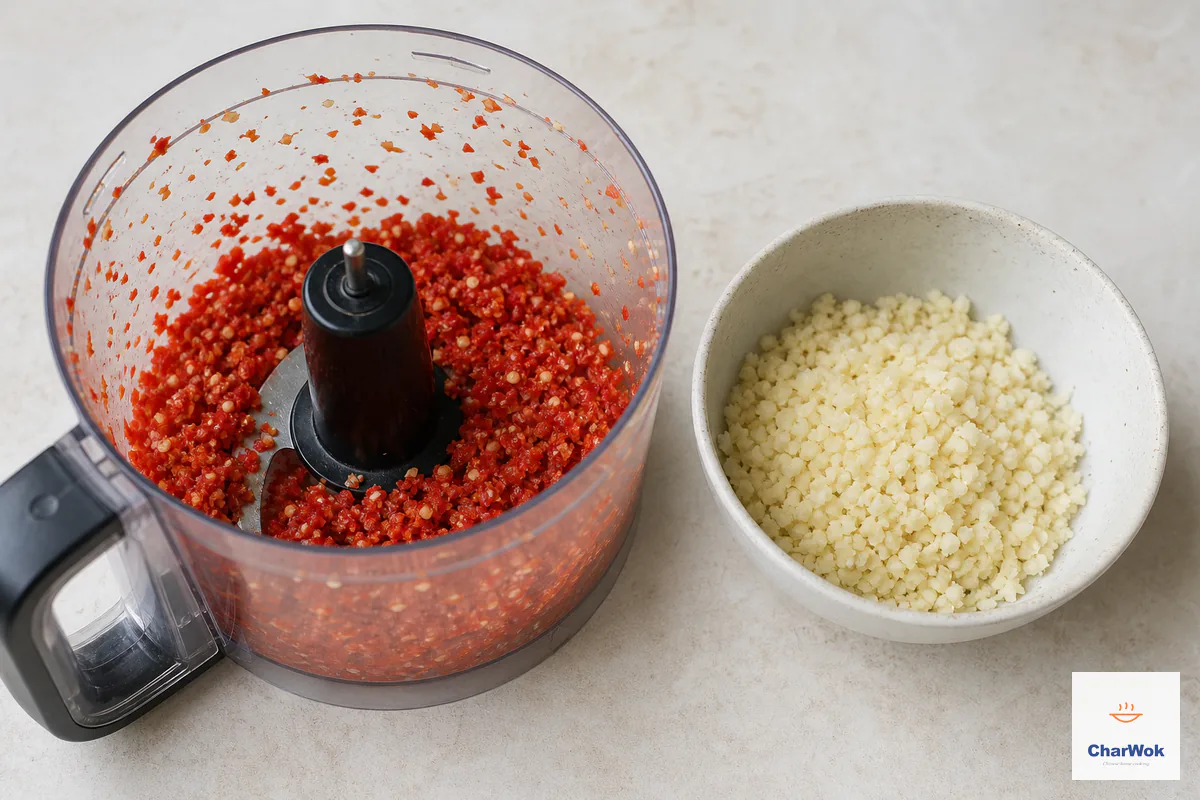
Coarsely chop the chilies in batches, stopping while the pieces are still distinct and textured.
- Mince the garlic to match. Peel the cloves and process them to roughly the same size as the chilies. The two should look like they belong together when they hit the oil.
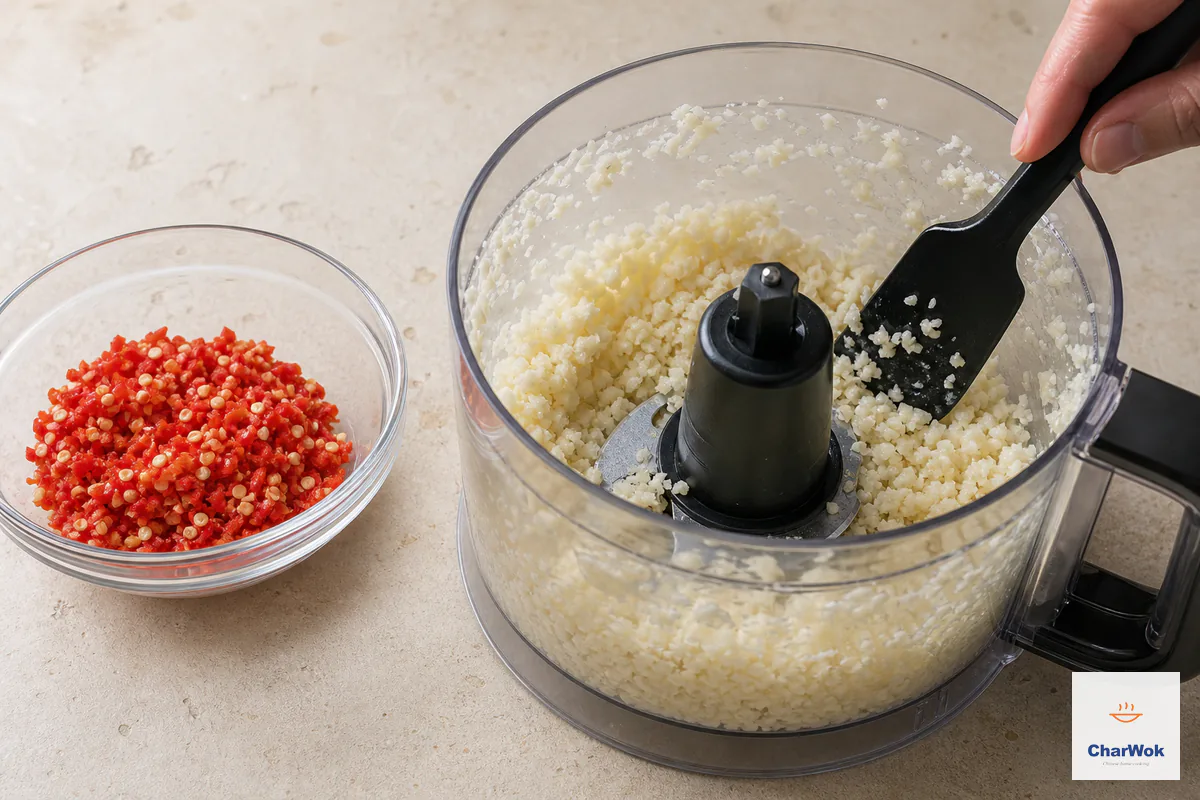
Mince the garlic to roughly match the chili texture so both cook evenly without turning pasty.
- Slice the onion. Cut it into thin half-moons. The onion is a flavoring for the oil, not part of the final condiment, so thin slices are easier to fish out later.
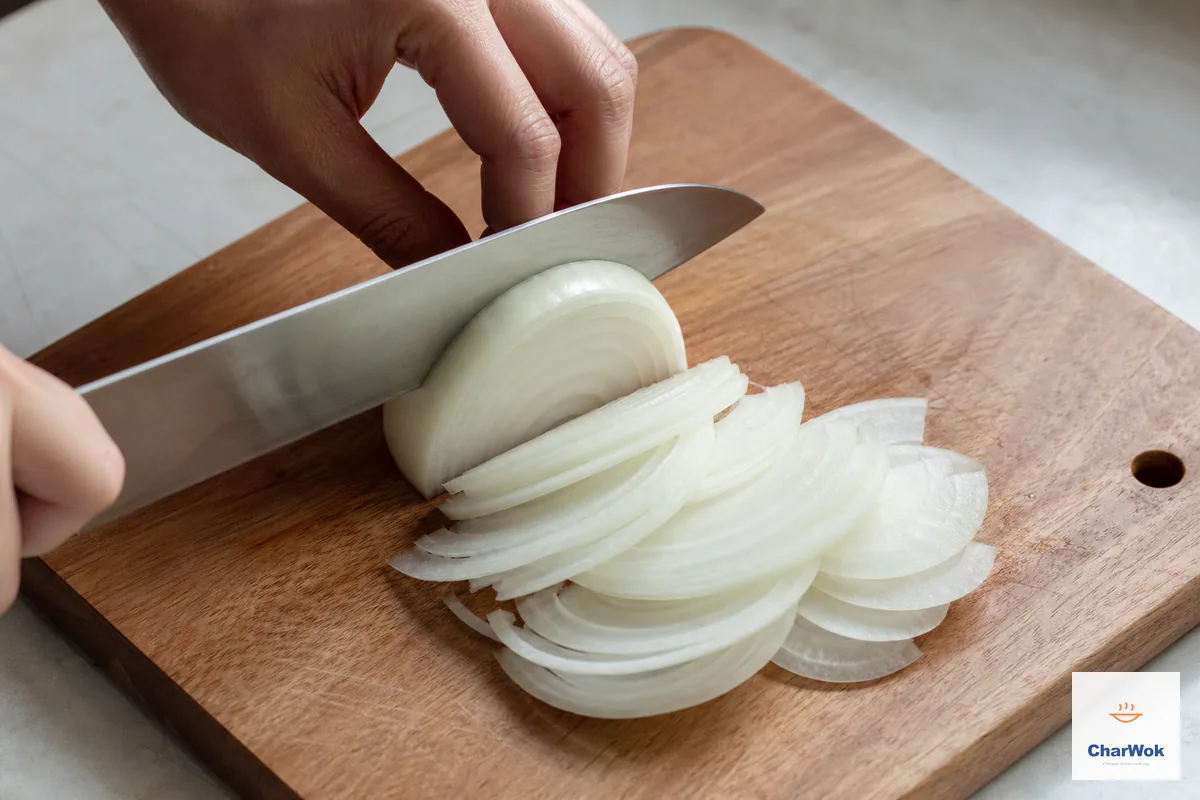
Slice the onion into thin half moons so it can perfume the oil evenly and be removed cleanly.
- Infuse the oil. Combine the oil and onion in a wok, deep skillet, or saucepan over medium-low heat. Fry gently for about 5 minutes, until the onion edges turn light gold. This step borrows the oil the way you would for a stir-fry base, layering a savory sweetness underneath the chili. Scoop the onion out with a slotted spoon and reserve it. Do not skip this: the onion perfumes the entire jar. The fried onion is a bonus, brilliant tossed into any quick stir-fry or scattered over a bowl of noodles.
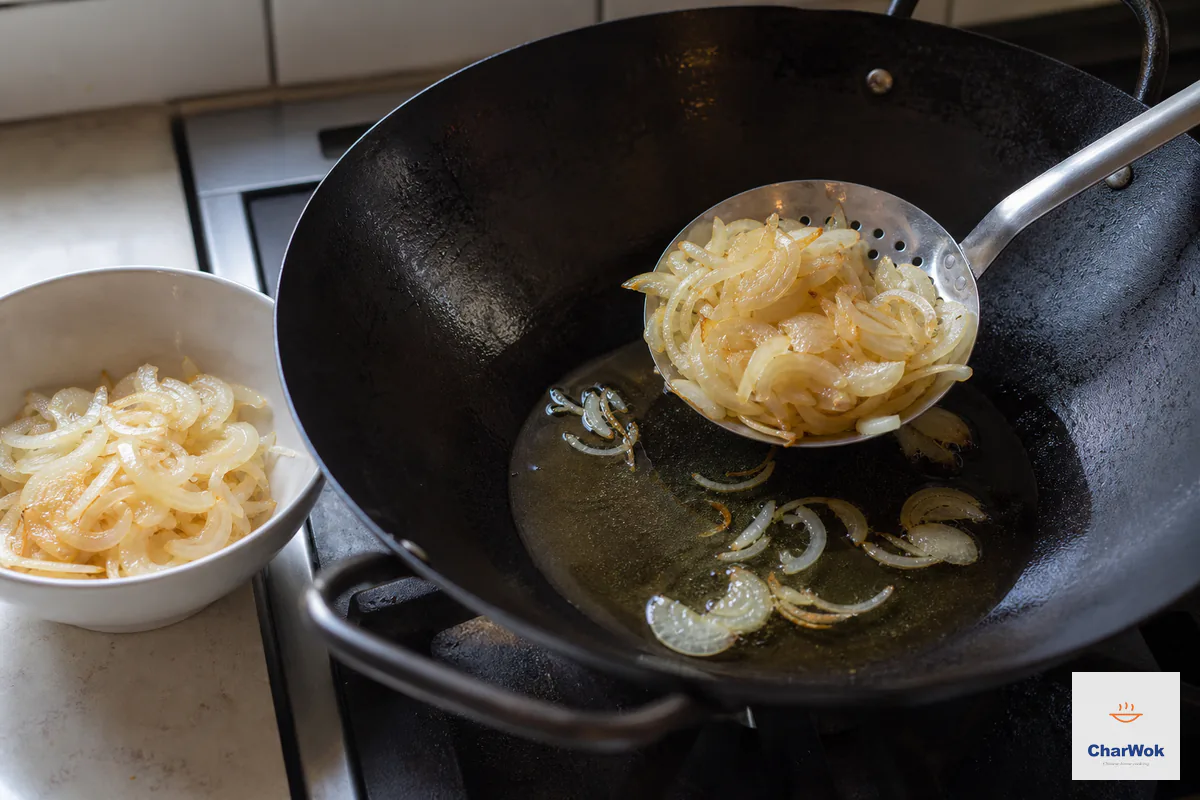
Gently fry the onion until golden and fragrant, then remove every slice before it can turn bitter.
- Add the garlic and chilies, drop the heat. Tip the minced garlic and chilies into the onion-scented oil and stir to combine. Now bring the heat down to low. This is the make-or-break moment. You want a bare shimmer across the surface, tiny bubbles rising like a very gentle simmer in a pot of water, not a rolling fry. Anything more and the garlic burns before the water leaves the chilies.
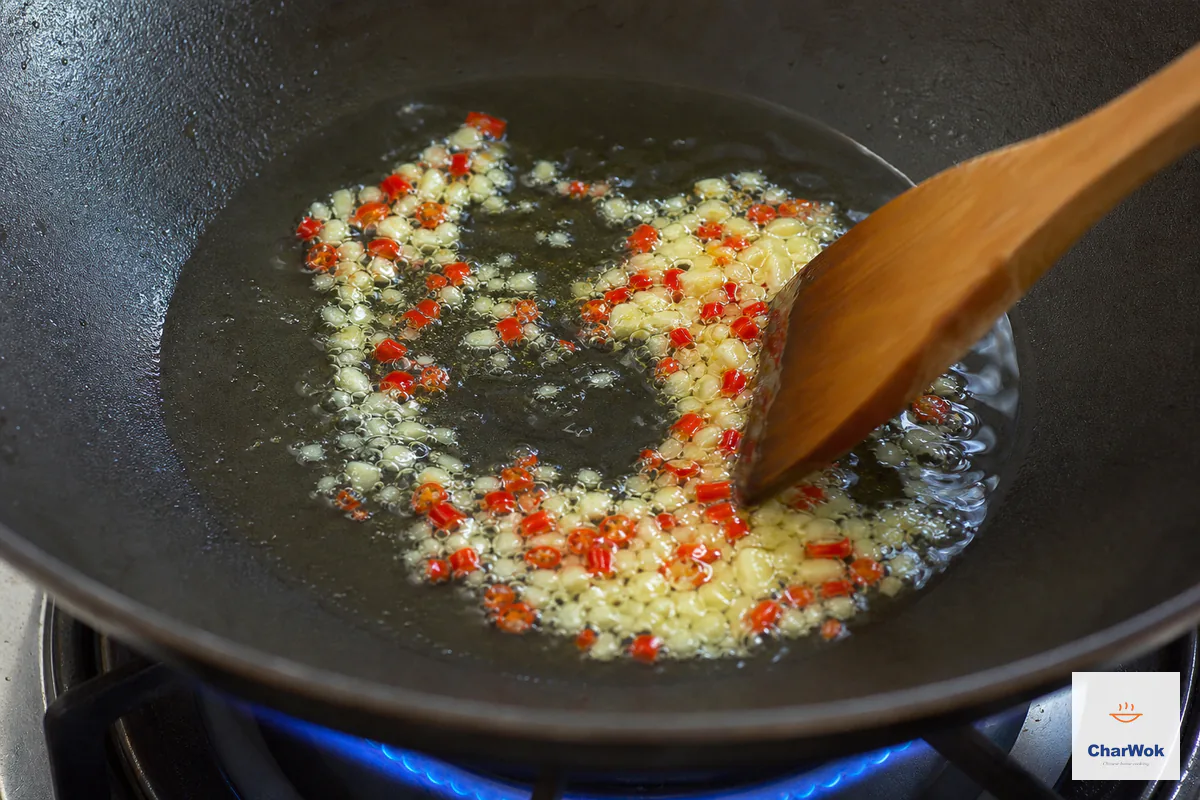
Add the chopped chili and garlic, then fry gently over low heat so the mixture cooks without scorching.
- Fry low and slow, about 25 minutes. Stir every few minutes, and use a spatula to scrape anything clinging to the pan walls back into the oil. Bits stuck above the oil line will scorch while the rest simmers. As the water cooks off, two things happen: the minced solids visibly shrink and settle below the oil, and a clean band of golden oil rises above them. When you can see that clear separation, you are done. If the mixture still looks cloudy and unified, it is not ready; keep going. Trust the visual, not the clock.
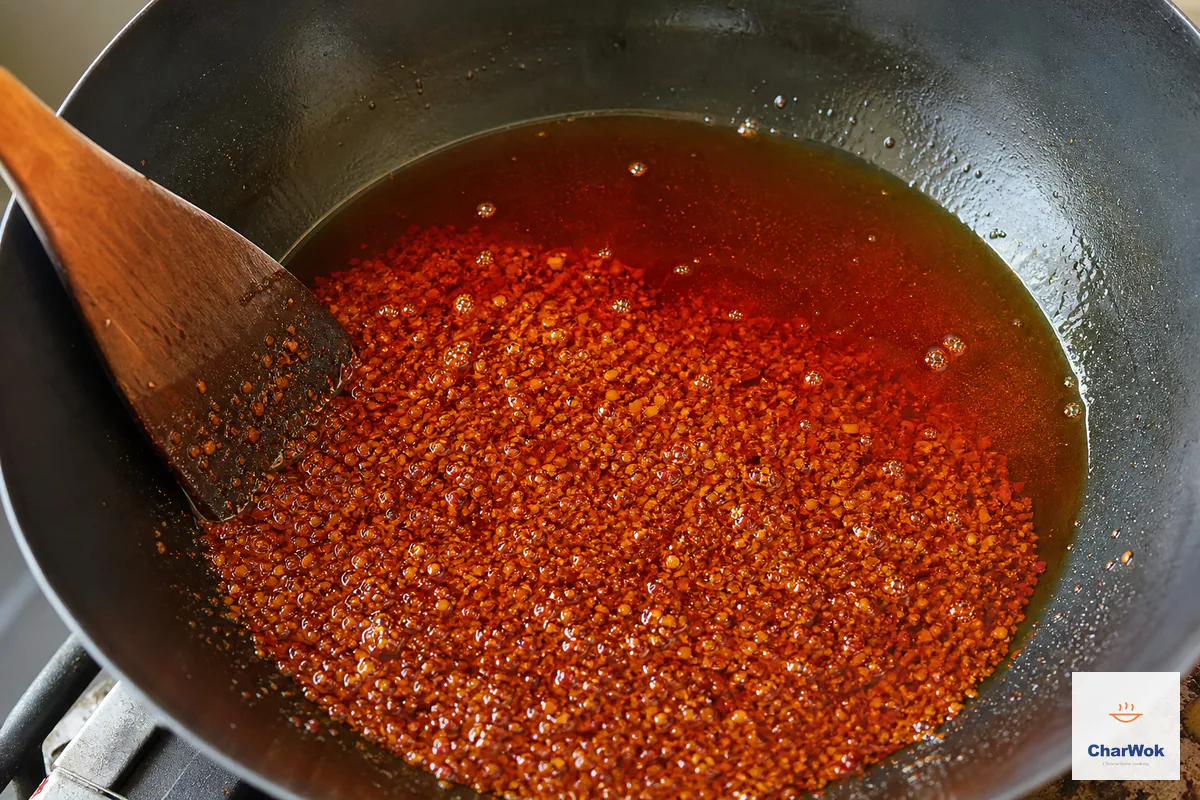
Continue gently until the solids reduce and a clear red-golden oil separates around the chunky mixture.
- Season. Stir the dried chili flakes into the soy sauce first, then add that slurry to the pan. Wetting the flakes is deliberate: dry flakes dropped into hot oil flash-burn and turn bitter in seconds; the soy sauce buys you a wide safety margin. Stir gently for about 30 seconds. Then add the salt, sugar, and toasted sesame oil, stir once more, and pull the pan off the heat. The residual heat finishes the seasoning without cooking it further.
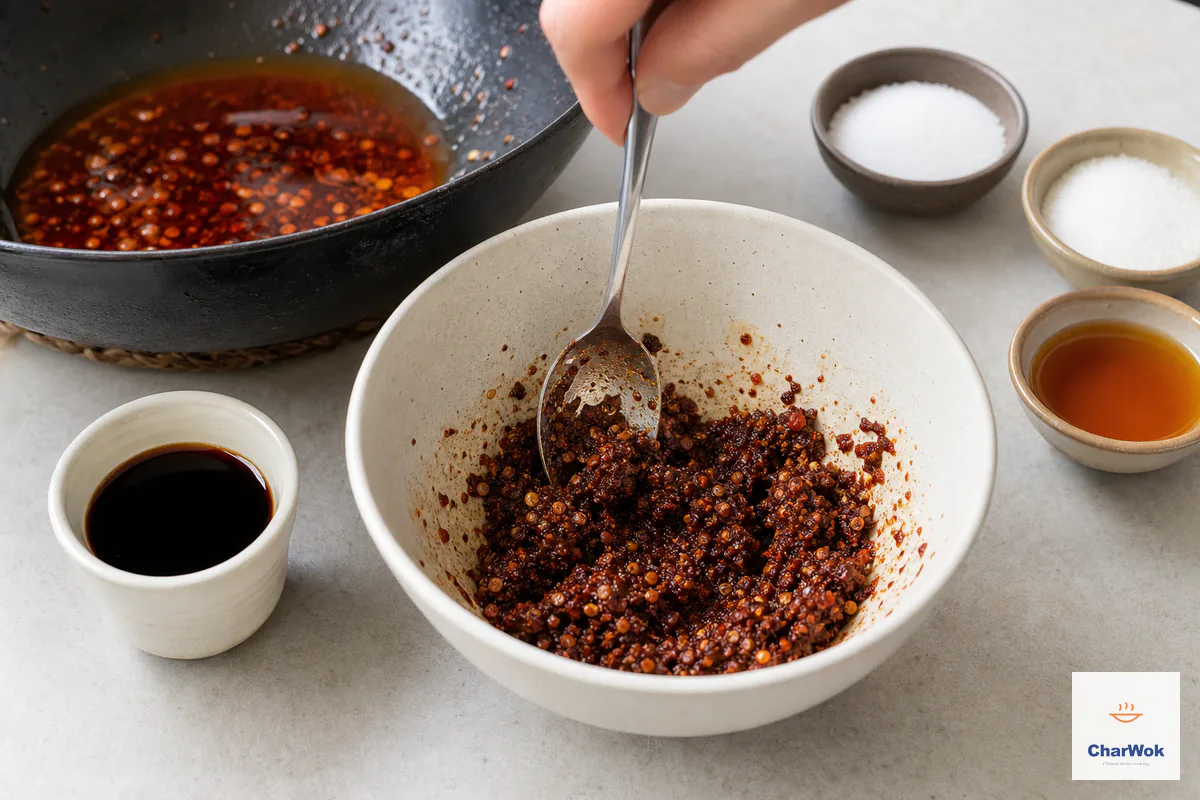
Moisten the dried flakes with soy sauce, stir them into the oil off the heat, then add the salt, sugar and sesame oil.
- Cool briefly, then chill. Let the oil stand only until the fiercest heat and steam subside, then divide it among clean, dry, heat-safe containers. Refrigerate within 2 hours of taking it off the heat; smaller containers cool faster than one large jar. This is refrigerator food, not a canned or shelf-stable preserve.
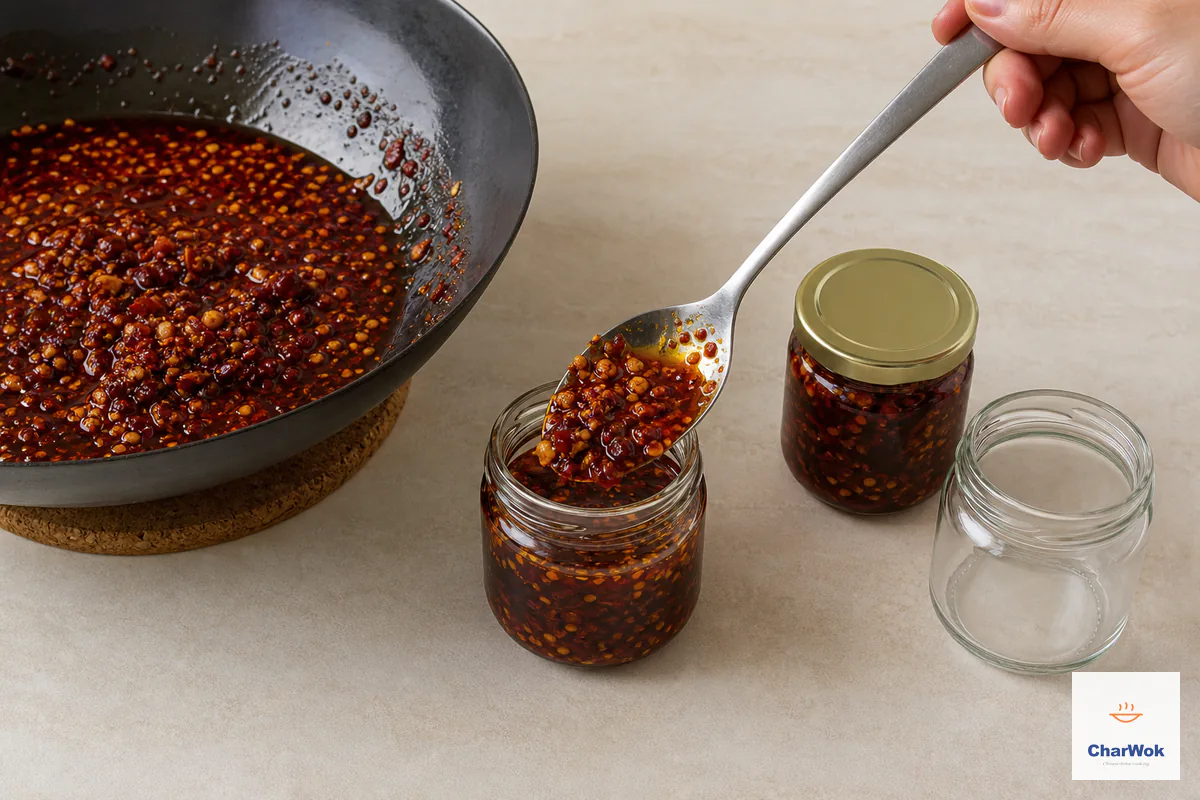
Let the chili oil cool completely before transferring it to clean, completely dry jars for storage.
When things go wrong
Most flavor problems are easiest to prevent before the condiment goes into its containers. Spoilage is different: do not taste or try to rescue a suspect batch.
- The garlic burned and tastes bitter. You ran the heat too high. There is no fix for burnt garlic once it is in the oil; strain everything out, discard the solids, and start the chili-garlic fry over in fresh oil, saving the onion-infused oil for cooking. Next time, lower and slower.
- The oil looks cloudy and the solids never separated. It likely needs more cooking for the intended texture. Put it back on low heat for another 5 to 10 minutes and watch for the split. Whether it splits or not, that appearance cannot establish shelf stability: cool and refrigerate the finished batch promptly.
- The whole batch went pale and most of the oil vanished. You cooked it too long, past the split and into a sort of confit where the solids drink the oil back up and the color bleaches out. Pull it sooner next time; the moment the oil splits clear is the moment to stop.
- It is unbearably hot. Your chilies were hotter than you thought, or you used too many bird's eye. Salvage it by stirring a spoonful into a bowl of plain oil to dilute, and lean on the mild fleshy chilies more heavily next batch. Toasted sesame oil and a little extra sugar also round the burn.
- It is too mild and tastes flat. You probably used all mild chilies. The fix is the dried flakes and a longer rest; chili oil deepens over its first day as the flakes rehydrate and release heat. Add more flakes to taste before jarring.
- White fuzz or any other mold appeared. Discard the entire container without tasting it. Mold can extend below the visible surface, so removing the top layer does not make the rest safe. Wash the container thoroughly before reusing it.
Safe storage
Refrigerate the condiment at 4°C/40°F or colder and use it within 4 days. Freeze small portions promptly if you need to keep it longer, then thaw a portion in the refrigerator rather than on the counter. Do not store it in a cupboard, even if the solids look dry or the oil has separated cleanly. Discard the whole container if you see mold, notice an off odor, or are unsure how long it has been warm.
Use a clean, dry spoon every time, and never return a spoon that touched raw meat or someone’s mouth to the container. Clean utensils reduce cross-contamination, but they do not extend the 4-day refrigerated limit.
How to use it (and what to put it on)
Always stir before scooping. The flavor lives in the solids at the bottom, and the oil on top is just the carrier. The best spoonfuls are a mix of both.
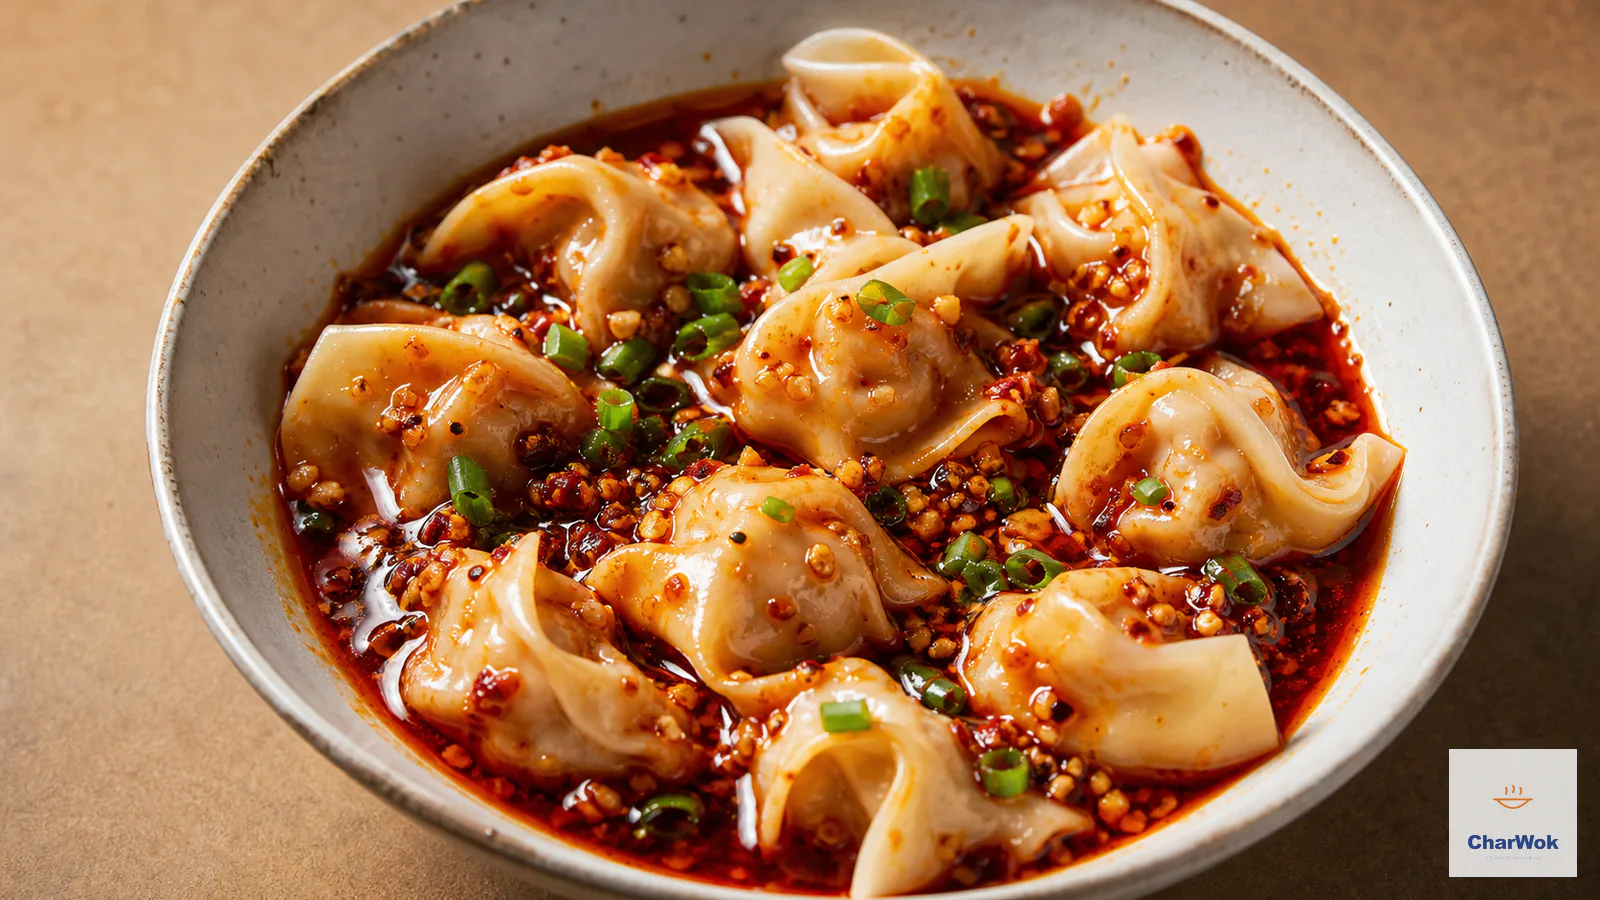
This is a finishing and dipping condiment, not a cooking oil. Add it at the end, or serve it on the side. Heat kills the fresh-chili fragrance that is the whole point of making it yourself. A few directions I lean on constantly: stirred into lo mein or beef chow fun right before eating; as a dip for any dumpling, alongside the classic dumpling dips; smeared on plain steamed buns or scallion pancakes; folded into the dressing for a cold plate like smashed cucumber salad or sliced cold scallion oil chicken. It is also the move that makes a plain bowl of chicken noodle soup feel like a restaurant meal.
For a quick weeknight dinner, a spoonful is the fastest way to add depth to a stir-fry sauce, the same supporting role that black bean sauce or a dollop of sesame paste plays in other dishes. And on the table at a hot pot or dumpling night, a small dish of this next to the pickled chili garlic sauce gives everyone a choice between bright and raw or deep and fried.
Variations worth trying
Once you have the base method, small tweaks take it in useful directions. Add a teaspoon of whole Sichuan peppercorns to the oil with the onion for a tingling, numbing edge. A star anise or a smashed piece of ginger in the onion-fry stage deepens the aroma. For a smoky version, char the chilies over a flame before mincing. For a chunkier, relish-style oil, hand-chop a quarter of the chilies more coarsely but fry them with the rest rather than adding raw pieces after cooking.
One honest limit: this oil does not work as a substitute where a recipe specifically calls for the pour-hot-over-dried-flake Sichuan oil. They behave differently, and the Teochew version is wetter, sweeter, and milder. Keep both on hand, with this fresh chili-garlic version in the refrigerator or freezer, and reach for each by what the dish asks for. If you are building out your shelf of Chinese condiments, this pairs well with the lineup in the essentials guide.
FAQ
Can I use dried chilies instead of fresh?
No, not as the main ingredient. This recipe is defined by fresh chili flesh frying in oil. Dried chilies go into the Sichuan pour-over style instead. You can add a little dried flake for color and extra heat, which the recipe does, but the body has to come from fresh.
How long does homemade Chiu Chow chili oil last?
Keep it at 4°C/40°F or colder and use it within 4 days. Freeze small portions promptly for longer storage. Cooking until the oil separates and using a clean spoon do not make a fresh garlic-in-oil mixture safe at room temperature.
My chili oil turned out too spicy. What can I do?
Dilute a serving in plain neutral oil, and add a little toasted sesame oil and extra sugar to soften the burn. For the next batch, cut the hot chilies back and lean on mild fleshy types like Fresno for body.
Do I have to use a food processor?
For a full batch, a processor is the practical choice. For a small jar, a mortar and pestle or a sharp knife gives you better control over texture and a chunkier result. Either way, aim for fine pieces, not a paste.
Why fry the chilies and garlic for so long?
The long cook concentrates flavor, softens the fresh ingredients, and lets the oil split cleanly from the solids. It improves texture, but it is not a validated preservation step; the finished condiment still needs prompt refrigeration and a short storage time.