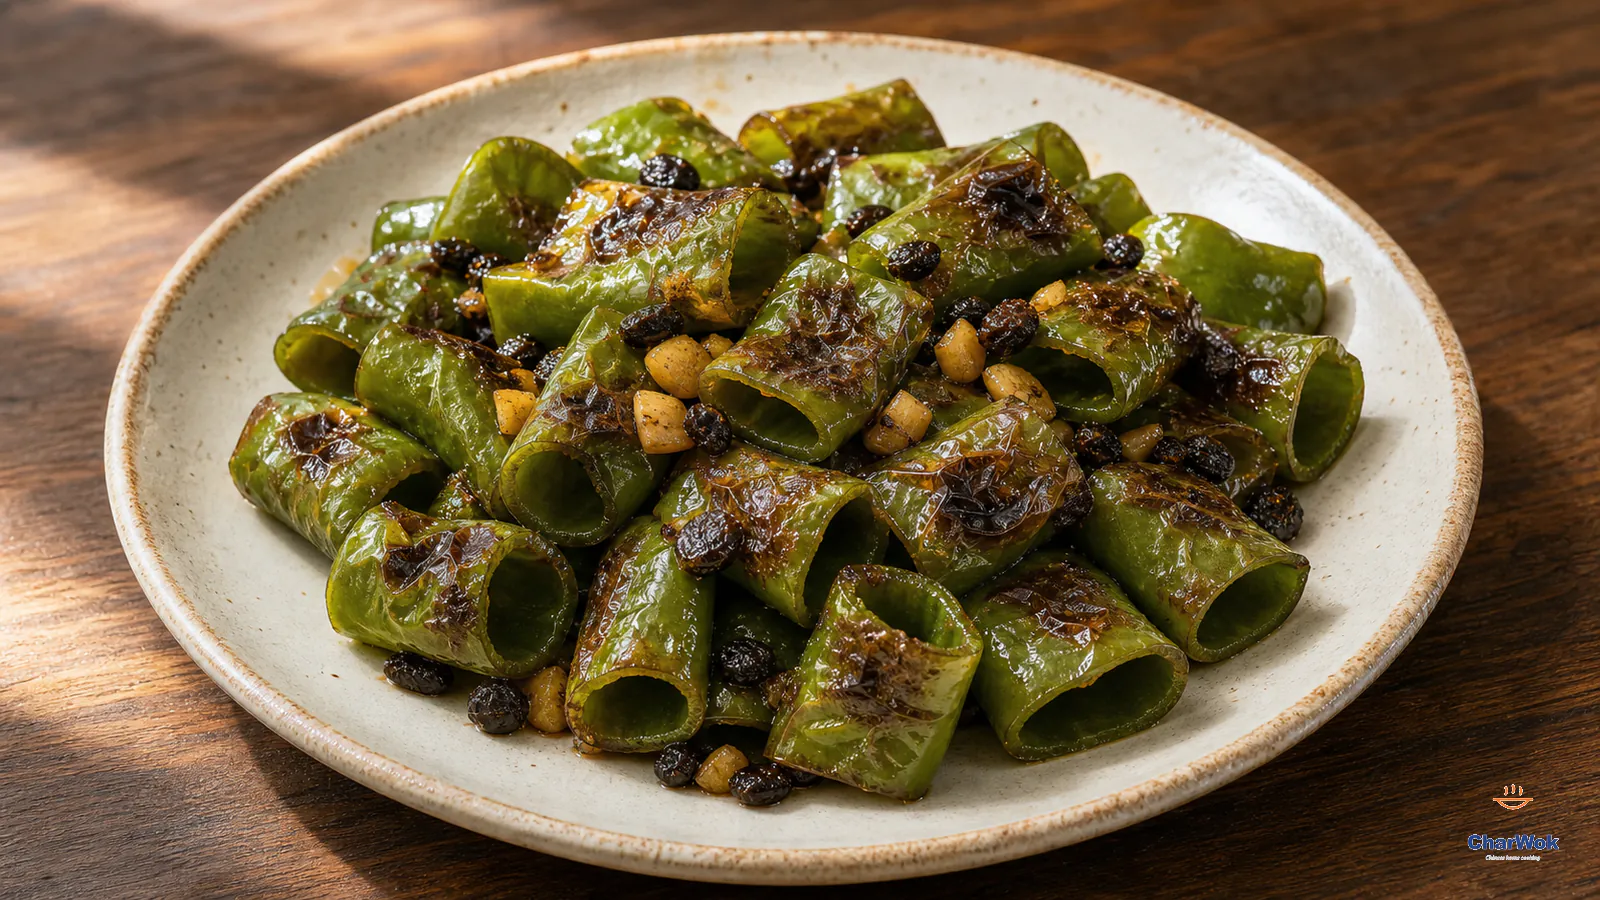
The first time I made tiger skin peppers, I burned half of them to a crisp and served the other half raw and rubbery. Same pan, same flame, two minutes apart. That gap is the whole dish. Hu Pi Qing Jiao (虎皮青椒) is a Sichuan home classic where the cook does almost nothing, and the few things you do must be done at the right moment. There is no sauce to hide behind, no batter, no long braise. Just a green chili blistered in a dry pan, then kissed with garlic, fermented black beans, soy, and a shot of dark vinegar. It tastes smoky, sweet-sour, and gently ferocious in about ten minutes.
At a glance: Dry-char the peppers first in a hot, unoiled pan until the skin blisters brown and the flesh wilts, then build the sauce. That order is the whole trick. Use about 300 g of mild green chilies for two people, medium heat throughout, and you will be eating in under 12 minutes.
What "tiger skin" actually means
The name is literal, not poetic. When a thin-skinned green chili hits a hot, dry surface, steam builds under the cuticle and the skin ruptures into irregular brown patches that mottle like a tiger's coat. That blistering is not just decoration. It is the same process that puts a crust on bread and a char on a good steak: the dry heat drives off surface moisture, browns the sugars and amino acids through Maillard reactions, and concentrates everything that is left behind. The chili collapses from a rigid wall into something soft, sweet, and faintly smoky, with the bitterness of the raw skin burned away.
This is squarely Sichuan home cooking, not banquet food. You will not find it on a dim sum cart. It belongs to the same family of cheap, fast, vegetable-forward stir-fries that fill out a weeknight table, the way dry-fried green beans or di san xian do. What ties them together is the discipline of cooking vegetables hard enough to transform them without turning them to mush.
Choosing the right chili
Here is where most home cooks, including me the first few times, get tripped up. The dish does not work with just any pepper. You want a long, slightly wrinkled, thin-fleshed green chili that is mildly spicy, the kind sold in US Asian markets as "long green chili," "Sivri," or sometimes Anaheim. Fresno and jalapeno are the wrong tools: too thick-walled, too wet, and they steam rather than char. Bell peppers are a nonstarter; they will never blister and they taste nothing like the dish.
Heat tolerance is your call, but I would lean mild. The point of tiger skin pepper is the char-and-vinegar interplay, not the burn. If the only chilies you can find are hotter than you want, scrape out every seed and the pale ribs, which is where most of the capsaicin lives. Red chilies char fine but lose the classic green-on-brown look, so I treat them as a swap rather than an equal.
The ingredient table
Ingredients at a glance
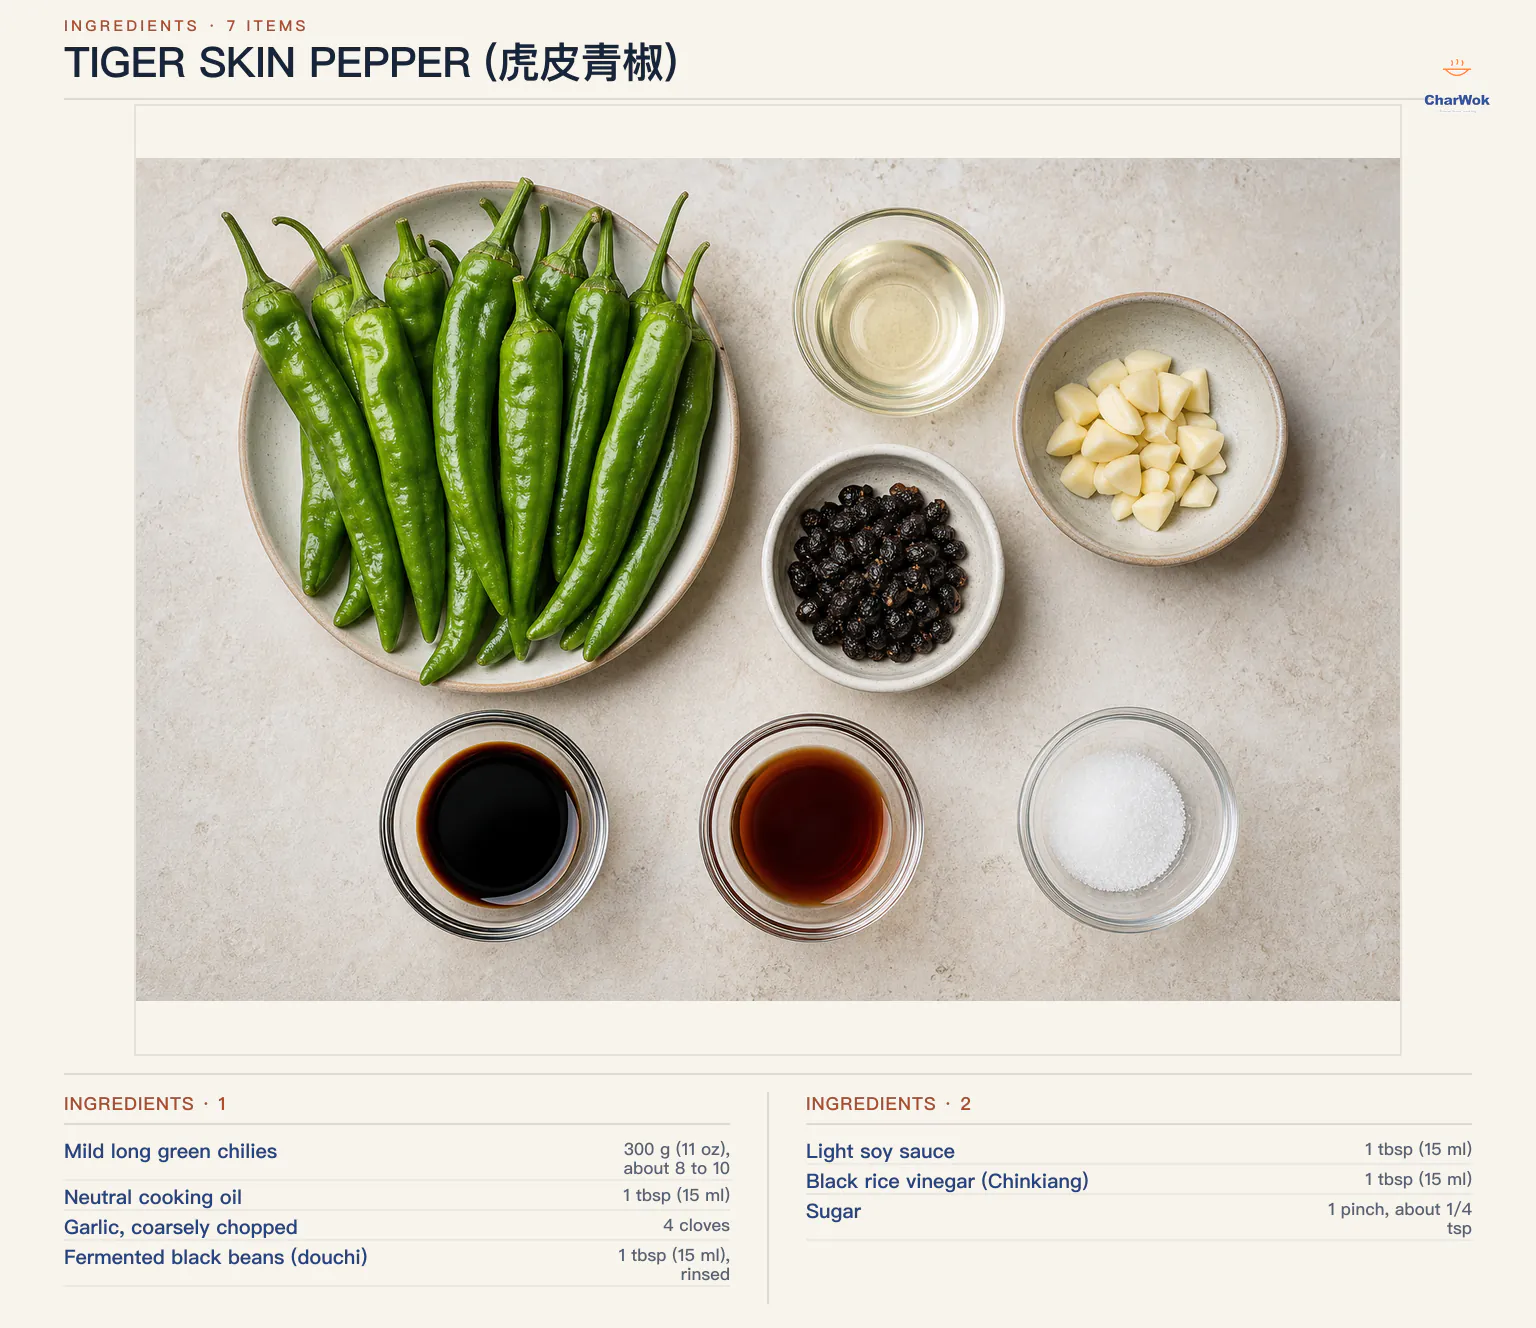
This is a five-item dish plus oil. The flavor comes from layering fermented, savory, and sour elements, so do not skip the black beans or the vinegar. They are not optional. See the notes for sensible swaps.
| Ingredient | Amount | Notes / substitute |
|---|---|---|
| Mild long green chilies | 300 g (11 oz), about 8 to 10 | Sivri, long green, or Anaheim. Avoid jalapeno and bell pepper. |
| Neutral cooking oil | 1 tbsp (15 ml) | Canola, peanut, grapeseed, or soybean. Nothing with a strong flavor. |
| Garlic, coarsely chopped | 4 cloves | Coarse, not minced. Mincing burns before the chilies are ready. |
| Fermented black beans (douchi) | 1 tbsp (15 ml), rinsed | Salted fermented soybeans. A staple of mapo tofu and twice-cooked pork. Found in any Chinese grocer. |
| Light soy sauce | 1 tbsp (15 ml) | Light, not dark. See the light-vs-dark soy guide if your shelf has both. |
| Black rice vinegar (Chinkiang) | 1 tbsp (15 ml) | The smoky-sweet acid the dish is built on. Black vinegar is correct, not white rice vinegar. |
| Sugar | 1 pinch, about 1/4 tsp | Just enough to round the vinegar. Leave it out only if you are certain. |
Equipment: why pan shape matters more than pan type
You need a wide, heavy pan with low sides, not a deep pot. A well-seasoned carbon-steel wok is ideal because the convex bottom concentrates heat and lets you press the chilies flat against it. A cast-iron skillet works nearly as well. Avoid nonstick: the coating will not let the skin blister properly, and the dry high heat is rough on it. Whatever you use, it must be large enough that the chilies lie in a single layer with gaps between them. Stack them and they steam.
The method, step by step
Read the whole sequence before you light the burner. This cooks fast, and the gap between perfect and ruined is about thirty seconds.
- Prep the chilies. Wash them, then dry thoroughly. Water on the surface will turn to steam and defeat the charring. Snip off the stem end and pull out the seed cluster; a small spoon does this cleanly. For long chilies, cut them in half crosswise so each piece lies flat. Leave small ones whole. Mix the soy sauce, vinegar, and sugar in a small bowl so it is ready to pour.
- Dry-char the chilies, no oil. Heat the empty pan over medium. When a corner of a chili sizzles faintly on contact, add all the chilies in one layer. Press each one flat with the back of a spatula and hold it there for 10 to 15 seconds. Move them around, press again. You are looking for the skin to mottle brown and blister, and the flesh to soften and collapse, about 4 to 6 minutes total. The make-or-break detail: if the pan smokes heavily, the heat is too high and the skin burns before the flesh wilts. Drop the flame. You want char, not carbon.
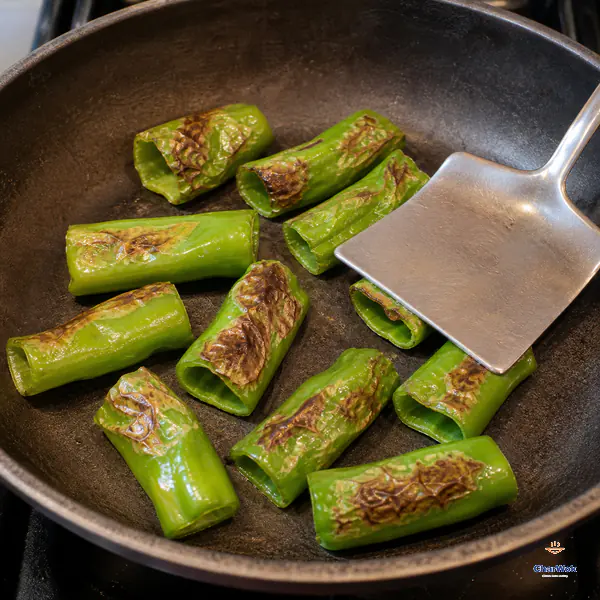
Set the dry peppers in one layer in an empty pan with no oil, press each one against the surface for 10 to 15 seconds and keep turning. Stop after roughly 4 to 6 minutes when the flesh has wilted and brown blisters appear, before the skin turns black or brittle.
- Set the chilies aside. Tip them onto a plate. Do not leave them in the pan.
- Bloom the aromatics. Off the heat or on low, add the oil, then the garlic and black beans. Return to medium-low. The garlic should sizzle gently and turn pale gold at the edges, about 20 to 30 seconds. Garlic goes from golden to bitter in five seconds, so watch it. If it is browning fast, lift the pan off the heat for a moment.
- Glaze the chilies. Return the chilies to the pan, pour the sauce over them, and toss for 15 to 20 seconds. The sugar will seize and the vinegar will hiss and reduce to a thin glaze that clings to the wrinkled skin. Plate immediately.
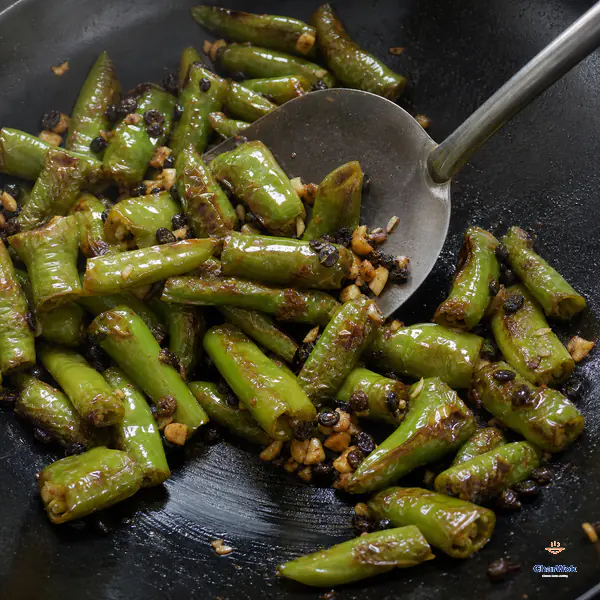
Return the blistered peppers after the garlic edges turn pale gold, add the soy-vinegar mixture and toss for only 15 to 20 seconds. Plate when a thin sheen clings to the wrinkles and almost no liquid remains on the pan bottom.
An air fryer will do a credible job on step 2 if you want to keep the kitchen cooler: 200°C (390°F) for about 7 minutes, checking once. The blisters come out even, but you lose the smoky wok flavor that the pan method gives the garlic in step 4.
When it goes wrong, and how to fix it
This is the section I wish someone had handed me the first time.
- The skin blackens but the flesh stays hard. Heat too high, pan too crowded, or both. The surface carbonizes before the inside cooks. Lower the flame, work in two batches, and press the chilies flat so the flesh actually contacts the hot metal.
- The chilies go soft and pale with no blisters. Either the pan was not hot enough when they went in, or there was water on the surface. Dry the chilies, preheat until a test edge hisses, and use a heavier pan.
- The garlic turns bitter. It browned past gold while you were chasing the chilies. Pull the pan off the heat the instant the edges color; carryover heat finishes the job. Coarse-chopped garlic gives you a longer window than minced.
- The dish tastes one-note salty. You used dark soy by mistake, or did not rinse the black beans. Both dump salt. Light soy, rinsed beans, and that pinch of sugar are what keep the seasoning in balance.
- The vinegar disappears. You added it too early and it flashed off. Pour the sauce in only when the chilies are back in the pan, and do not cook it more than 20 seconds.
Variations and pairings
The bare-bones version above is what I cook most nights, but the format bends easily. For a more aggressive plate, finish with a spoon of chili oil or a pinch of ground Sichuan pepper, which adds the numbing tingle the dish often carries in Chengdu. A teaspoon of doubanjiang fried with the garlic gives a deeper, redder bass note.
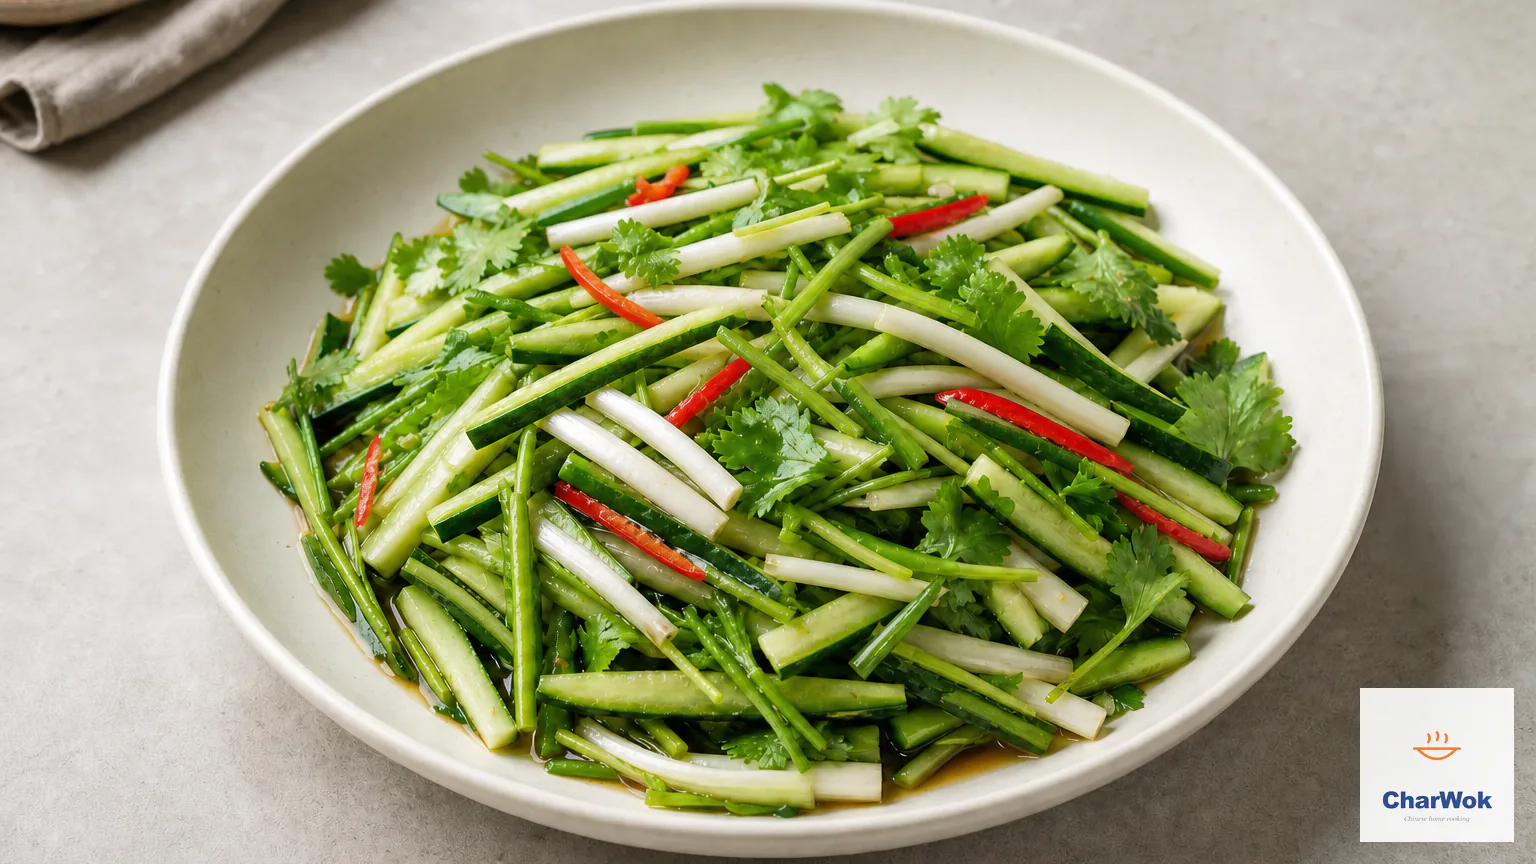
Tiger skin peppers are a side, and they want company. Pile them next to a bowl of steamed jasmine rice with one cool dish and one or two heartier plates. A cold smashed cucumber salad and a quick egg drop soup balance the heat, while eggplant with garlic sauce or a stir-fry like pepper steak round out the meal with another savory anchor.
Cold leftovers are better than they have any right to be. The vinegar and garlic keep developing, and the chilies lose their bite overnight. I eat them straight from the container, or chop them into scrambled eggs the next morning.
Storage and reheating
Keep leftovers covered in the fridge for up to three days. Reheat gently in a dry pan over low heat just until warm; high heat will turn the chilies to mush and kill the vinegar. They are also good cold, which is how I usually eat them. This dish does not freeze well.
Frequently asked questions
Can I make it less spicy?
Yes. Choose mild long chilies and strip out every seed and white rib. The ribs hold most of the heat, so removing them tames the dish more than switching pepper varieties does.
Why dry-char before adding oil?
Oil in the pan insulates the skin and turns the dry char into a shallow fry, so the chilies soften without blistering. Dry heat is what creates the tiger-skin mottling and the smoky depth.
Is there a substitute for black vinegar?
Balsamic mixed with a splash of rice vinegar is the closest stand-in, though it is sweeter and less malty. Plain white or apple cider vinegar will work but taste noticeably different; add a tiny extra pinch of sugar.
Can I skip the fermented black beans?
You can, but the dish loses its savory backbone. If you do, add an extra splash of soy sauce and a little minced fermented tofu or a half teaspoon of miso to replace the umami.