Peking duck is the one Chinese dish where the skin matters more than the meat. Bite a proper slice and you get a glassy, mahogany shell that shatters into warm fat, then a thin layer of tender flesh underneath. Get the skin wrong and you have a roasted duck, which is fine, but it is not Peking duck. The reason most home versions disappoint is not the recipe. It is the drying.
I learned this the hard way. My first attempt came out of the oven looking beautiful and tasting like a rubber glove. I had skipped the overnight rest because the duck "looked dry enough." It was not. The skin needs a full day, uncovered, in cold moving air to give up its water; without that, the surface steams in the oven instead of crisping, and you end up chewing leather. So before we touch a single ingredient, fix this idea in your head: this is a two-day project built around removing moisture from one piece of poultry.
At a glance: count on a 2.5 kg (5.5 lb) duck, one overnight uncovered rest in the fridge (24 to 48 hours), and about 75 minutes of roasting. The skin is the dish. A maltose-vinegar glaze plus the long, dry cold rest is what turns a plain roast duck into Peking duck. Skip the rest and you have a nice duck, not a crisp one.
What you are actually trying to do
Two things have to happen before the duck ever meets heat. First, the skin has to separate from the fat and meat beneath it, so the fat can render out instead of staying trapped. Second, the surface water has to leave, because water boils at 100°C/212°F and fat crisps far above that. As long as there is moisture on the skin, the oven's energy goes into evaporating water rather than browning and puffing the skin. Pouring boiling water over the bird tightens and slightly pulls the skin away from the fat layer (a gentle shrink), and the maltose glaze lays down a thin sugar film that browns fast and gives the classic lacquered look. The acid in the vinegar helps that film set. Then the fridge does the rest of the work for you, slowly.
None of this requires a hanging oven, an air pump, or a butcher's license. The restaurant method of blowing air under the skin does produce a more even puff, and if you have a compressor and the patience you can try it. For a home cook it is optional. The rest of the technique transfers cleanly to a normal oven.
Ingredients
16 ingredients for home-style Peking duck
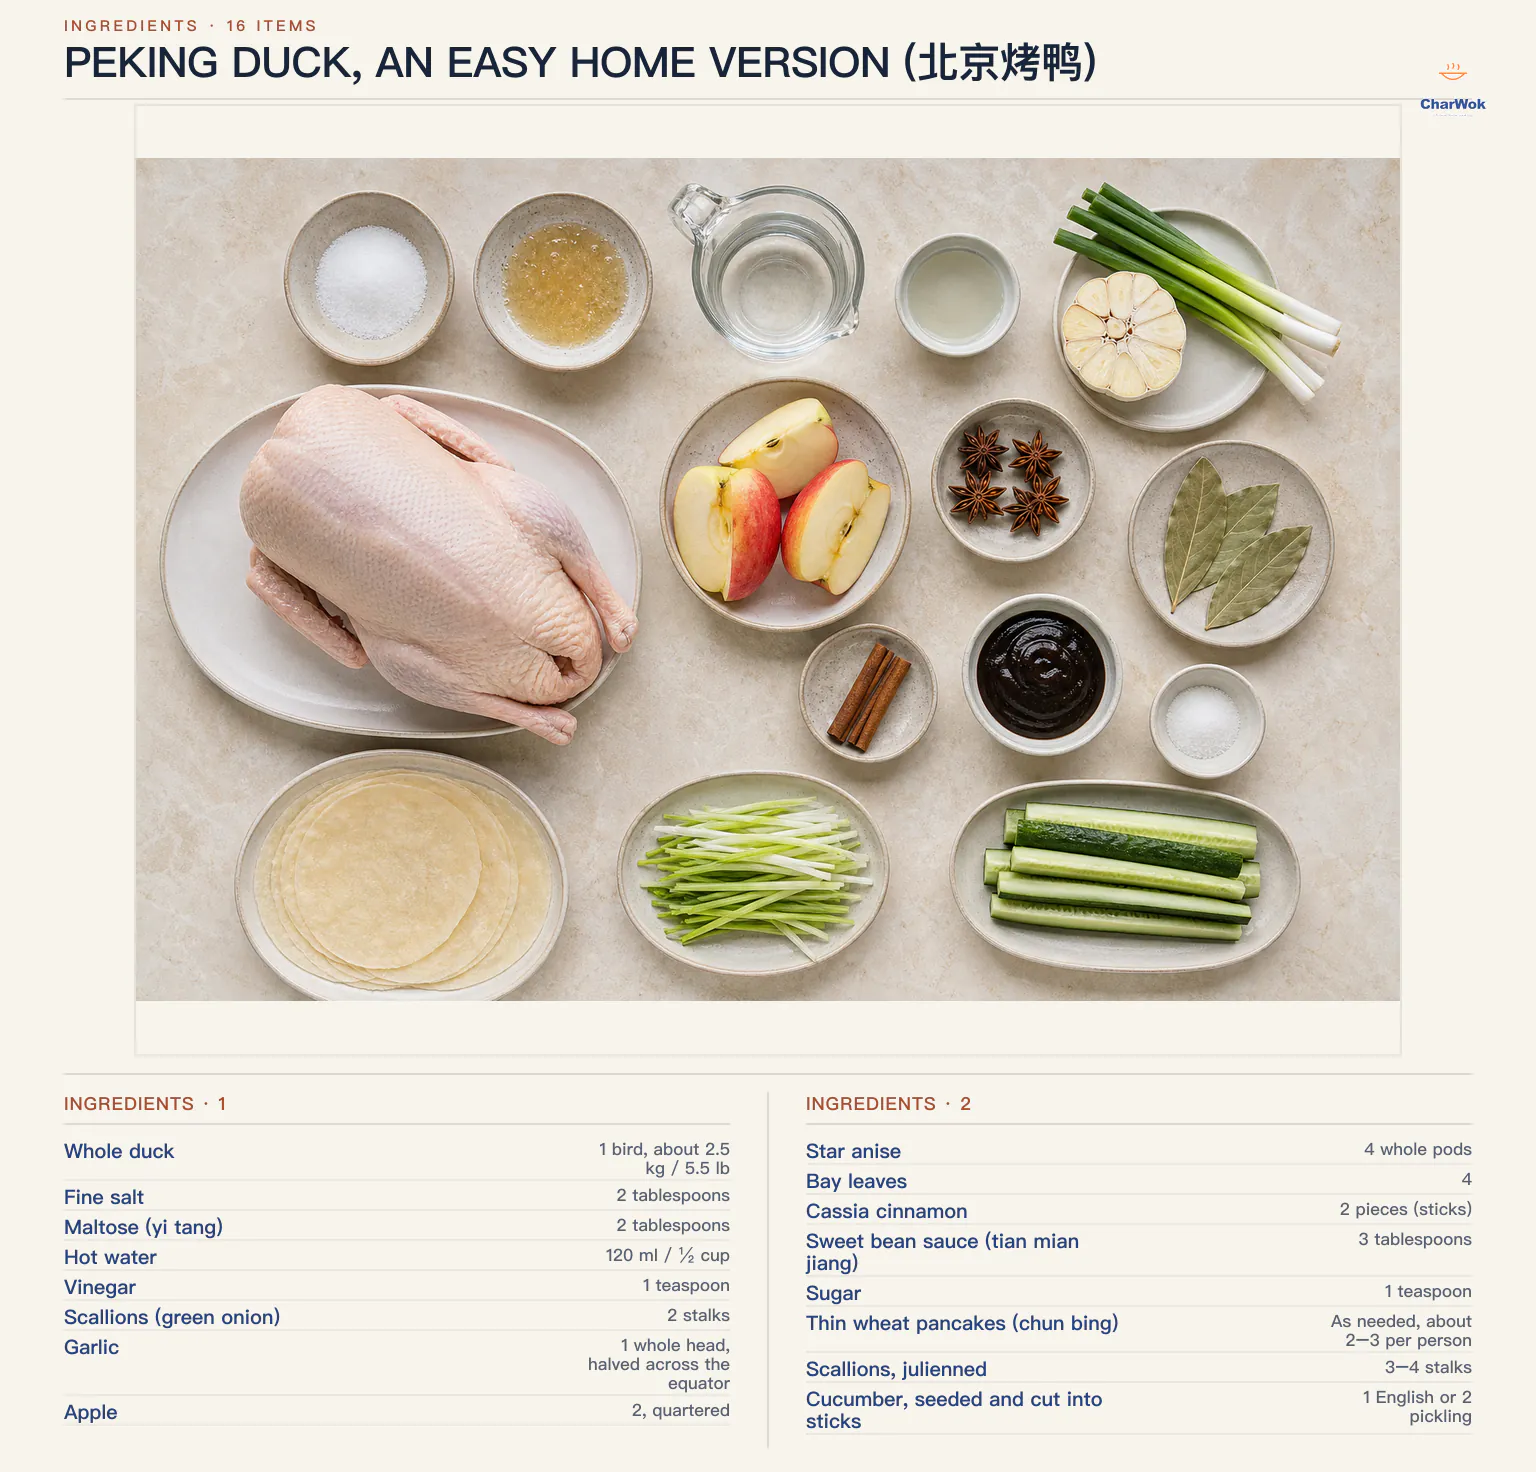
| Ingredient | Amount | Notes / substitute |
|---|---|---|
| Whole duck | 1 bird, about 2.5 kg / 5.5 lb | Not a duckling; you want a full-size bird for the meat-to-skin ratio. Gressingham or Long Island work well. |
| Fine salt | 2 tablespoons | Kosher salt is fine. Half goes inside, half over the skin. |
| Maltose (yi tang) | 2 tablespoons | This is the authentic glaze and gives the deep brown color. Substitute honey or light corn syrup, but the color will be paler and the flavor sweeter. |
| Hot water | 120 ml / ½ cup | Boiling, to dissolve the maltose. |
| Vinegar | 1 teaspoon | Rice vinegar or white vinegar. Do not use balsamic; the color will muddy. |
| Scallions (green onion) | 2 stalks | For the cavity and for serving. |
| Garlic | 1 whole head, halved across the equator | Aromatics inside the bird flavor the meat, not the skin. |
| Apple | 2, quartered | Releases moisture and a little fruit acid that keeps the breast tender. Pear works too. |
| Star anise | 4 whole pods | |
| Bay leaves | 4 | |
| Cassia cinnamon | 2 pieces (sticks) | Regular cinnamon is an acceptable swap; cassia is more pungent. |
| Sweet bean sauce (tian mian jiang) | 3 tablespoons | The classic dipping sauce base. Hoisin is the common supermarket stand-in and is fine, just sweeter. |
| Sugar | 1 teaspoon | To round out the sauce. |
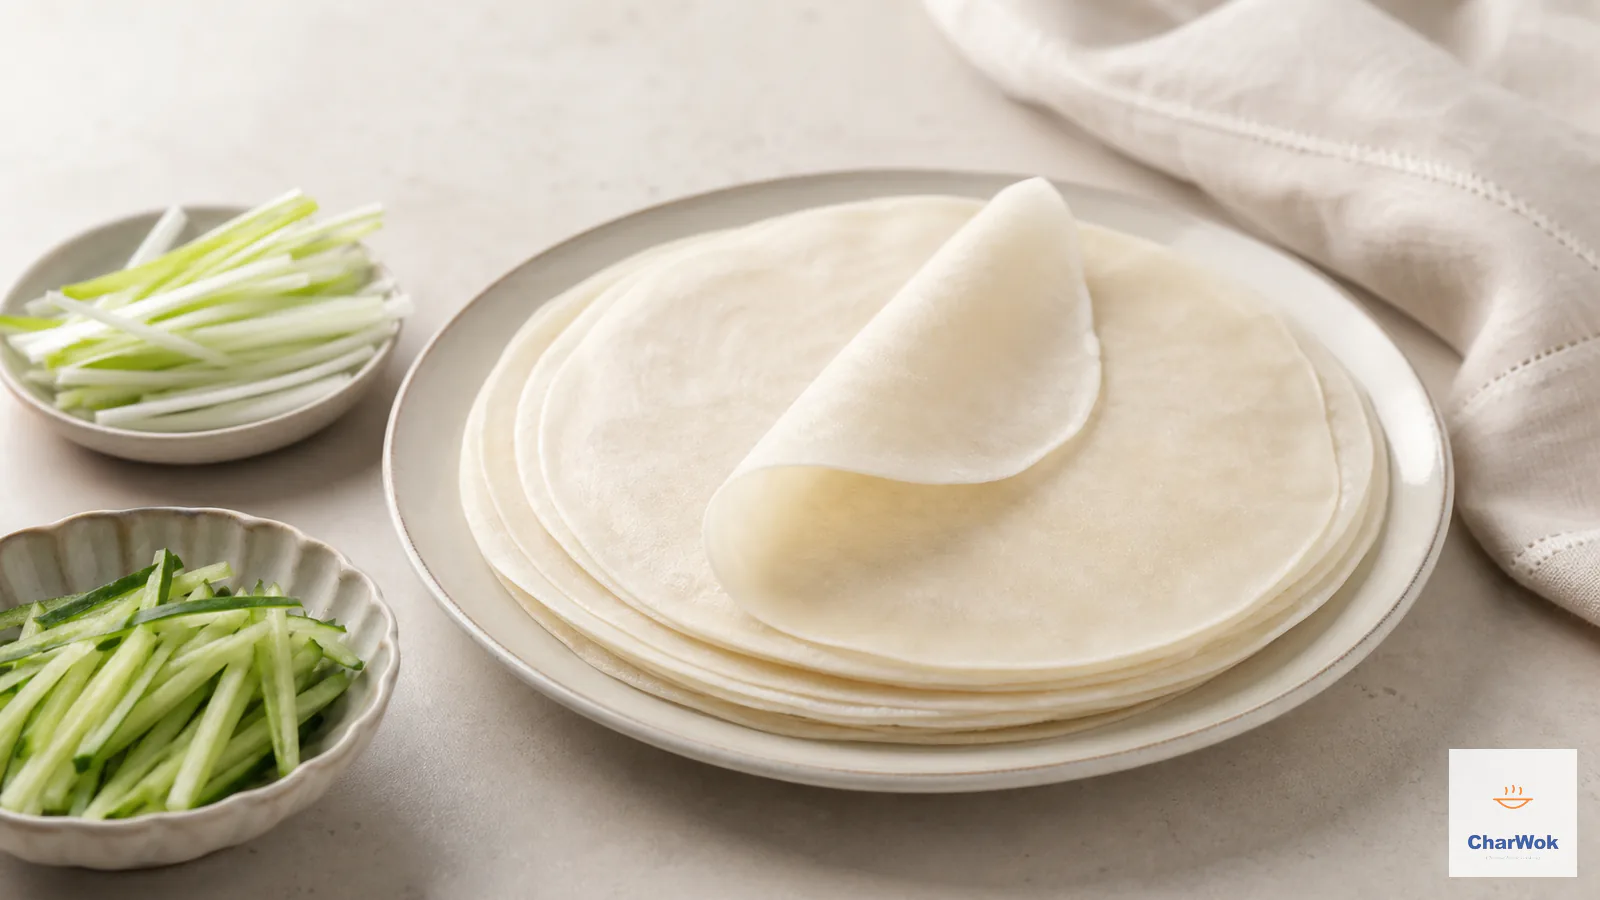
| Thin wheat pancakes (chun bing) | As needed, about 2–3 per person | Homemade Peking duck pancakes are better than store-bought; see the pairing notes below. |
| Scallions, julienned | 3–4 stalks | For wrapping. |
| Cucumber, seeded and cut into sticks | 1 English or 2 pickling | Cooling crunch against the fat. |
The method, with the reasoning behind each step
Start the day before you want to eat. If you try to compress the schedule you will get a decent duck and a disappointing skin, and you will blame the recipe. It is the schedule, not the recipe.
- Dry and salt the bird (day 1, takes 10 minutes). Unwrap the duck, pull out any giblets, and pat it very dry inside and out with paper towels. Rub half the salt into the cavity and the rest evenly over the skin. Set the duck on a wire rack over a tray and leave it on the counter for an hour. This first rest lets the salt start drawing moisture out and takes the chill off the bird so the next step is not a shock. Tweezers out any feather quills you can see now; they will only be more visible after roasting.
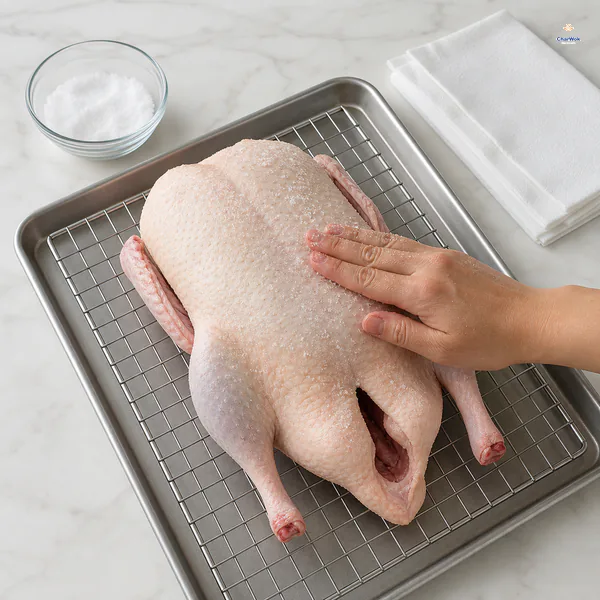
Pat the duck dry inside and out, rub half the salt into the cavity and the rest over the skin, then leave it on the rack for 1 hour.
- Pour boiling water over the skin. Bring about 1.5 liters (6 cups) of water to a full boil and pour it slowly over the entire bird, flipping it to get the underside. Do this in the sink or over a deep tray. You will see the skin tighten and shrink slightly, pulling away from the fat. This is the step that does what an air pump does in a restaurant: it sets the skin up so the fat can render rather than sit. Skip it and the skin stays glued to the meat.
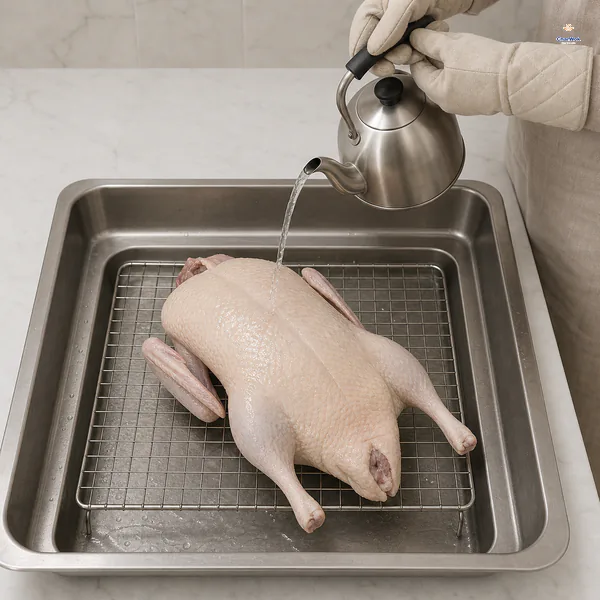
Pour about 1.5 litres of boiling water slowly over the entire bird, flipping it to reach the underside; the skin should tighten and shrink slightly.
- Glaze with maltose. Stir the maltose into the hot water until fully dissolved, then add the vinegar. Brush one even coat over the whole bird, then put it on its rack and into the fridge for an hour. Brush a second coat. Two thin coats give a more even film than one thick one, which would pool and run.
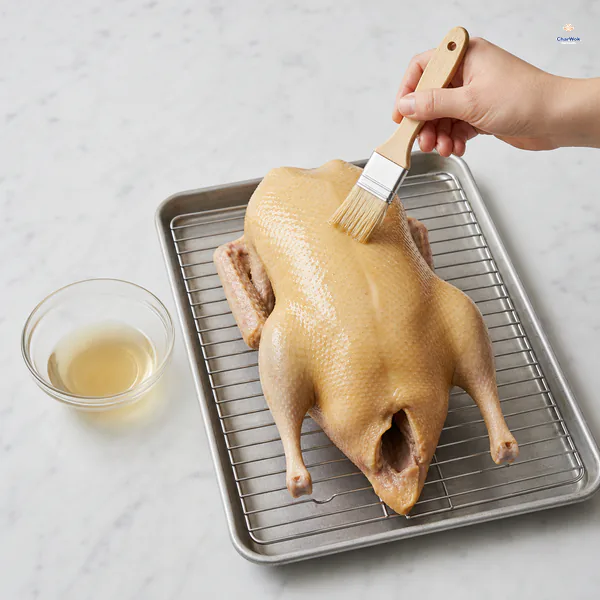
Dissolve the maltose in hot water, stir in the vinegar and brush on one thin even coat; chill for 1 hour, then repeat with a second thin coat.
- Dry, uncovered, in the fridge for 24 to 48 hours. This is the non-negotiable step. Leave the duck on the rack over a tray, completely uncovered, in the coldest part of the fridge. After a day the skin will feel dry and papery, like parchment, and look slightly translucent. Two days is better than one if you have the space. A small fan set to blow gently across the bird (not directly on it) speeds this up noticeably.
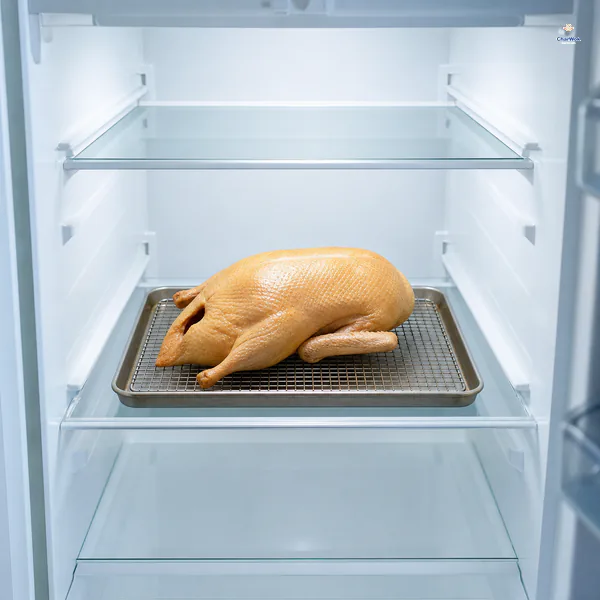
Refrigerate the duck completely uncovered on its rack for 24 to 48 hours, until the skin feels dry, taut and papery.
- Stuff the cavity and temper the bird (day 2 or 3). An hour before roasting, take the duck out to lose its chill. Tuck the scallions, garlic, apple, star anise, bay leaves, and cassia into the cavity. The fruit does real work here: as it heats it releases steam that keeps the breast from drying, and the mild acid keeps the meat tender. Skewer or toothpick the cavity openings shut so the aromatics do not fall out and the steam stays mostly inside.
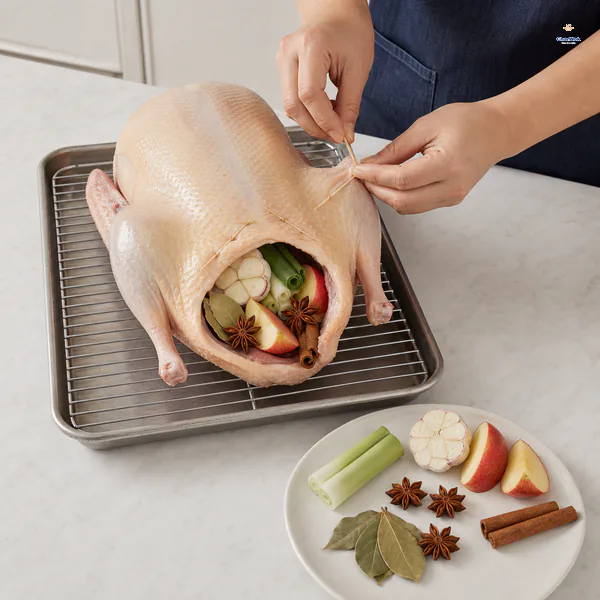
Temper the duck for 1 hour, fill the cavity with the listed aromatics and fruit, then secure the opening with skewers or toothpicks.
- Roast hot first, then low. Heat a fan-assisted (convection) oven to 200°C/390°F, or 220°C/425°F for a conventional oven. Put the duck breast-up directly on the middle rack and slide a roasting tray on the rack below to catch the fat. Roast 15 minutes at the high heat. This initial blast sets the glaze and starts the Maillard browning on the skin. Then drop the temperature to 180°C/350°F fan (200°C/390°F conventional), tent the wing tips and the ends of the drumsticks with foil so they do not burn, and continue for about 60 minutes. The foil matters: those thin parts char long before the thigh is done.
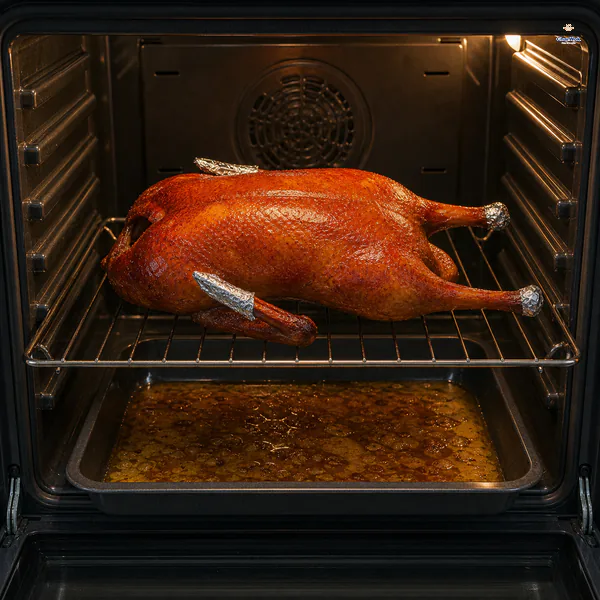
After 15 minutes at the initial high heat, lower the oven to 180°C fan or 200°C conventional, protect the thin tips with foil and roast for about 60 minutes.
- Check temperature, not color alone. Push an instant-read thermometer into the thickest part of the thigh, near the joint with the breast, avoiding bone. You want at least 74°C/165°F. Color can lie to you: a deeply browned skin can still hide undercooked meat at the joint, and a pale-ish skin can be perfectly done underneath if your oven runs cool. Trust the probe.
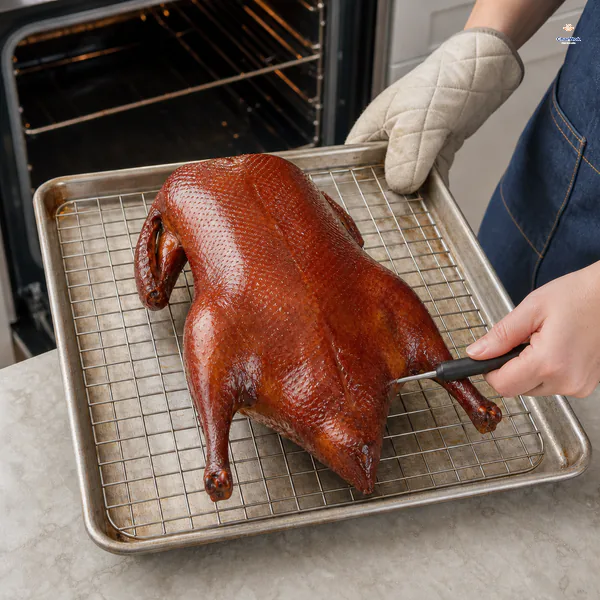
Check the thickest part of the thigh beside the breast joint without touching bone; the center must reach at least 74°C or 165°F.
- Rest before carving. Pull the duck out and let it stand 15 minutes on the counter. Resting lets the muscle fibers relax and the juices redistribute, so the slices are juicy rather than weepy. Carving Peking duck well is its own small skill; aim for slices that carry a strip of skin with a thin layer of meat, not big chunks.
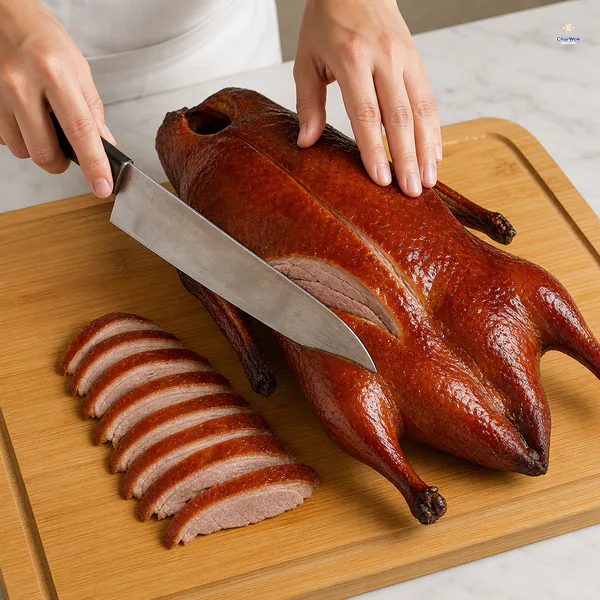
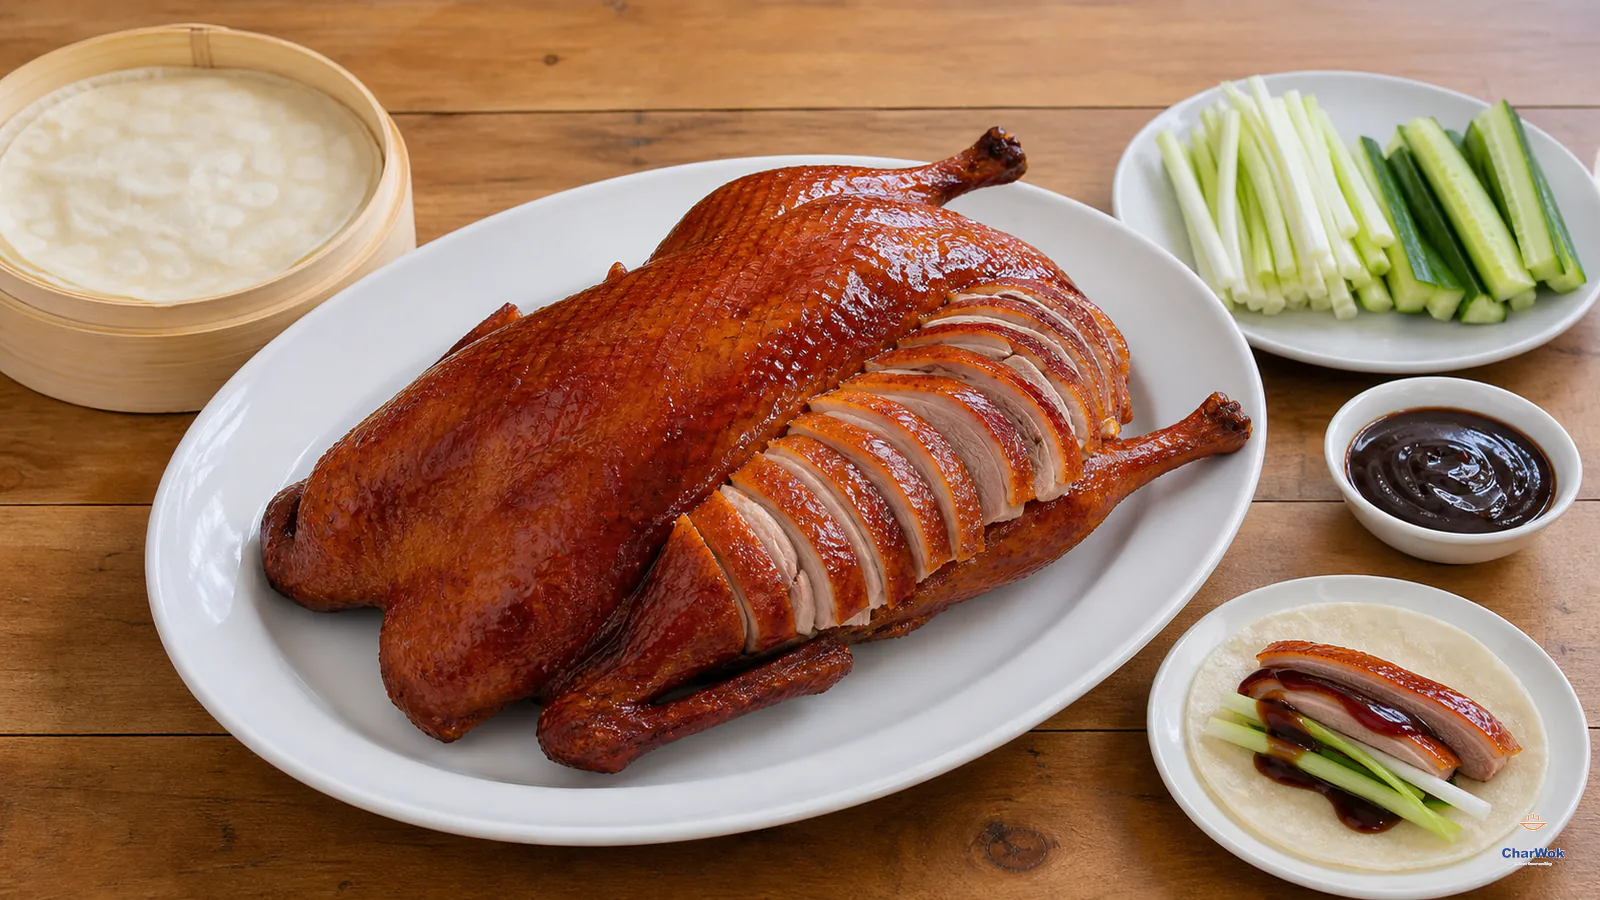
Rest the duck for 15 minutes before carving, then cut thin slices that each carry a strip of crisp skin with tender meat.
- Make the sauce while it rests. Spoon about ½ tablespoon of the collected duck fat into a small pan, add the sweet bean sauce and sugar, and warm gently over low heat until tiny bubbles appear. Whisk to emulsify the fat into the sauce. Decant to a small dish. If you are using hoisin instead of tian mian jiang, taste first and cut the added sugar to a pinch; hoisin is already sweet.
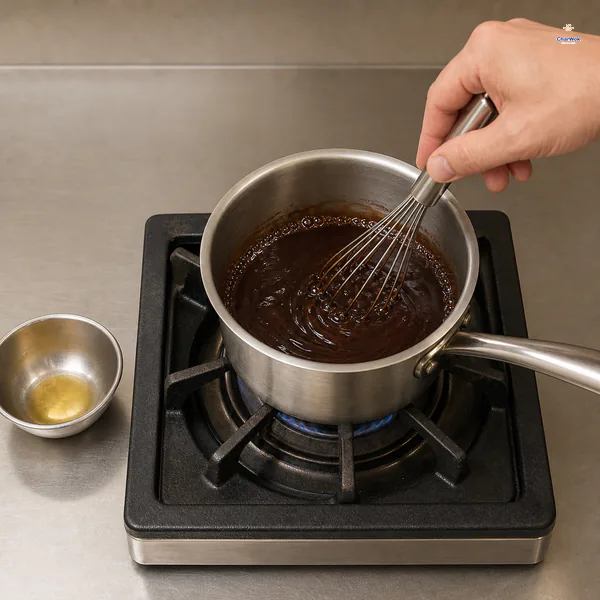
Warm the sweet bean sauce with the sugar and about half a tablespoon of duck fat over low heat until tiny bubbles appear, then whisk smooth.
- Warm the pancakes and build the wraps. Steam the pancakes for about 3 minutes if they are cold (a bamboo steamer is the easy tool for this). To eat, lay a pancake flat, swipe a little sauce across the middle, add two or three slices of duck, a few scallion batons, and cucumber sticks, then fold the near edge up and roll into a loose cylinder. Eat in one or two bites.
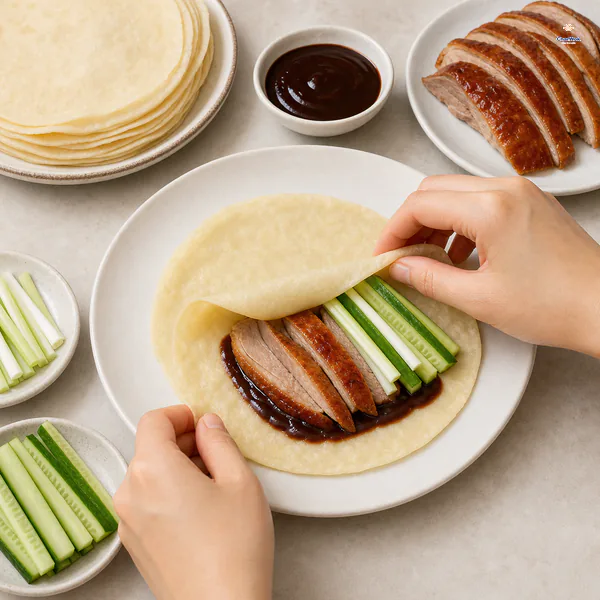
Warm the pancakes, swipe each with sauce, add two or three duck slices, scallion and cucumber, then fold and roll into a loose cylinder.
When the skin does not crisp: a troubleshooting section
This is where most home cooks lose the dish, and the fixes are concrete.
- Skin is leathery, not shattery. Almost always under-dried. The bird went into the oven with too much surface water. Next time, give it a full 24 hours uncovered, and add the gentle fan. You can also rescue a leathery bird at the table by flash-broiling the carved skin-side-up slices for 60 to 90 seconds, watching closely; the residual sugar in the glaze will blister and re-crisp.
- Skin burned in patches. The glaze pooled in low spots, or the oven has a hot spot. Two thin coats instead of one thick coat fixes the pooling; rotate the bird 180 degrees halfway through the low-heat phase to even out a hot oven.
- Wing tips or legs charred black. You forgot the foil tents, or applied them too late. Cover those thin parts from the start of the low-heat phase.
- Skin pale and blonde. Oven ran cool, or the bird was cold in the center when it went in. Always temper for an hour, and confirm the high-heat phase is genuinely hot with an oven thermometer if yours is suspect.
- Skin crisp but meat dry. You overcooked it past 74°C/165°F by a wide margin, or skipped the cavity stuffing. The apple and aromatics buy you a real margin of safety on the breast; use them.
- Lots of fat in the pan but skin still soft. The fat rendered (good) but the skin was not dry enough to crisp (bad). Rendering and crisping are different processes; fat leaving does not automatically make the skin shatter. The drying step is still the answer.
- Bird raw at the joint despite brown skin. The oven browned the outside faster than the inside cooked. Drop the temperature sooner, tent earlier, and always confirm with a thermometer in the thigh.
Variations, sauces, and what to serve alongside
The canonical wrap is duck, sweet bean sauce, scallion, and cucumber, and for a first attempt you should not mess with it. Once you have the technique, the format opens up.
For sauces, hoisin is the supermarket default and perfectly acceptable. Tian mian jiang warmed with a little duck fat is more authentic and less cloying. A spoonful of chili oil on the side lets heat-seekers calibrate their own wrap, and a dab of plain sesame paste thinned with warm water adds a nutty counterpoint that some Beijing-style tables prefer over the sweet sauce.
For the vegetables, julienned scallion and cucumber sticks are mandatory in my house, but shredded napa cabbage or a side of cold cucumber salad (or the quicker smashed cucumber) lightens a meal that is otherwise very rich. If you want to lean into scallion flavor across the table, the same allium powers a jar of scallion oil you can drizzle on the duck itself.
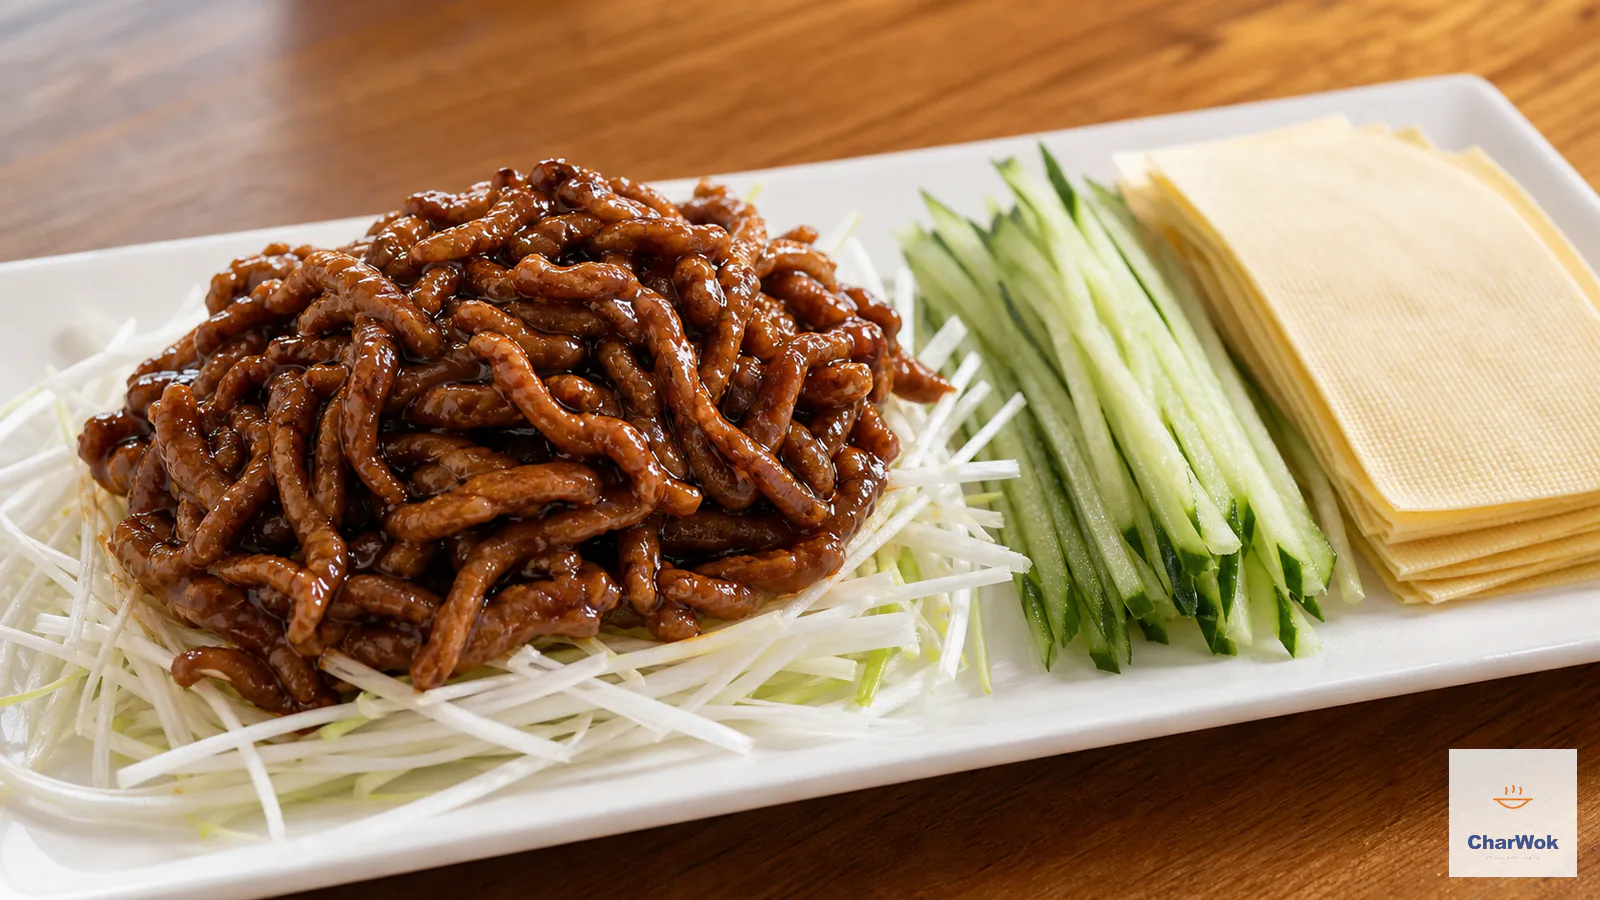
The wrap-and-roll format travels. Once you can build a duck pancake, the same motion serves moo shu pork, the sweet-bean-sauce classic Peking shredded pork, and even the lamb-filled baked bao buns. If you are staging a full Chinese roast spread, pair the duck with a batch of char siu so the oven does double duty.
Don't waste the carcass
After the table has picked the slices clean, the bones still carry flavor and a good amount of meat. Break the carcass up and simmer it for an hour or so to make a light stock, then use it for a clean soup with napa cabbage or winter melon, seasoned only with salt and white pepper. It is the traditional second course and the reason nothing of the bird is lost. You can also reduce the bones into a richer stock base for later, or drop the meatier bits into a bowl of winter melon soup. If you want a simpler close to the meal, a small cup of egg drop soup alongside the duck from the start gives the table something light to balance the richness.
Storage and reheating
Peking duck is a same-day dish. The crisp skin is a one-time event; once it sits, the moisture from the meat migrates into the skin and softens it. If you must store leftovers, keep the meat and skin separate from any sauce and refrigerate, uncovered, for up to two days. To reheat, lay the slices skin-up on a rack in a 200°C/390°F oven for 6 to 8 minutes, or hit them briefly under the broiler. The microwave will destroy the skin. Pancakes keep a few days in the fridge and re-steam perfectly; do not freeze them, the texture suffers.
Where this dish fits
Peking duck is Beijing table-center showpiece food, and it earns its place as the anchor of a bigger meal. For a multi-dish Chinese feast it is the obvious centerpiece, with two or three vegetable sides and a soup rounding things out. It also belongs firmly in the festive and holiday recipe category: the two-day timeline is easy to plan around a gathering, and the slicing-and-wrapping at the table is half the fun. Plan it for a crowd, not a Tuesday.
Frequently asked questions
Can I skip the overnight rest? No, not if you want crisp skin. The drying is the dish. A four-hour rest gives you a roast duck; 24 hours gives you Peking duck.
Is honey an okay substitute for maltose? Yes, with caveats. Honey browns faster and is sweeter, so the color skews darker and the glaze tastes less neutral. Brush a thinner coat and watch the oven closely.
Do I really need to stuff the cavity? The stuffing does not flavor the skin, but it keeps the breast moist and adds subtle aroma to the meat. Worth the two minutes.
Why pour boiling water over the bird? The hot water tightens the skin and pulls it slightly away from the fat layer, which helps the fat render out during roasting instead of staying trapped.
Can I use a smaller duck or duck legs only? A whole bird gives the best skin-to-meat ratio. Duck legs alone roast well but will not give you the long slices you wrap in pancakes.
What temperature signals doneness? 74°C/165°F measured in the thickest part of the thigh, away from bone. Rely on the thermometer, not the color of the skin.