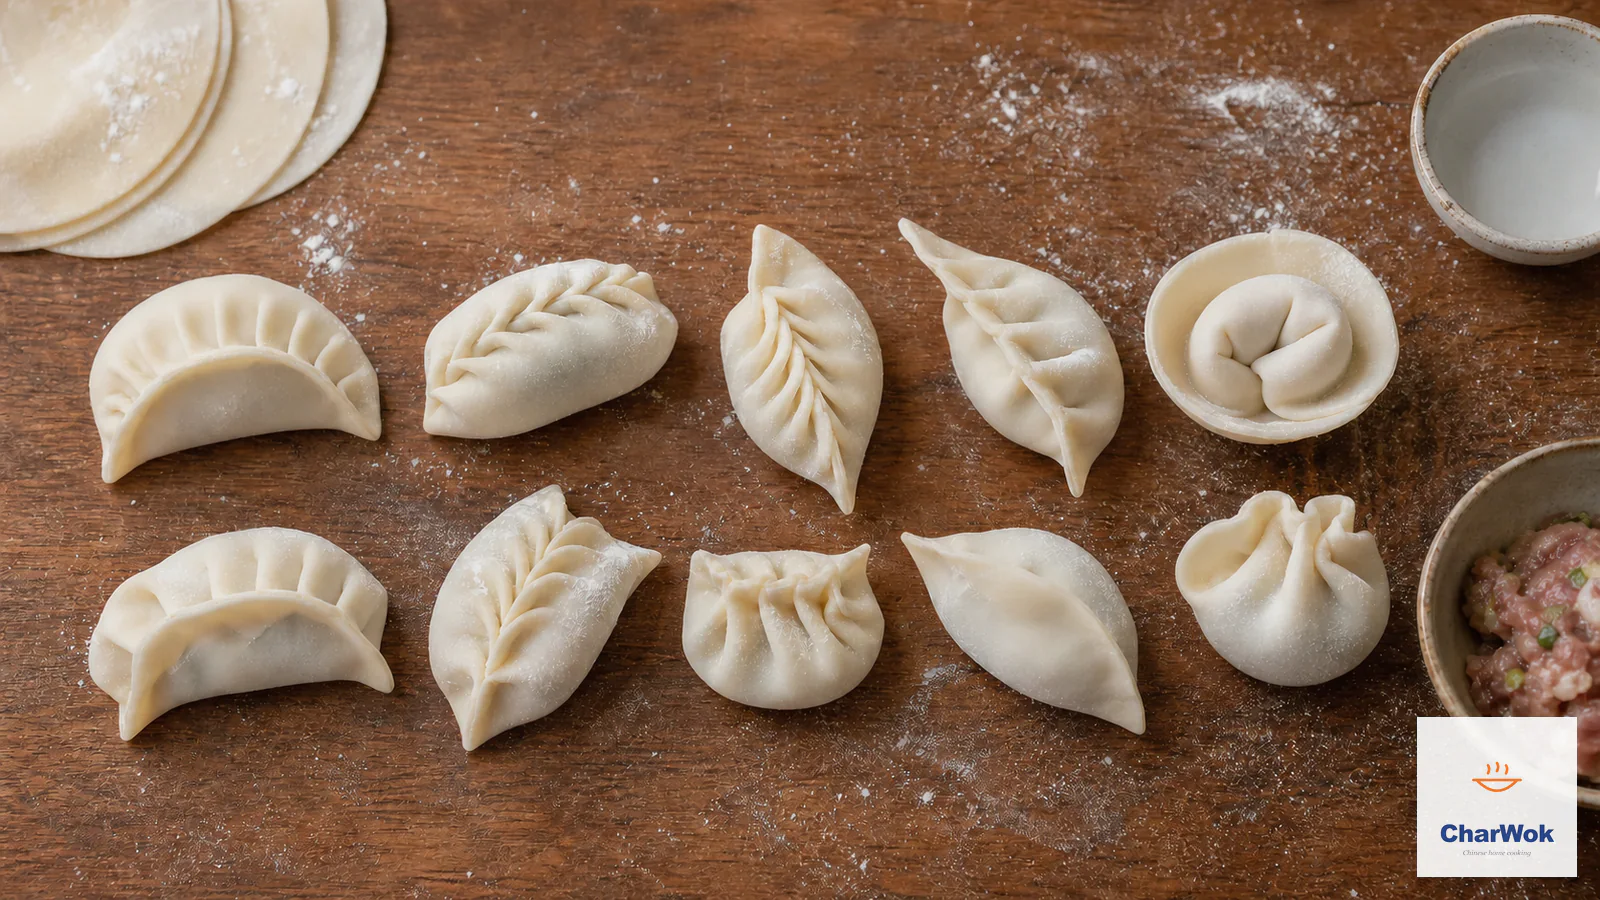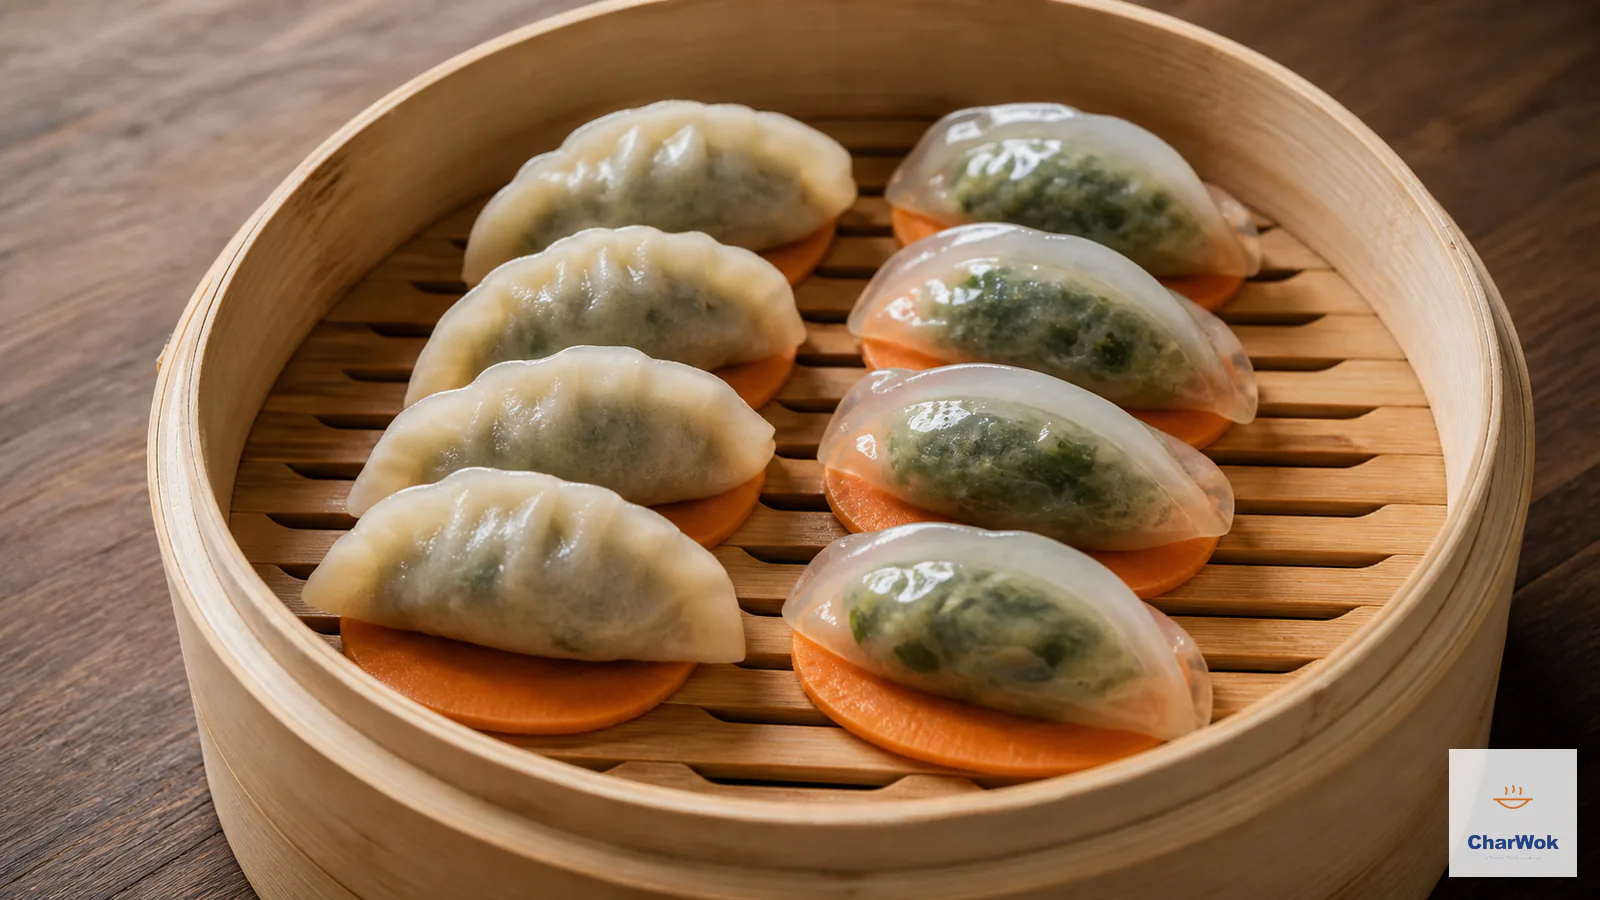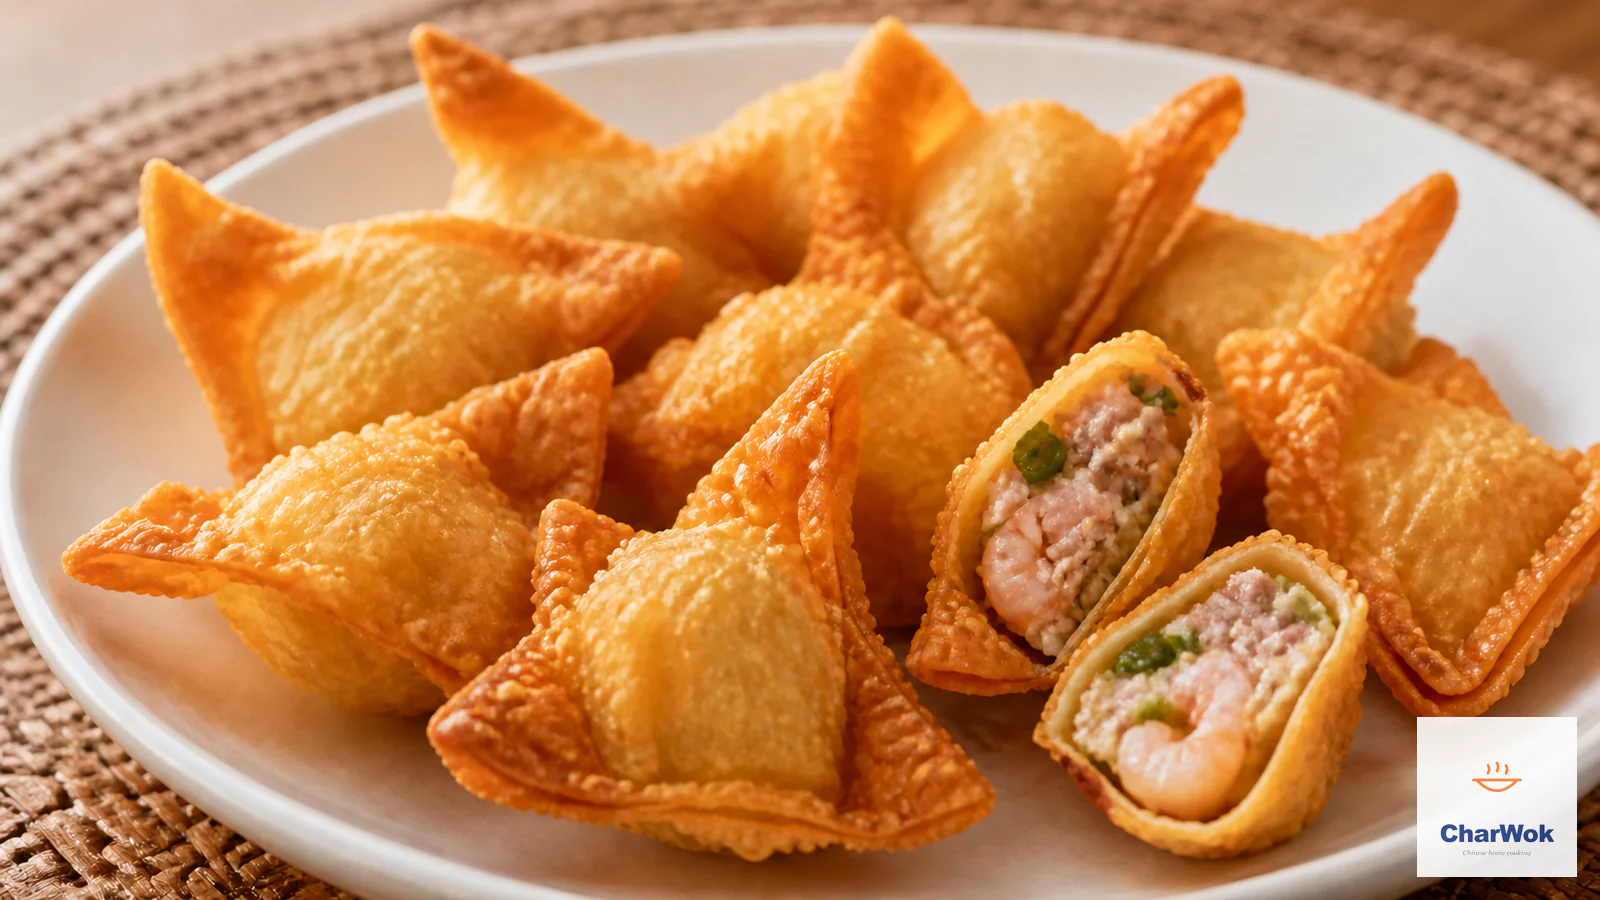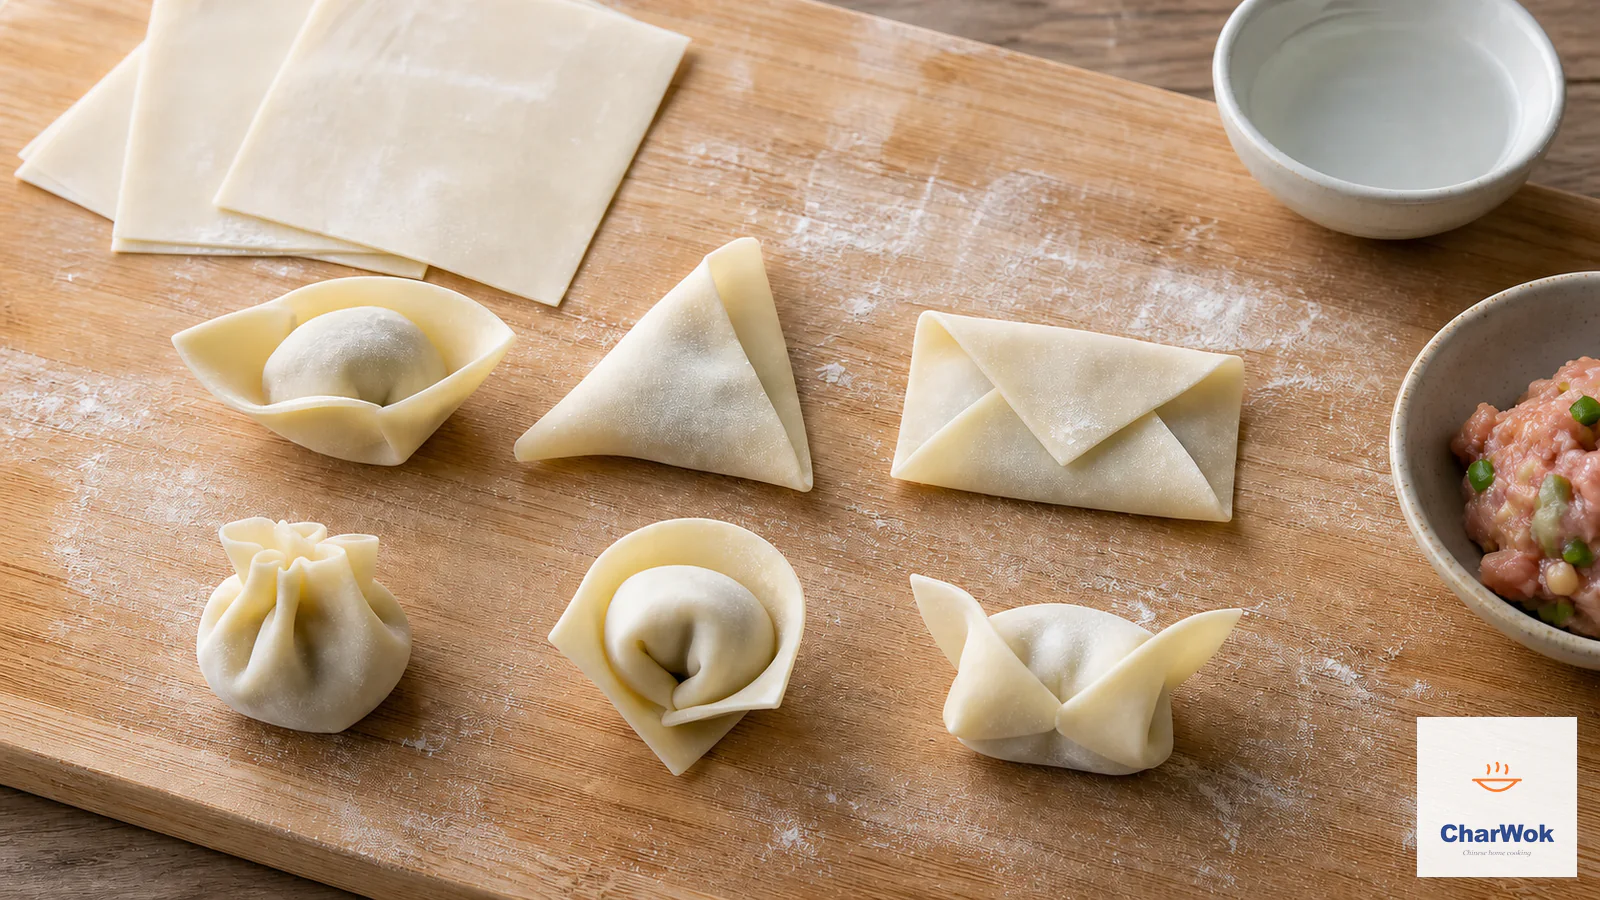
A wonton is mostly wrapper with a small dot of filling, so how you close that wrapper decides whether you end up with a neat little parcel or a sad flap of noodle floating loose in the bowl. I learned this the hard way the first time I tried to boil a batch I had "just pinched shut" with dry fingers: half of them opened in the water and turned the broth into a meaty cloud. The good news is that folding wontons is a thirty-second skill per shape, and once it clicks you can fold a whole tray while the kettle boils.
Unlike dumpling folds, which lean on a dough with enough gluten to stretch and pleat, wonton skins are thin and low-moisture by design. They are meant to cook down to something silky and almost translucent, not to hold elaborate crimps. That thinness is the whole point, and it is also the source of every failure mode below. Work with the skin, not against it.
At a glance: six folds, one rule. Keep the skins under a damp towel, wet only the seam you mean to seal, and use about 1 teaspoon (5 ml) of filling per wrapper. Aim for a tight seal with no trapped air, and choose the shape by how you plan to cook them.
What you are actually trying to achieve
Three things, in this order. Trap the filling. Push out the air. Close the seam so it holds through a rolling boil or a bath of hot oil. A fold that looks pretty but leaves a pocket of air between dough and filling will balloon in the pot and burst. A fold that is sealed dry will spring open the moment the starch gelatinizes and the skin relaxes. Every shape below is just a different route to those same three goals, tuned for a different cooking method or a different look on the plate.
You can build these on either wrappers you mix and roll yourself or a store-bought square pack. Homemade skins are softer and seal with barely a dab of water; commercial ones are drier and stiffer and need a slightly wetter edge. Neither is wrong. If you have never folded before, start with commercial squares in the 75 mm (3 inch) size, because their stiffness forgives clumsy fingers.
The starter kit
Ingredients at a glance
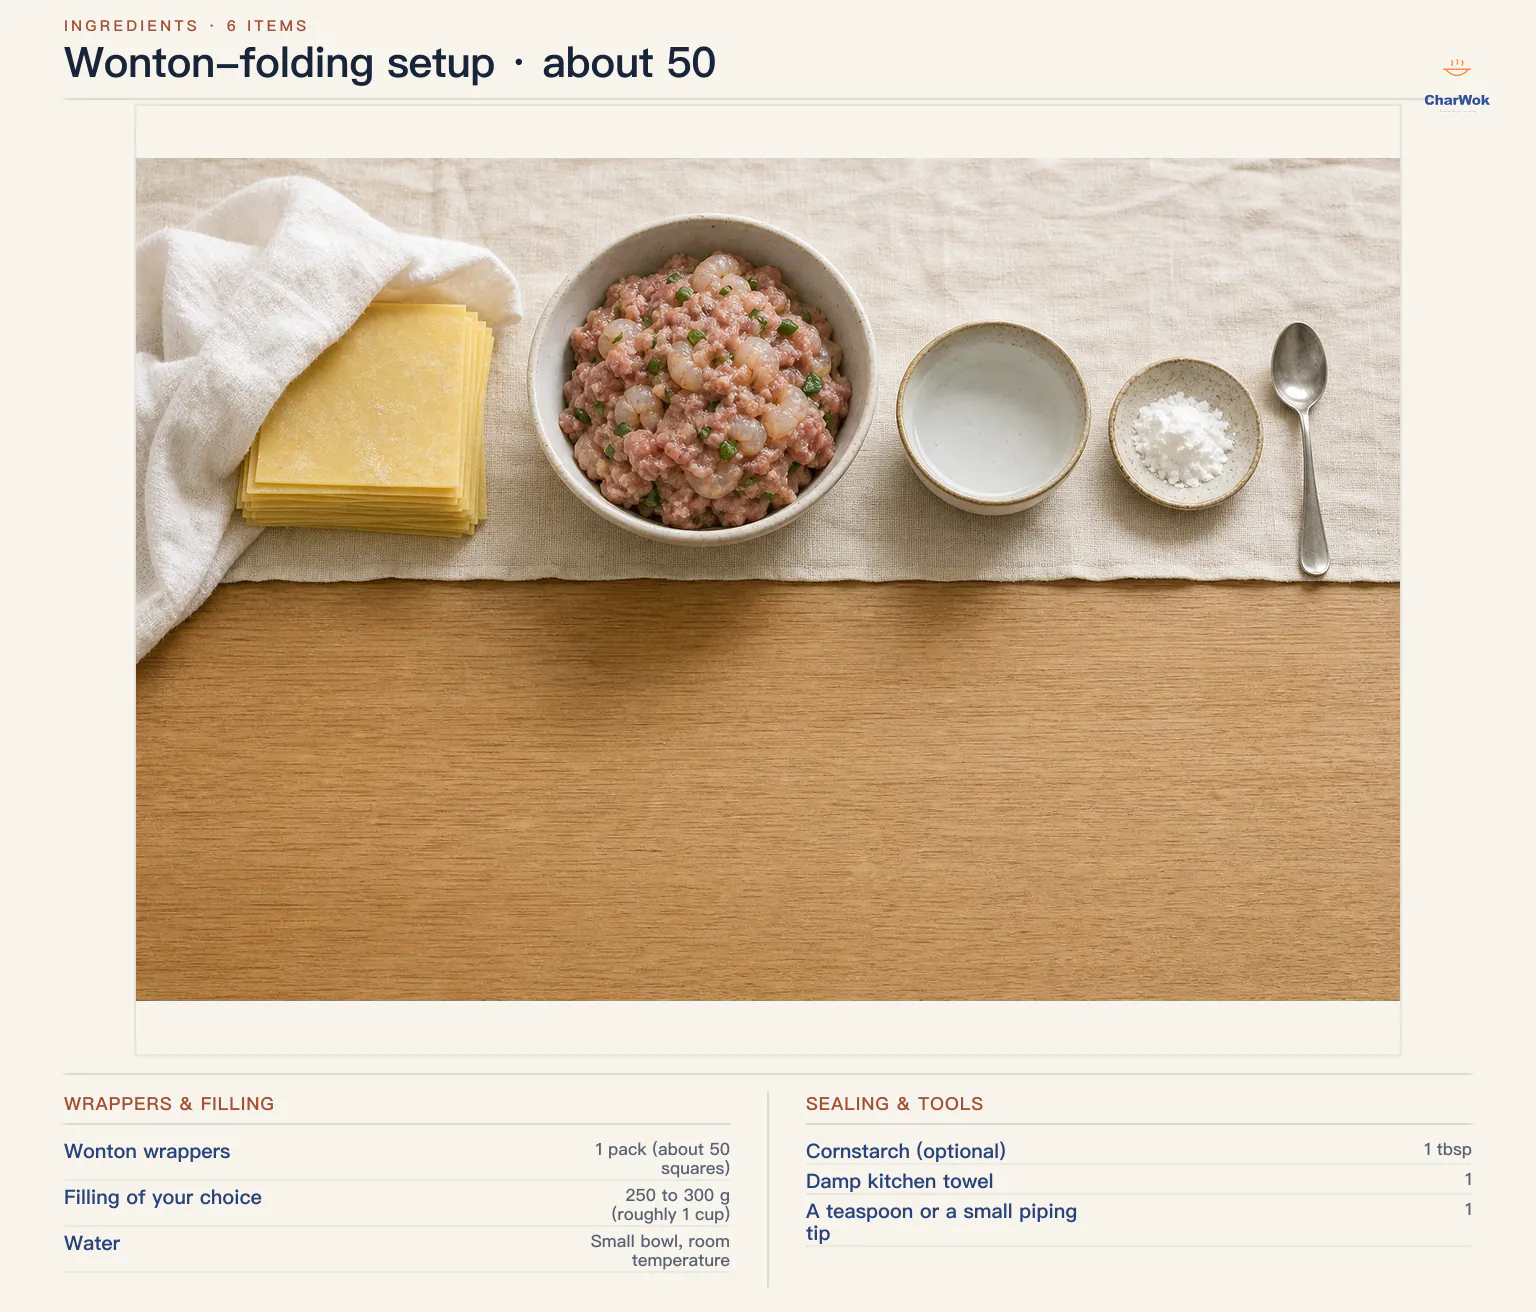
| Item | Amount | Notes / substitute |
|---|---|---|
| Wonton wrappers | 1 pack (about 50 squares) | HK-style yellow-egg squares are easiest for beginners; Shanghai white squares are softer. See the wrapper recipe to make your own. |
| Filling of your choice | 250 to 300 g (roughly 1 cup) | Enough for about 50 wontons at 1 tsp each. Pick from the filling guide or use a classic pork-and-shrimp wonton mix. |
| Water | Small bowl, room temperature | Your glue. Keep it clean; refill if it turns starchy and cloudy. |
| Cornstarch (optional) | 1 tbsp | Dust the tray so filled wontons do not stick and tear. |
| Damp kitchen towel | 1 | Lay it over the stack of unused wrappers and over the finished tray. Non-negotiable. |
| A teaspoon or a small piping tip | 1 | A regular teaspoon is fine. A butter knife works for portioning. |
Before you fold: set yourself up to win
Wonton skins lose moisture to the air faster than you think. Within ten minutes of an open stack sitting out, the top sheets crack at the fold line and the bottom sheets go gummy. So open the packet at the last second, pull off only the five or six squares you will use in the next few minutes, and drop the rest back into the bag with the corner folded over. Lay a damp (not wet) towel across the working stack.
Keep your filling cold and relatively stiff. A loose, wet filling slides during folding and turns the seal into a greasy mess that will not stick. If your filling looks loose, chill it for twenty minutes first; cold fat solidifies and the mixture scoops cleanly off the spoon. And portion small. One level teaspoon per 75 mm square is the sweet spot. Beginners almost always overfill, and an overstuffed wonton is one that splits.
Fold 1 — the nurse cap (good for everything)
This is the shape you see in most wonton soups: a tidy rectangle with the two top corners pinched together so the wonton sits up like a little folded cap. It is the one I would teach first.
- Center 1 teaspoon of filling on the square. Wet a thin ring of water around the filling, not the whole wrapper.
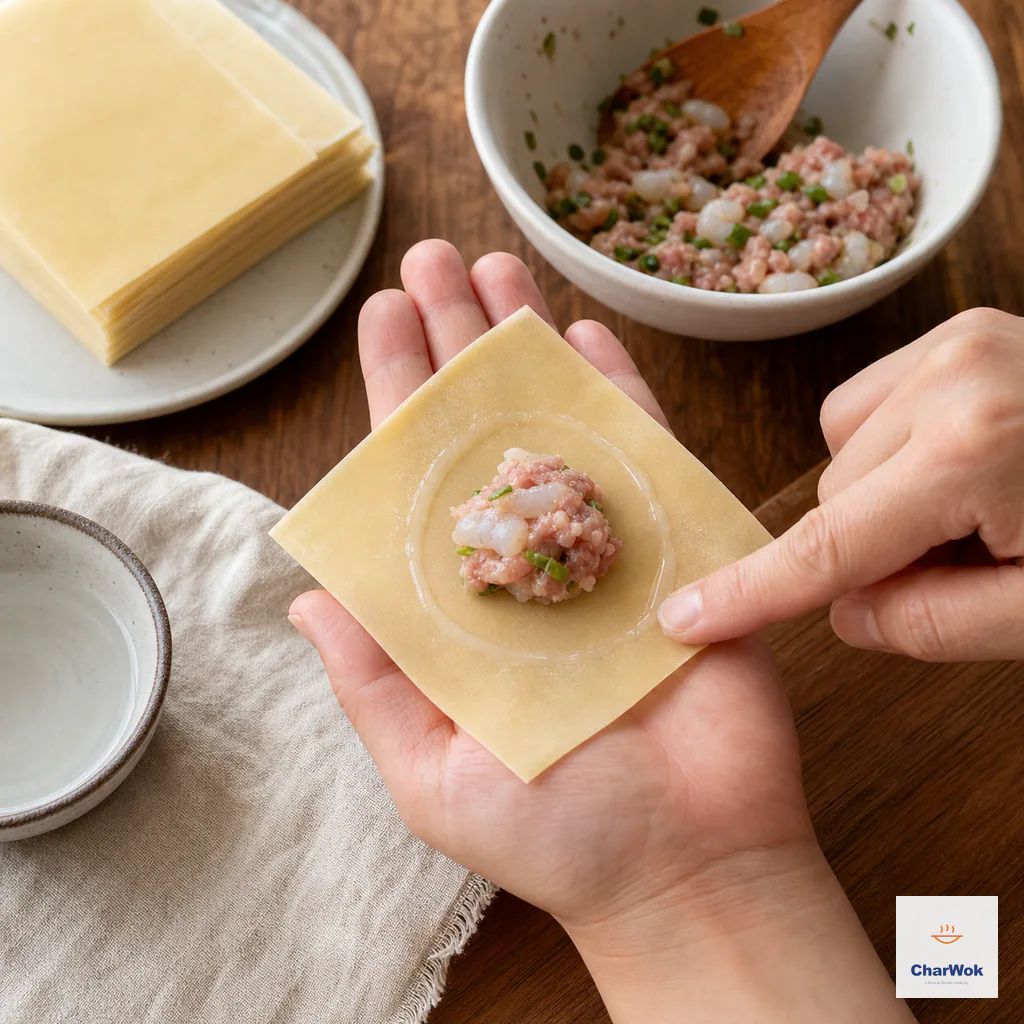
Keep the filling centered and wet only a narrow ring so the wrapper stays dry enough to handle.
- Fold the square in half over the filling to make a rectangle. Press from the filling outward to push trapped air out the open sides before you seal them; this is the step that stops the wonton from ballooning in the pot.
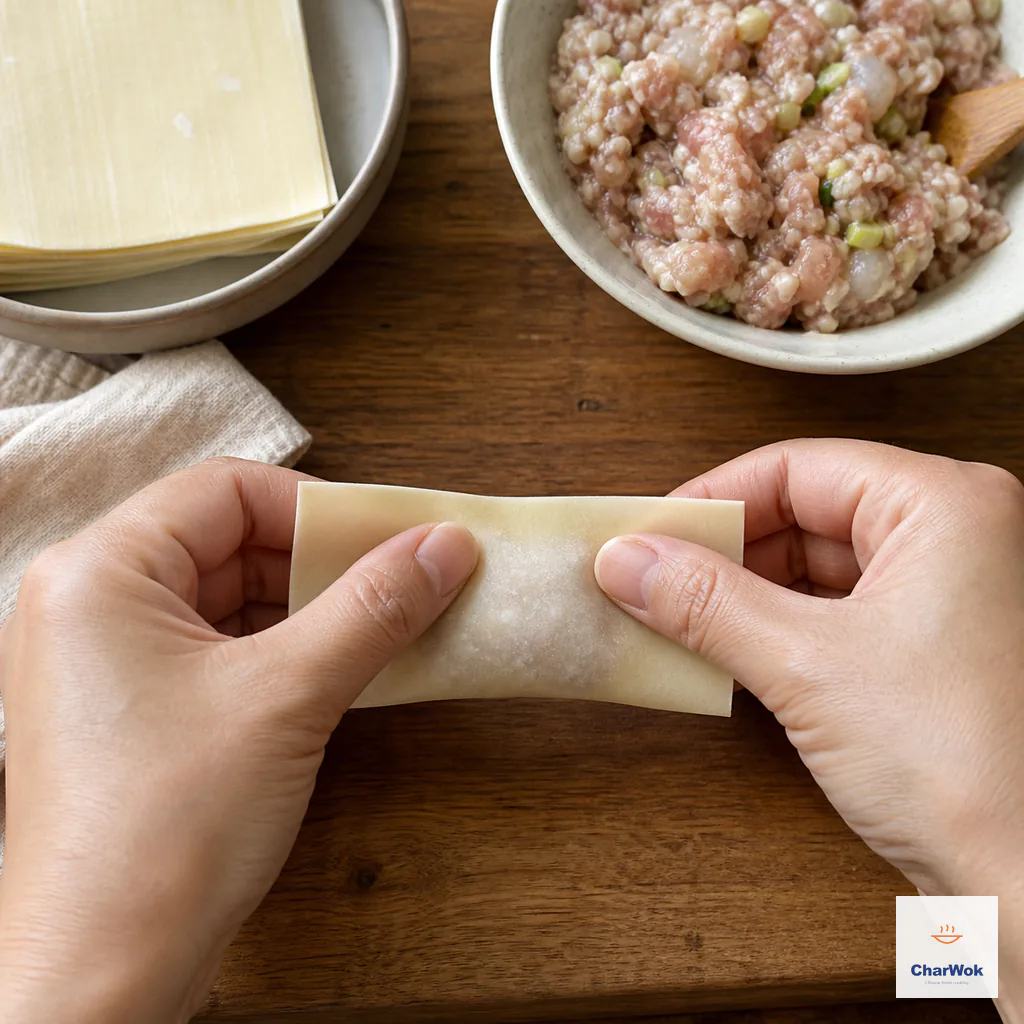
Bring opposite edges together and press outward around the filling before sealing.
- Press the three open edges flat. You should see a clean outline of the filling through the skin.
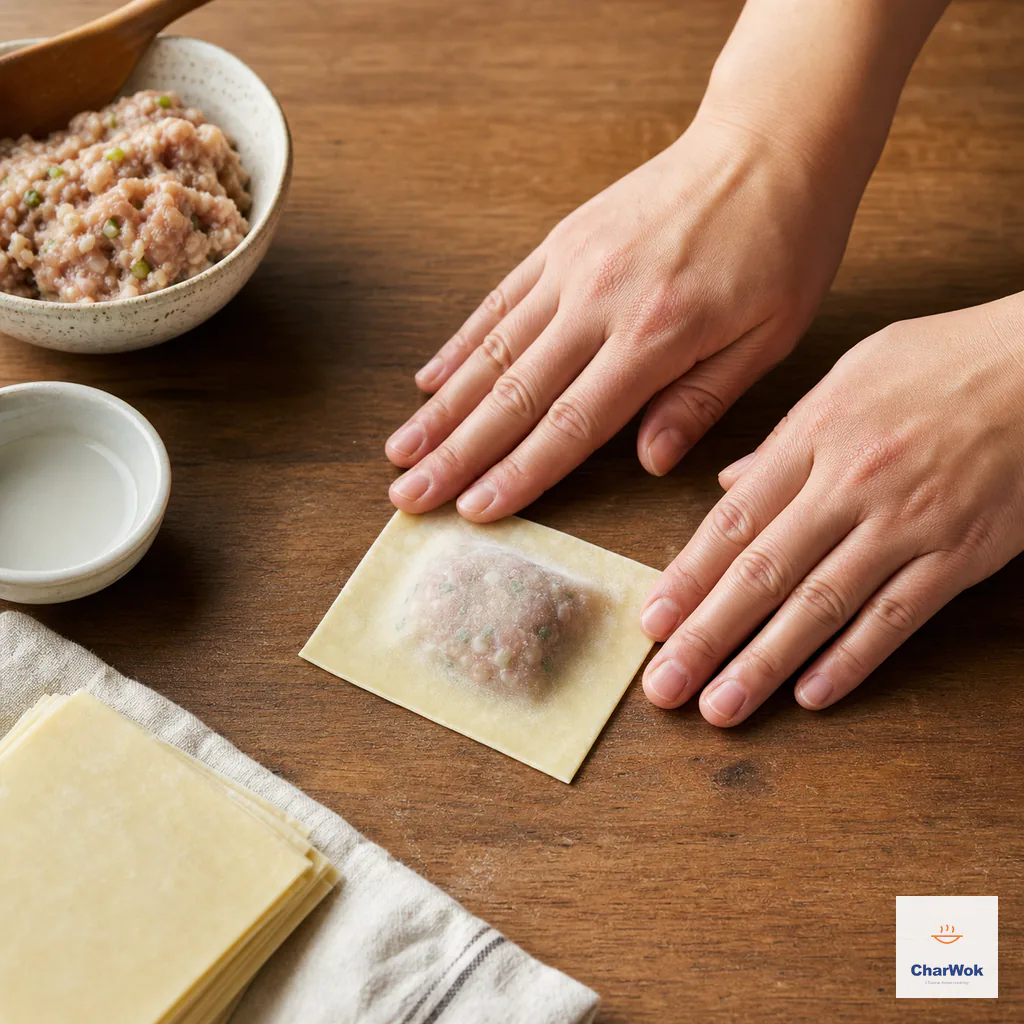
Seal all three open edges firmly so no filling or air pocket can break the wrapper.
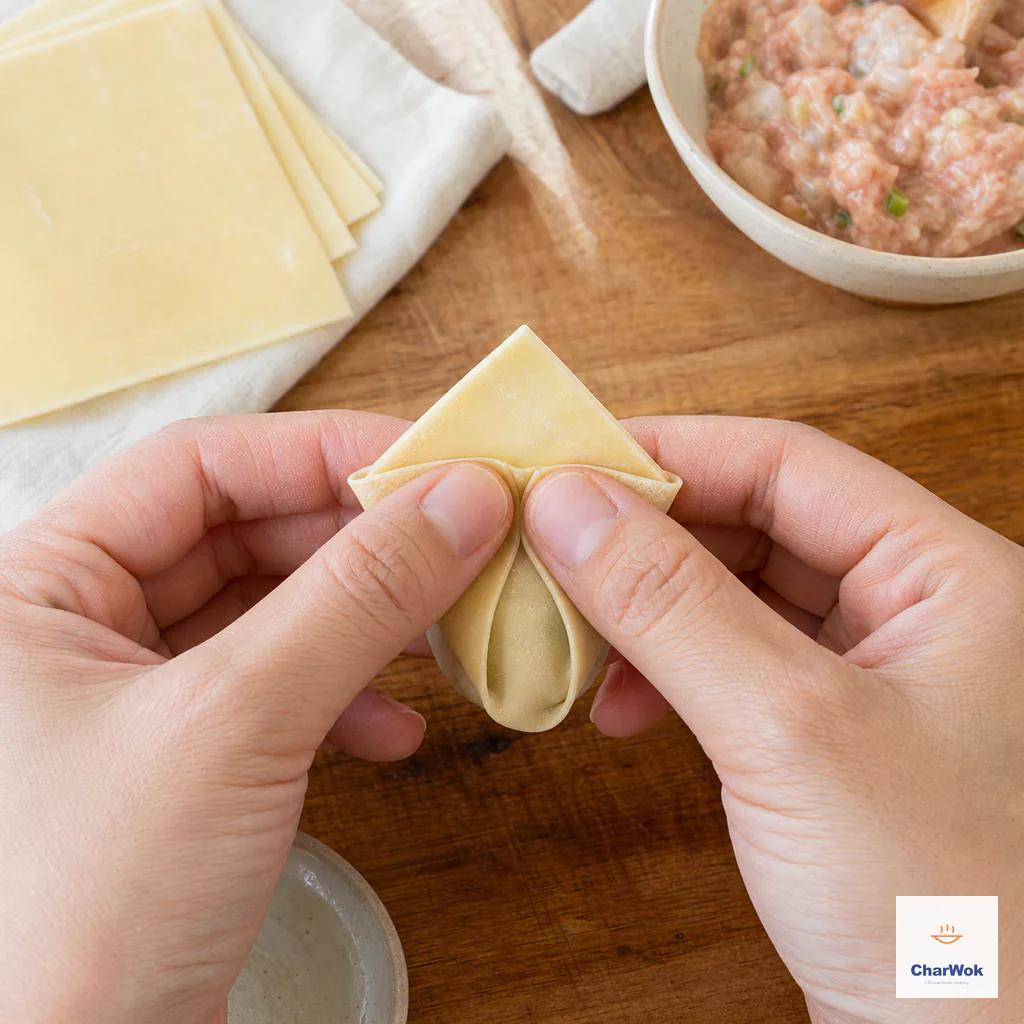
- Dab water on one top corner. Swing both top corners toward each other so one overlaps the other, and pinch. The wonton should stand on its folded base.
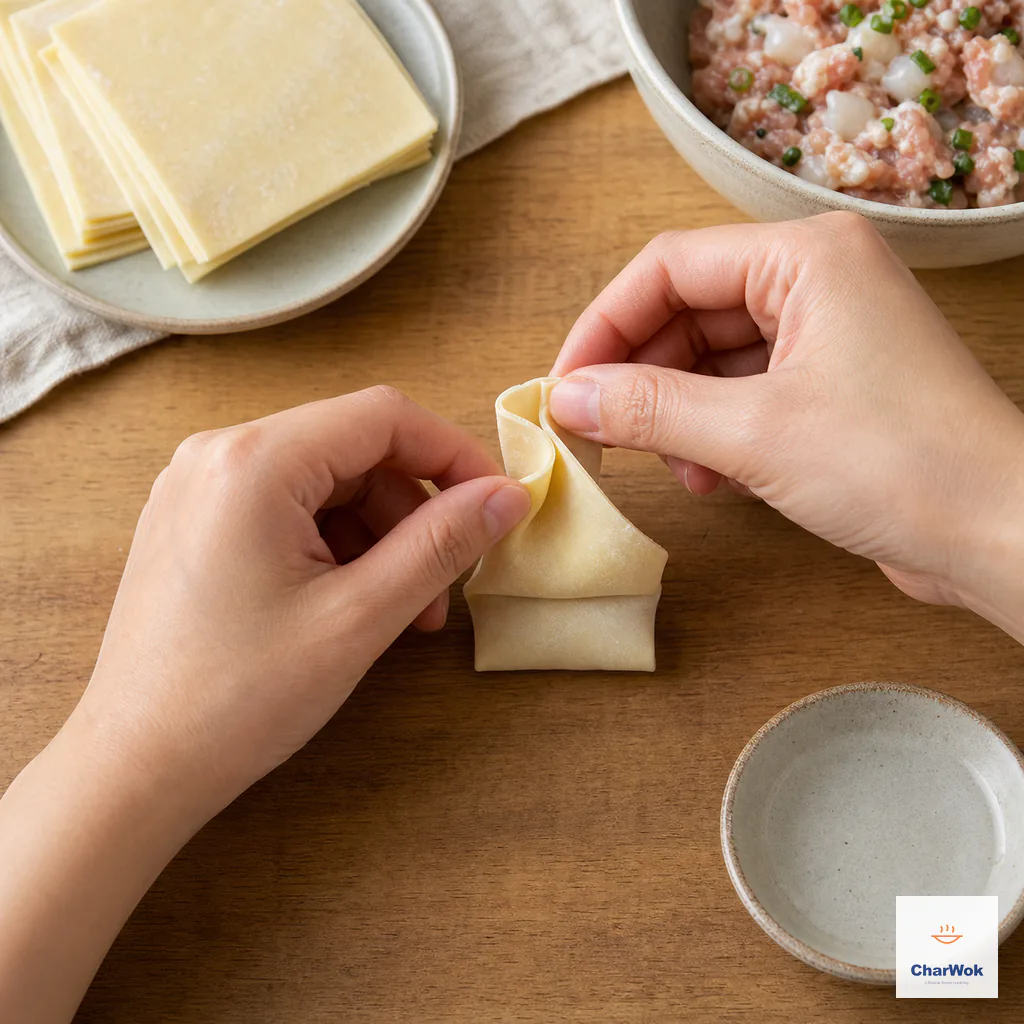
Wet one corner, overlap the pair, pinch firmly and stand the nurse-cap fold upright.
Fold 2 — the triangle with crossed arms
Fold on the diagonal instead of straight across. The result is a triangle with the two long arms crossed in front. This holds a slightly larger dollop of filling than the nurse cap and looks sharp floating in a clear broth.
- Wet two adjacent edges of the square. Fold corner to corner into a triangle, pressing air out from the filling toward the open hypotenuse.
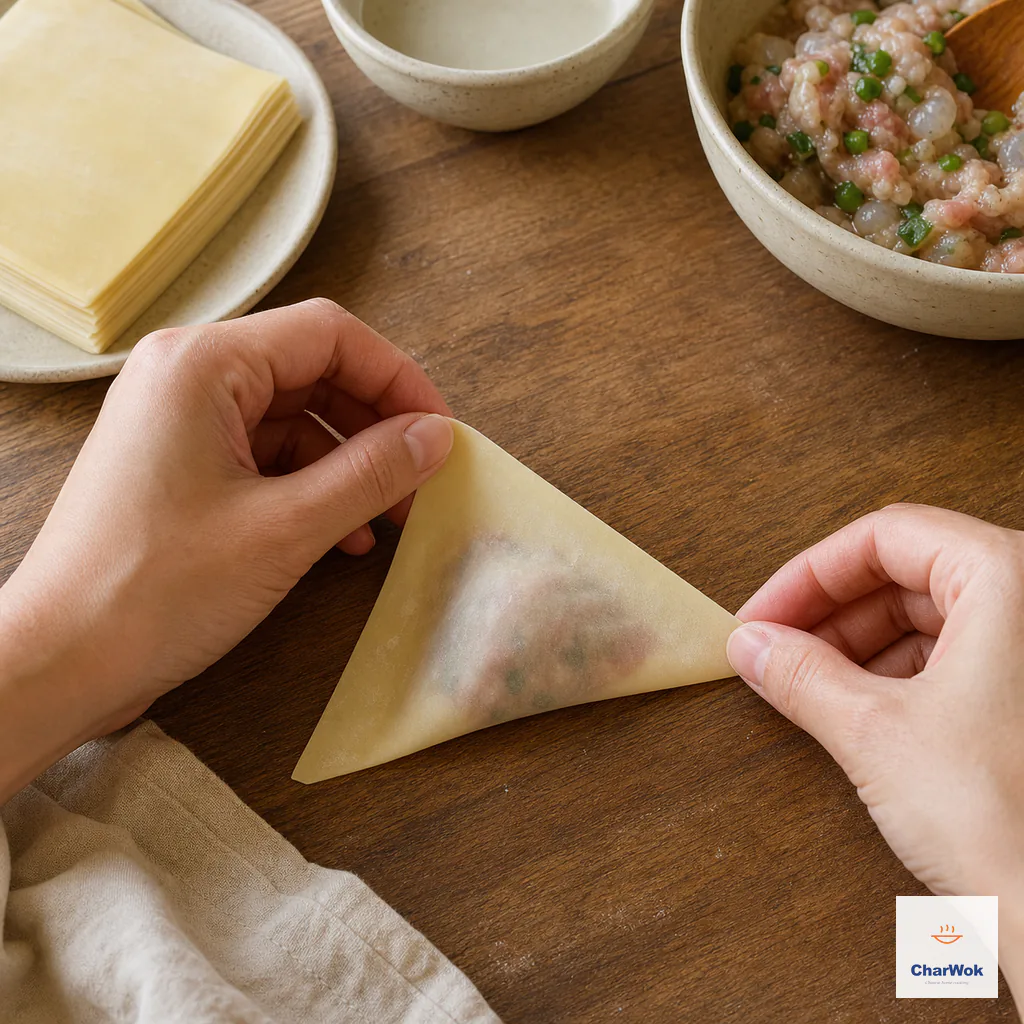
Wet two adjacent edges, fold into a triangle and expel the air before pressing shut.
- Seal the long open edge firmly.
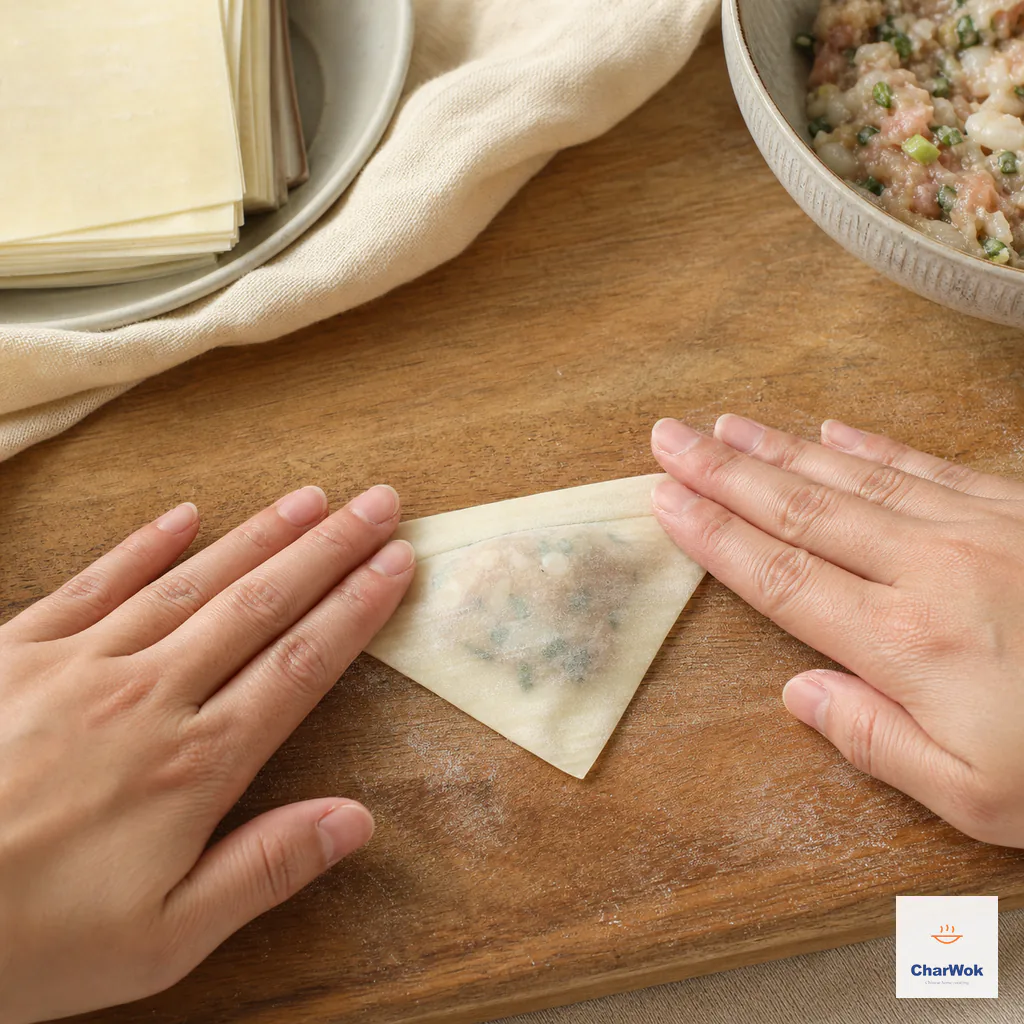
Run firm pressure along the entire long edge until both wrapper layers are welded.
- Wet the two acute corners, fold them toward each other across the front of the triangle, and overlap one over the other. Pinch to lock.
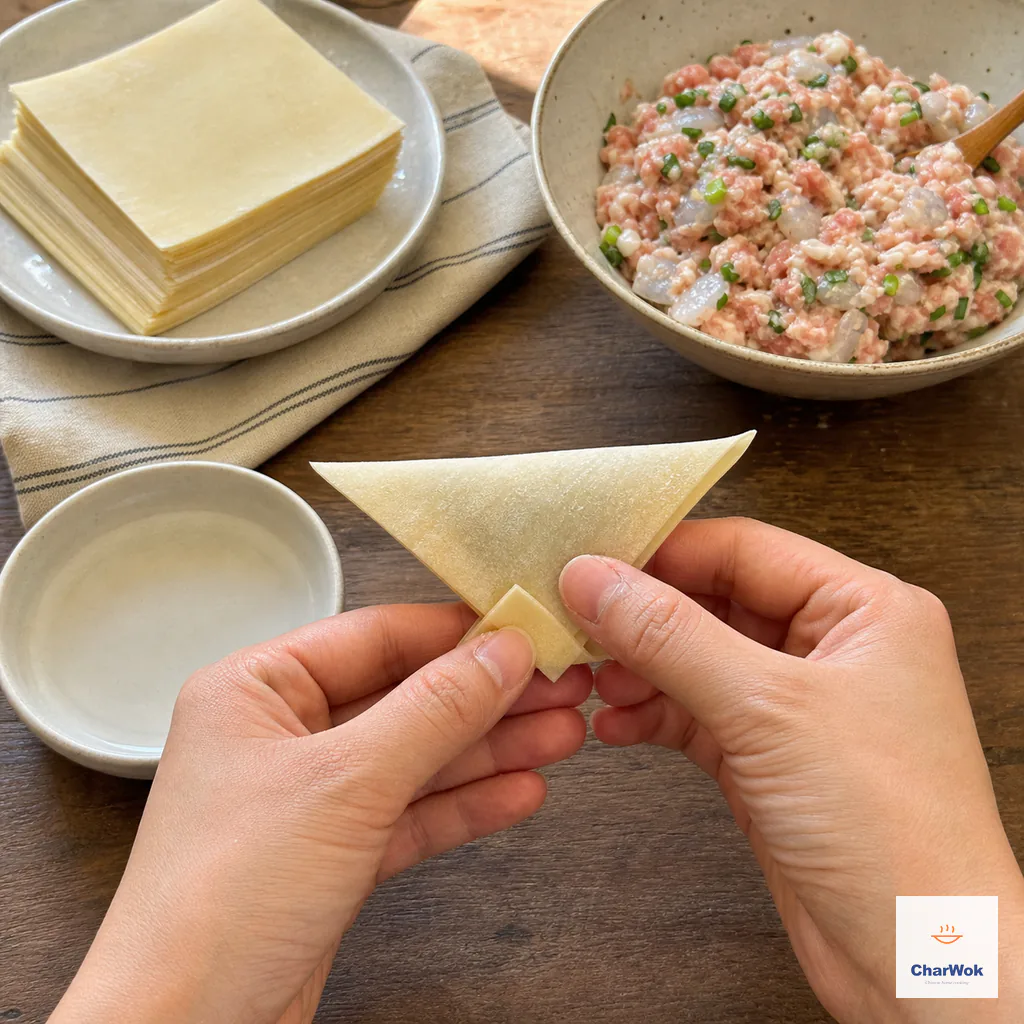
Wet the pointed corners, cross one over the other and pinch to lock the fold.
Fold 3, the envelope
Same idea, different geometry. Instead of overlapping the corners on the center line, you leave two opposite corners pointing up without crossing. It is the fastest of the sealed folds and reads as a neat little money purse on the plate.
- Wet the perimeter lightly. Bring two opposite corners up over the filling so they meet but do not overlap.
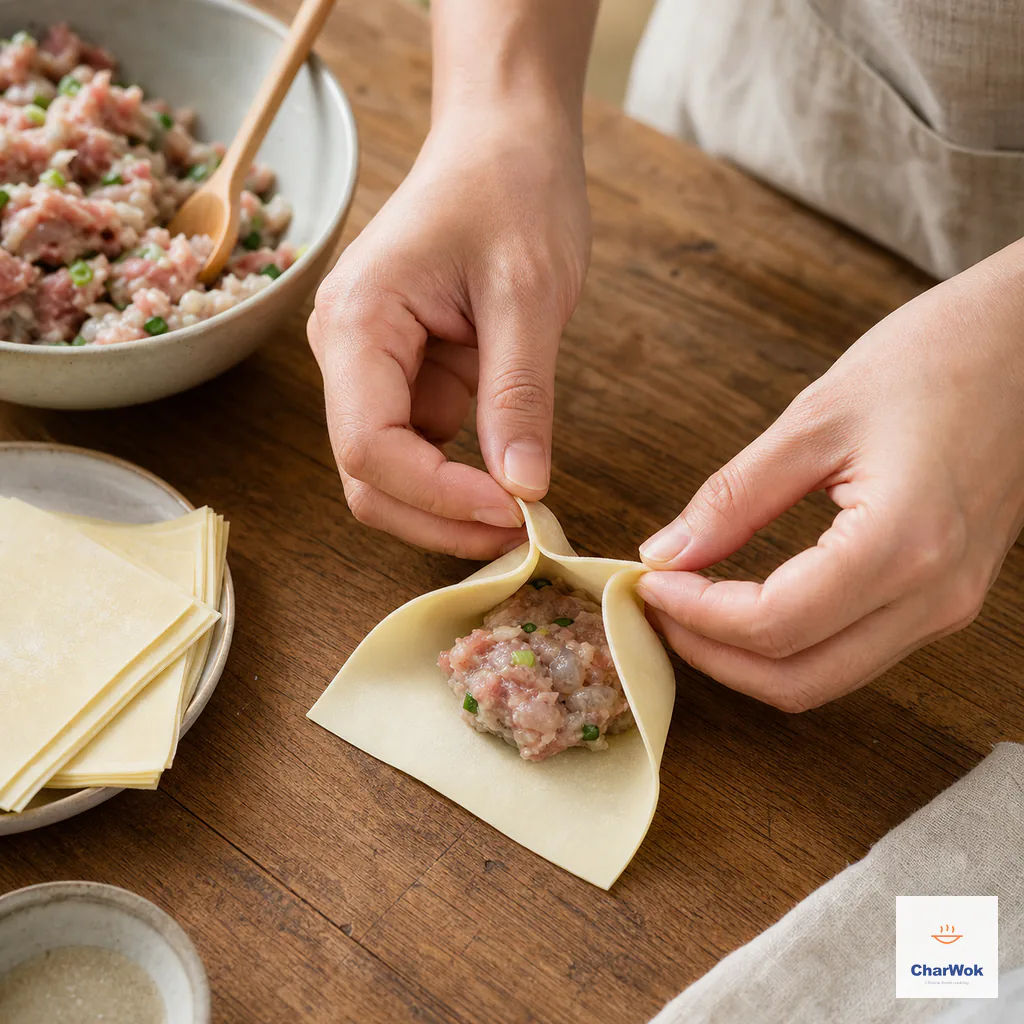
Bring all four corners up without overlapping them yet, keeping the filling in the center.
- Press the four seams flat, working from the filling outward to evacuate air.
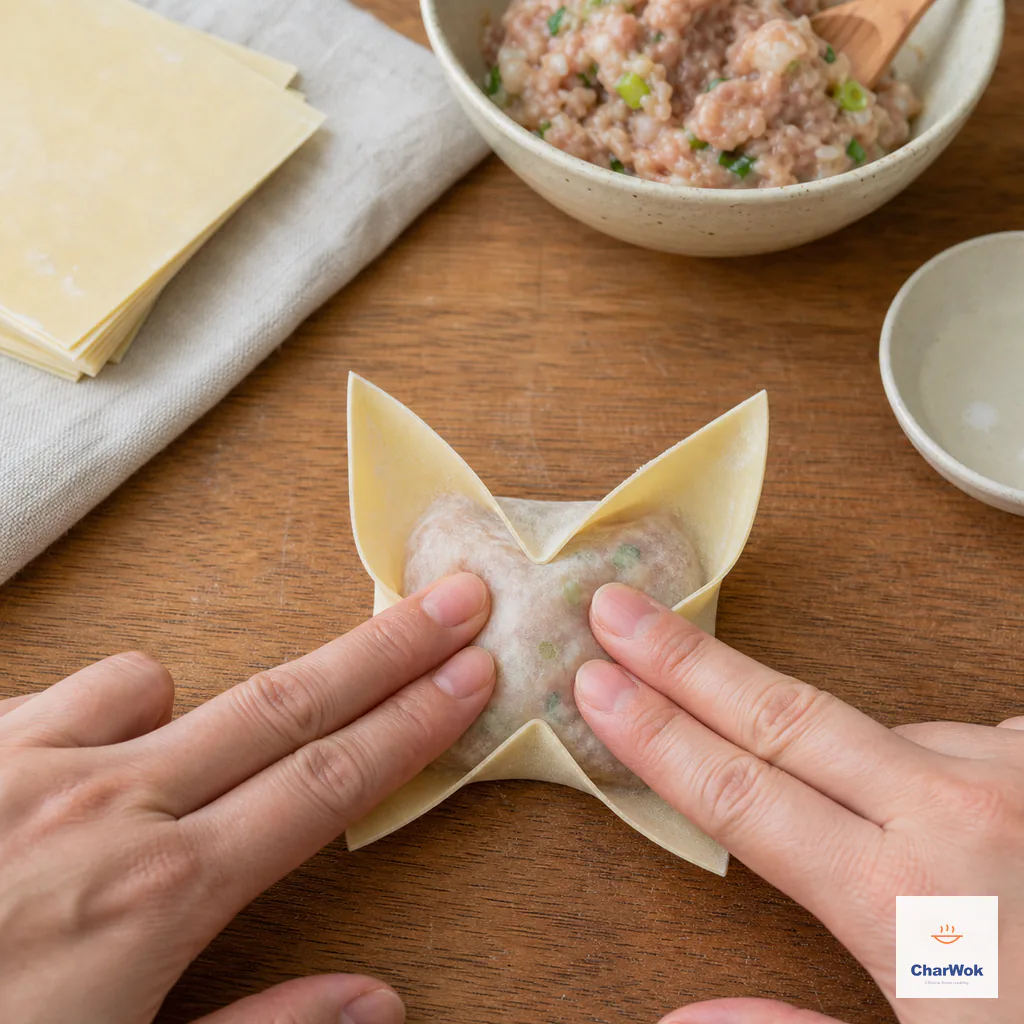
Press all four radiating seams flat and clear every air pocket before closing the pouch.
- Dab water on the two standing corners, draw them toward the center, and pinch them together so the wonton becomes a plump sealed pouch.
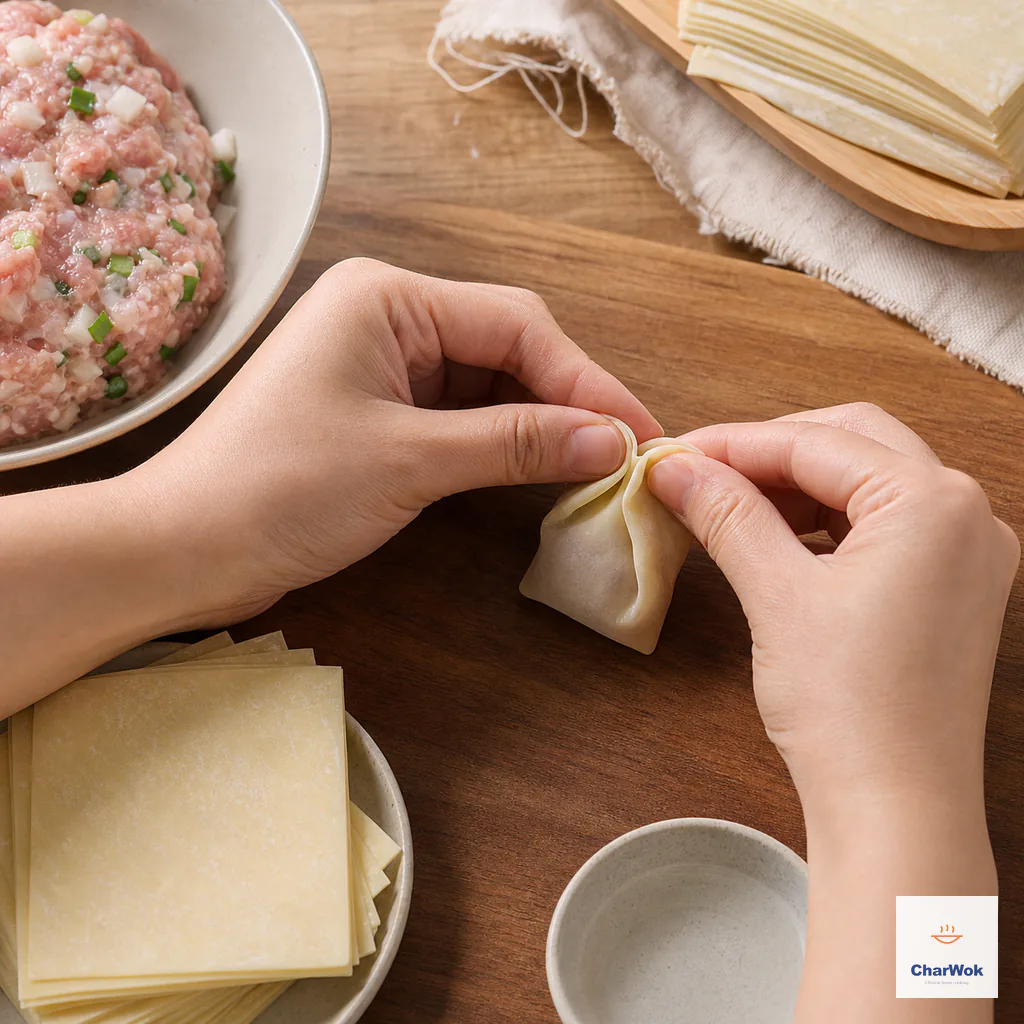
Wet the standing corners, draw them inward and pinch the compact pouch closed.
Fold 4, the ingot roll (best for frying)
This is the shape you want for fried wontons and for the crisp golden pillows on a dim sum cart. Rolled rather than folded, it gives you a thicker band of dough on the seam, which is exactly what you want when the wonton is going into hot oil. A thin crimped edge would crisp and crack before the filling was hot.
- Lay the filling in a short log across the wrapper, about a third of the way up from the bottom edge. Wet the top edge lightly.
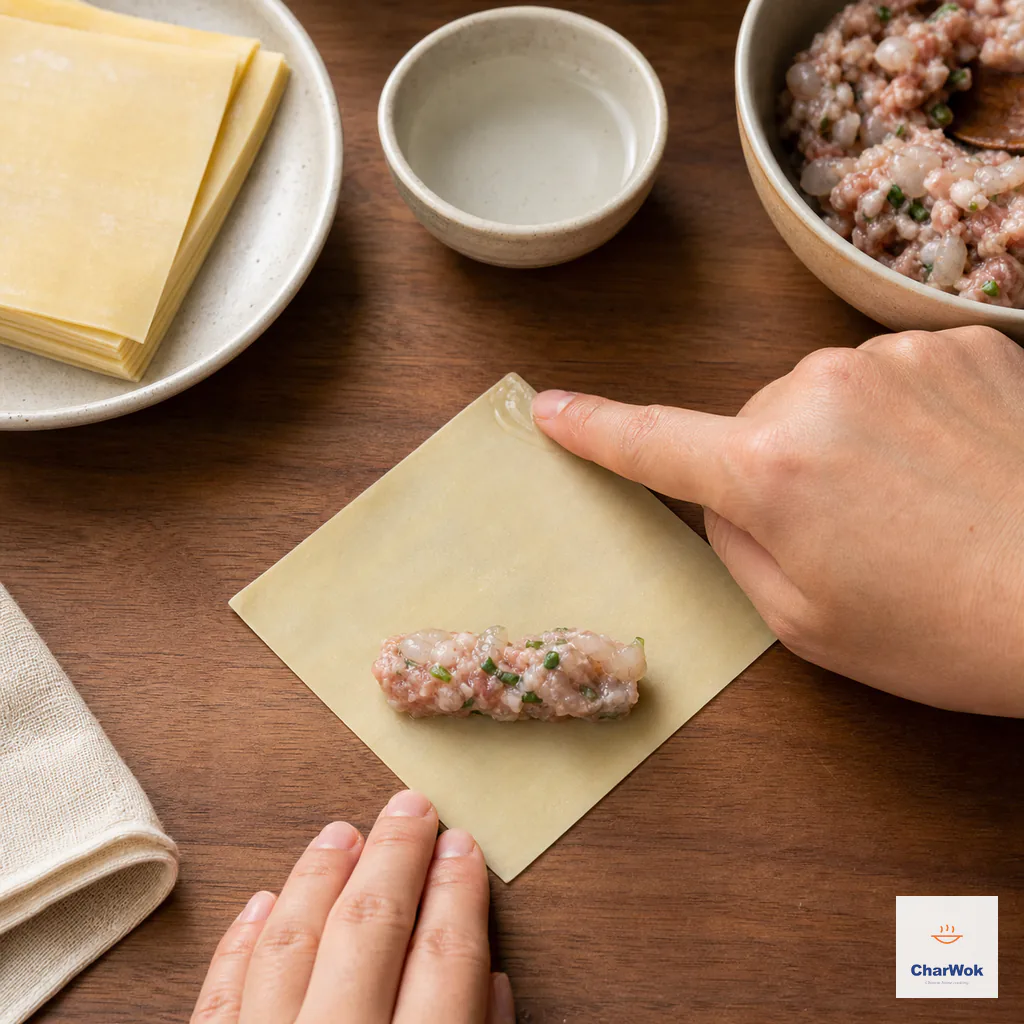
Shape a short even log and wet only the far edge before rolling.
- Roll the wrapper up from the bottom, encasing the filling in a cylinder. Stop about 1 cm short of the wet top edge so the seam lands on top of the roll, not at the very edge.
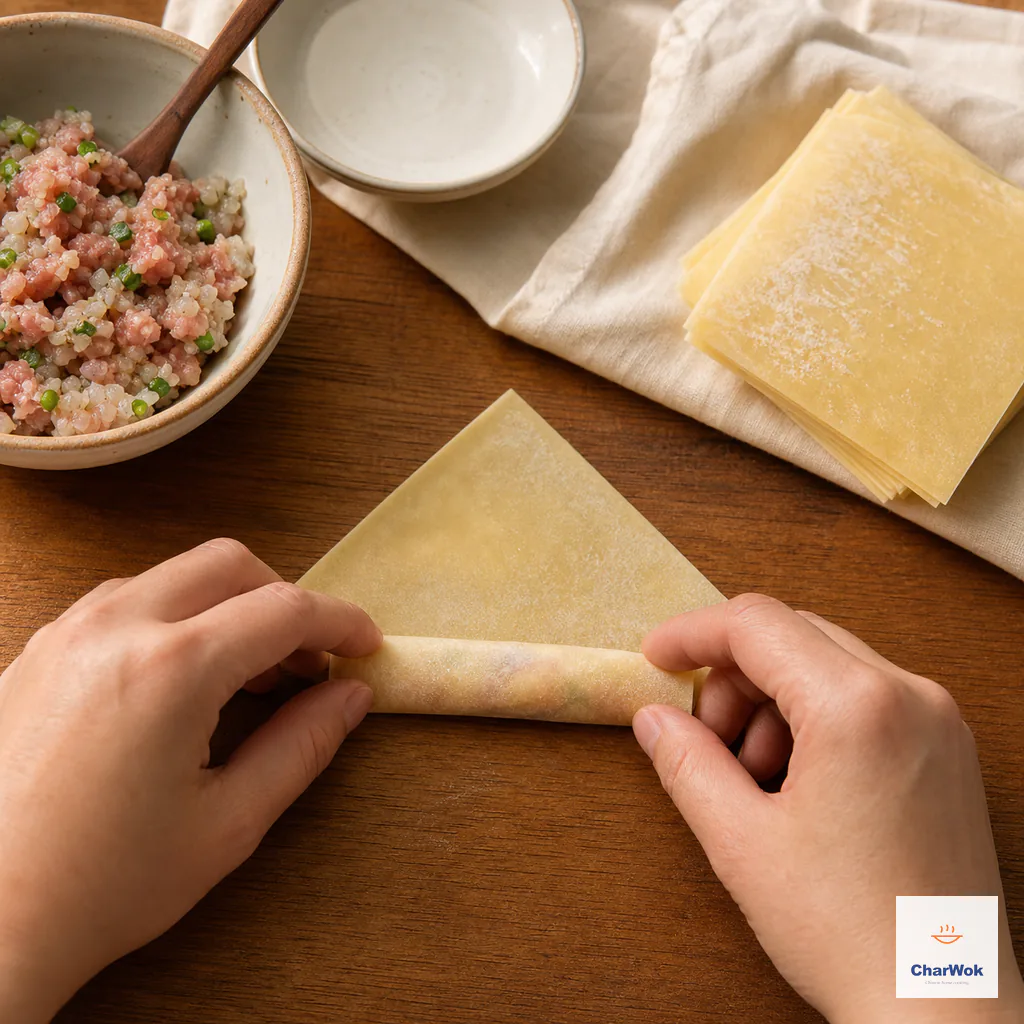
Roll snugly around the filling, leaving about one centimeter of the far corner visible.
- Press the seam to seal, then wet the two open ends.
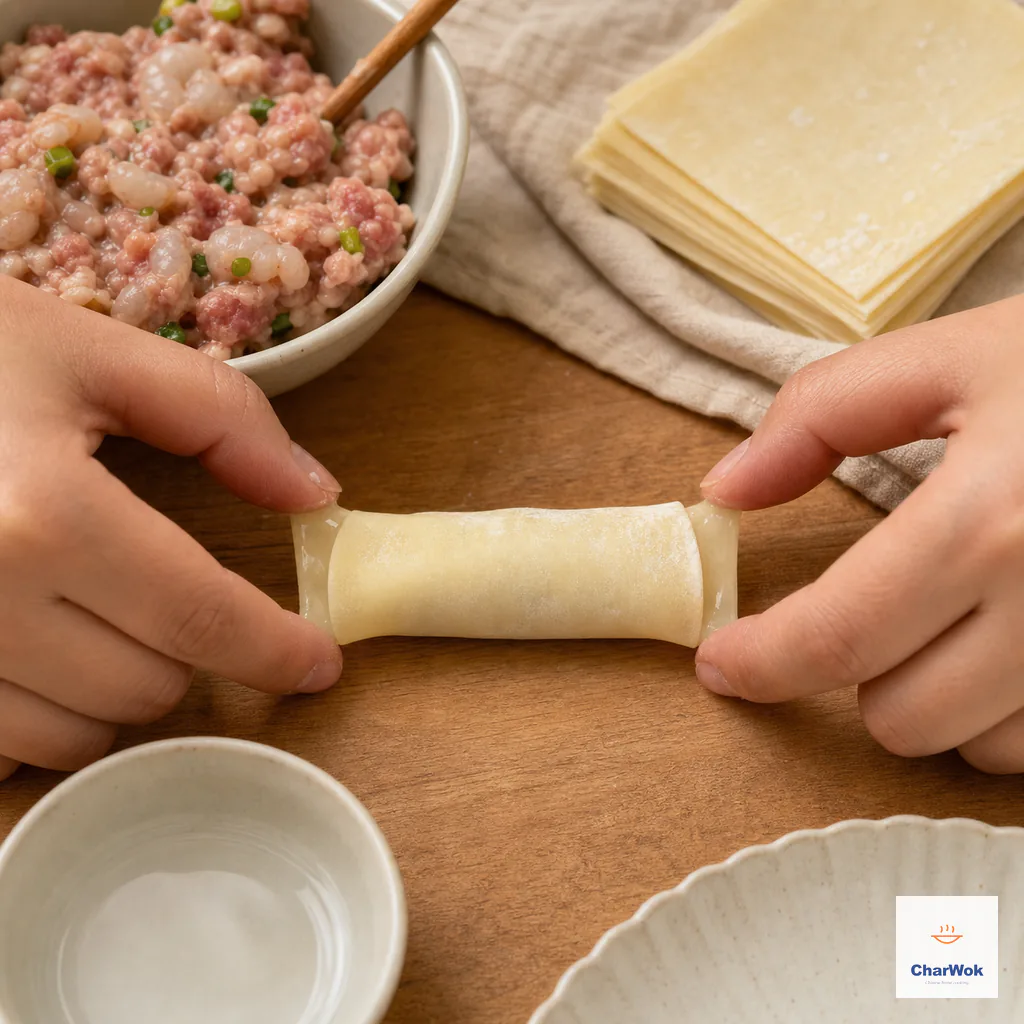
Press the seam first, then wet both open ends so they will hold when bent inward.
- Draw both ends toward the center, lay one over the other, and pinch. The wonton should look like a fat little gold ingot.
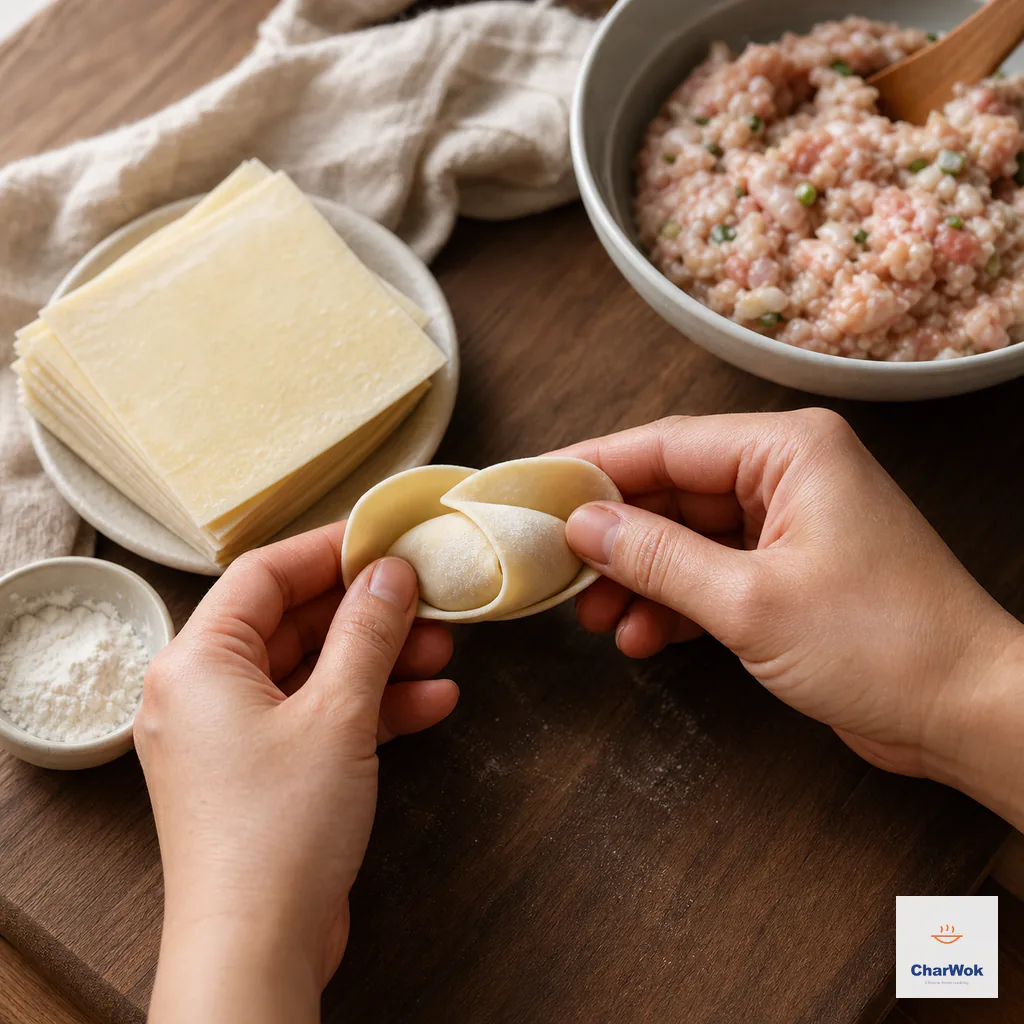
Bring the ends to the center, overlap and pinch them into a fat ingot.
Fold 5, the squeeze pouch (the fast one)
This is the method the cooks at a busy noodle stall use, because once you have the hang of it you can fold a wonton in a single motion. The skin gathers into a ruffled little purse with a gathered neck. It is also the least sealed of the six; the ruffled top is held shut by the gather, not by a pressed seam, so it is best for boiling and not ideal for deep-frying.
- Make a circle with the thumb and index finger of your non-dominant hand, about the diameter of a walnut. Lay a wrapper over the hole and drop the filling into the center.
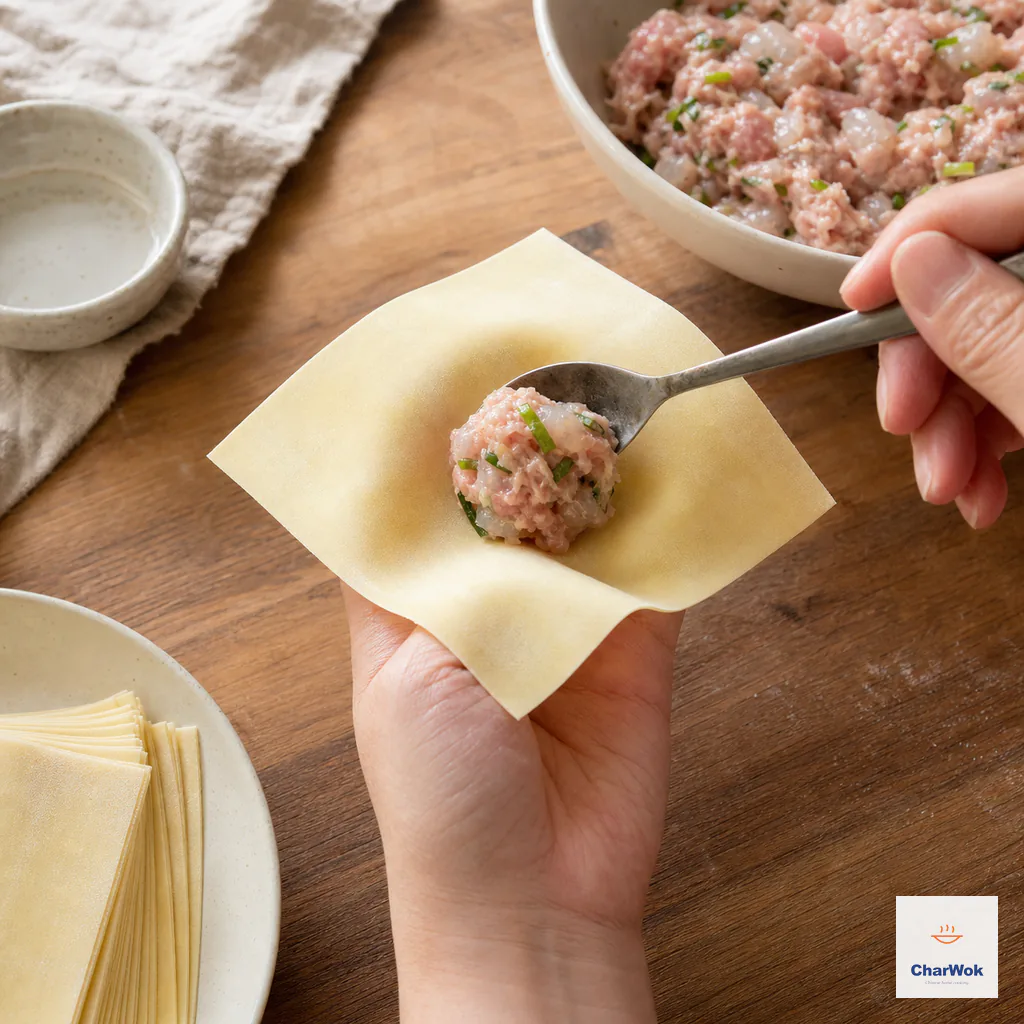
Form a finger ring under the intact wrapper and set a small amount of filling over the opening.
- With a spoon or your damp thumb, push the filling straight down through the hole so the wrapper dips into a pouch.
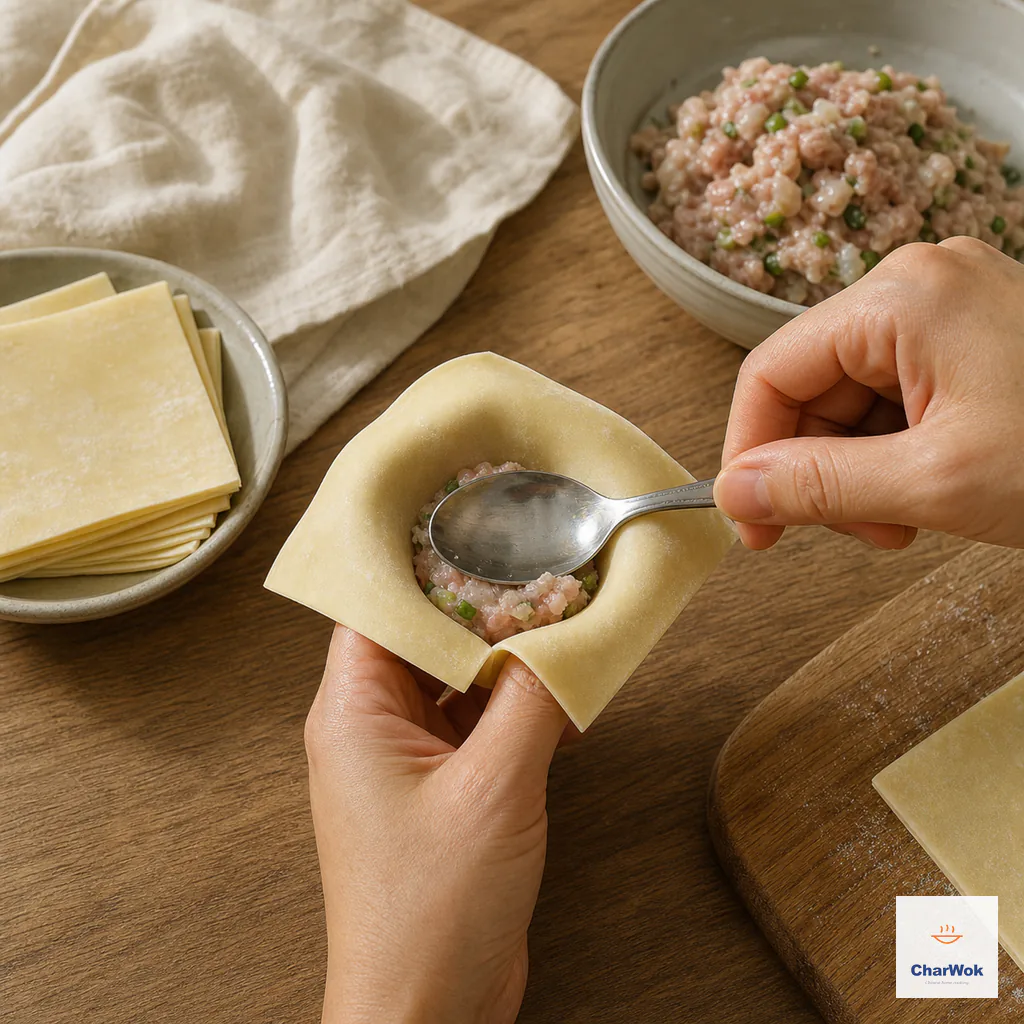
Use the spoon back to guide the filling down, creating a deep pouch without tearing the wrapper.
- Gather the excess wrapper at the top around the filling and give it a gentle squeeze. A small ruffled neck forms. Do not crush it; you want the gather to hold the filling in, not to pinch the dough into a solid lump.
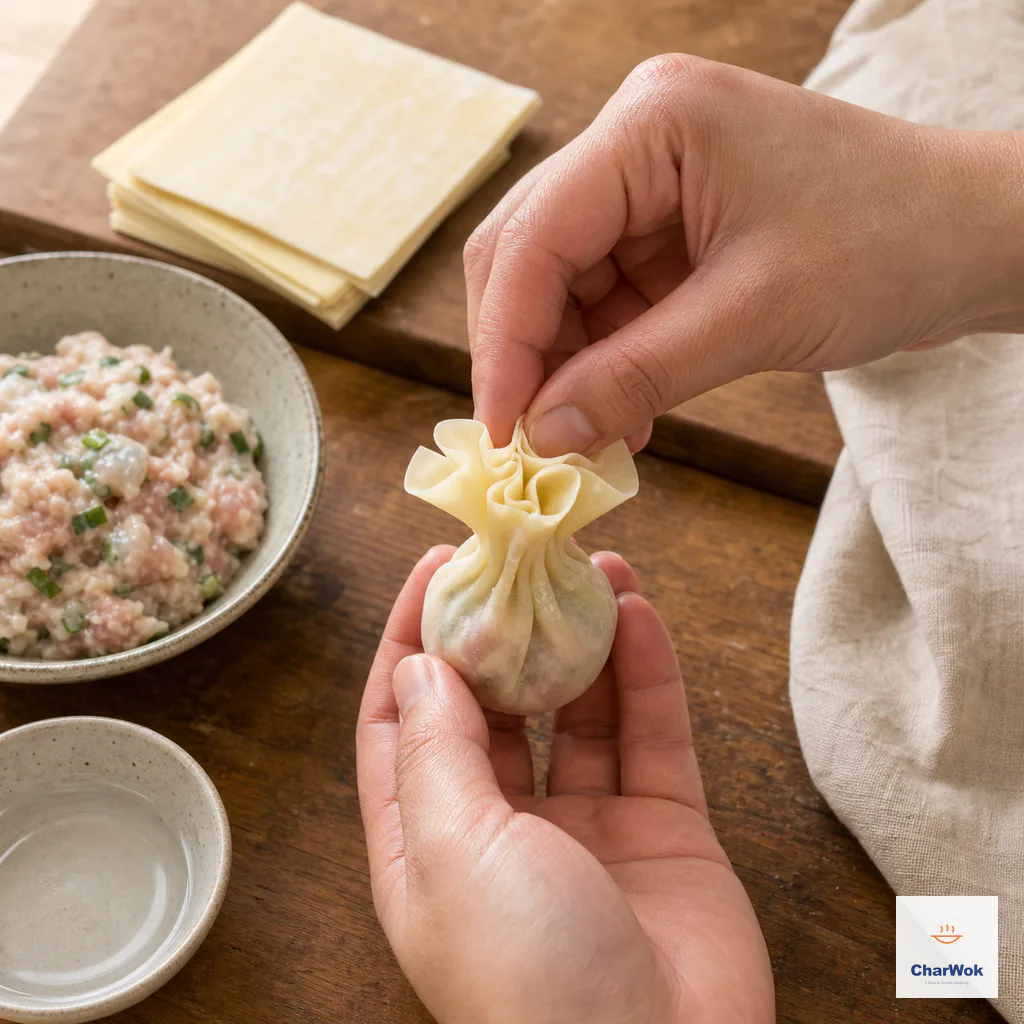
Gather the excess wrapper and squeeze gently just above the filling for a ruffled open top.
Confession: this fold took me longer to learn than the other five combined. For the first week my pouches leaked at the gather because I was squeezing too high and leaving a gap below the filling. Squeeze just above the filling, where the dough naturally wants to neck down.
Fold 6, the bishop's hat
A showy fold that sits tall on the plate, good for plating when the wonton is the centerpiece of a dish like chili oil wontons, where the sauce needs somewhere to pool.
- Place the filling near one corner of the square. Wet the two edges that lead away from that corner.
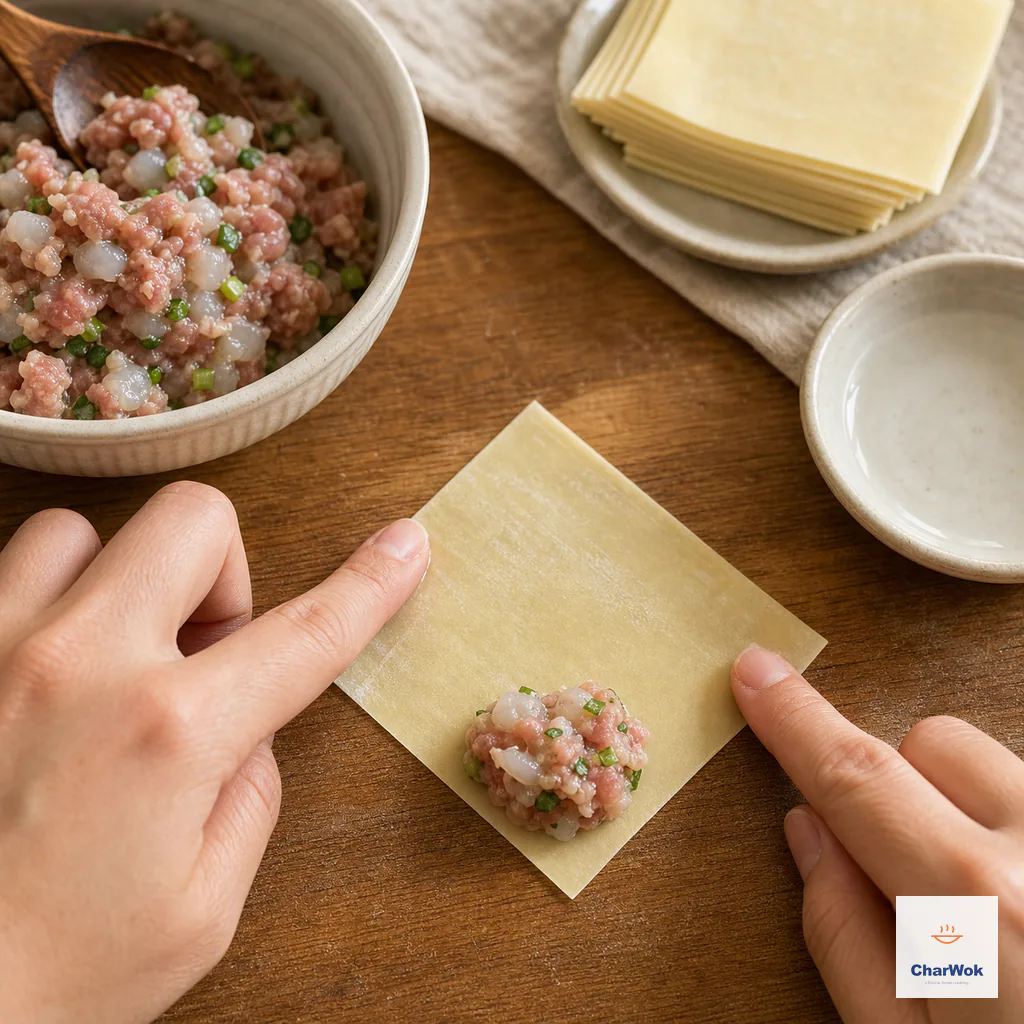
Keep the filling close to one corner and wet both edges that extend from it.
- Roll the wrapper up from the filled corner, swaddling the filling, until only the opposite corner is left visible on top.
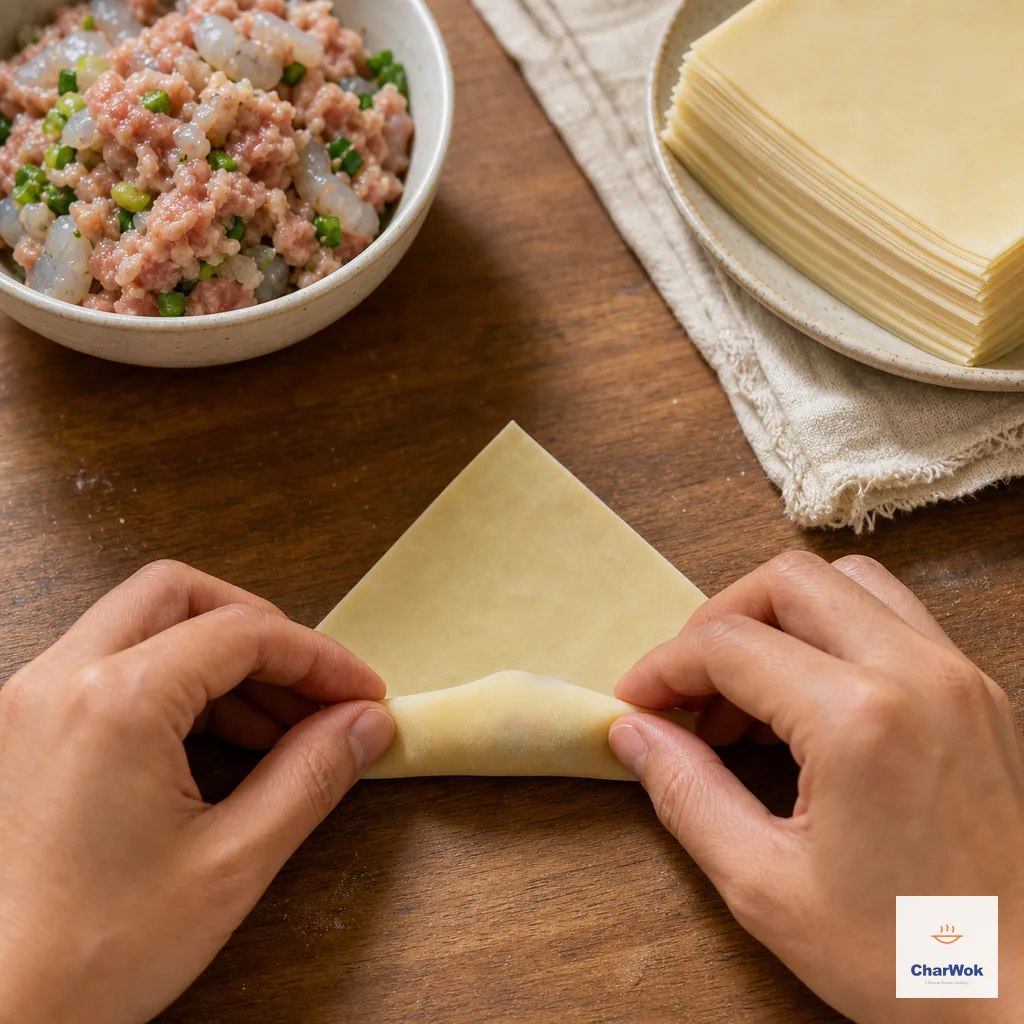
Roll from the filled corner until the opposite point still shows above the cylinder.
- Wet the two side corners that now stick out, bring them together over the top of the roll, and pinch them to each other over the visible corner. The result is a tall, peaked hat.
Bring the side corners over the visible point and pinch their overlap firmly at the center.
When things go wrong
Most wonton failures share a small set of causes. Here is the troubleshooting table I wish someone had handed me.
- The seam pops open in the pot. You sealed dry, or you sealed over grease from the filling. Wet the seam with a clean finger (not a soaked one), and wipe any filling smears off the dough before you press. A starchy, cloudy water bowl means you are dragging filling into your glue; swap it.
- The wonton balloons and bursts. Trapped air. Press every fold from the filling outward to chase air out the open edge before you close that edge. With the squeeze pouch, push the filling all the way down so no air pocket sits under the gather.
- The skin tears while folding. Either the wrapper dried out (cover the stack) or you overfilled (halve the portion). A small tear can be patched with a fingertip of damp dough pressed flat; a big tear means start over.
- Filling leaks into the cooking water. Loose wet filling, or a vegetable-and-tofu mix that does not bind. Chill the filling, or add a teaspoon of cornstarch or beaten egg to bind it. Meat fillings will tighten into a ball even if a little escapes, so do not panic over a stray shred of pork.
- Filled wontons stick to the tray and tear when lifted. Dust the tray with cornstarch, and do not let them touch each other. If freezing, freeze them flat and loose before bagging.
- Oil spits and spatters during frying. The filling was wet, or the seal was not tight. For fried wontons, use a drier filling and the rolled ingot fold, which gives the most robust seam.
Which shape for which dish?
The folds are not interchangeable once you have chosen a cooking method. Here is how I match them.
- Boiling in broth or water (for soup, or for wonton noodle soup): the nurse cap, triangle, envelope, and squeeze pouch all work. The squeeze pouch is fastest for a big batch.
- Serving in chili oil or sesame sauce: the bishop's hat and the triangle, because their ridges hold sauce. The hat is the prettier choice if you are plating for people.
- Deep-frying or pan-frying: the rolled ingot, full stop. Its thick seam survives the oil and stays crisp.
Once folded, you can cook them right away or follow one of the three methods in the cooking guide (boiling, pan-frying, steaming), which applies to wontons as much as to dumplings. For dipping, the six sauces in the dumpling sauce guide cover the full range from a simple black-vinegar dip to a numbing chili oil finished with freshly ground Sichuan pepper.
Filling ideas that travel well
Any of these folds can carry any filling, but a few pairings are worth pointing out. The bishop's hat and triangle show off a delicate shrimp filling beautifully; try the shrimp-and-pork mix used for siu mai. The nurse cap is the classic vehicle for a plain pork-and-ginger filling in clear broth. If you want something closer to soup dumplings, the gathered neck of the squeeze pouch can be made tighter to trap a little extra juice, though it will never match a properly pleated xiao long bao for broth retention; for that, the dough and the technique are different. And if you are just starting out and want one reliable collection of ideas, the round-up of dumpling recipes includes several fillings that fold cleanly into wonton skins.
Storing and reheating
Folded wontons freeze exceptionally well, which is the main reason to fold a big batch at once. Lay them in a single layer on a cornstarch-dusted tray, not touching, and freeze until solid (about an hour). Tip them into a bag, squeeze the air out, and they will keep for two months. Cook them straight from frozen; do not thaw, or the skins will weep and stick together. Add about thirty seconds to the boiling time.
Cooked wontons are best eaten immediately. Leftover boiled wontons turn soft and cloudy by the next day. If you must reheat, drop them back into barely simmering broth for thirty seconds rather than microwaving, which makes the skin leathery.
A note on store-bought versus homemade skins
I keep commercial wrappers in the freezer for weeknights and reach for a slightly sturdier homemade dough only when I want a softer, more delicate skin for a special broth. Commercial wonton skins are thinner than homemade dumpling skins and have less gluten, which is exactly why the same gentle handling matters more here. If a recipe calls for dumpling skins and you only have wonton skins, you can substitute, but expect a more delicate, quicker-cooking result. The reverse does not work as cleanly; a thick dumpling skin folded into a wonton shape will be doughy in soup.
Common questions
Here are the questions I get asked most often, with short answers.
Do I need to wet the whole wrapper?
No. Wet only the seam you intend to seal. A soaked wrapper turns gummy and slides instead of folding.
How much filling is too much?
About 1 level teaspoon (5 ml) per 75 mm (3 inch) square. If the filling touches the edge of the wrapper, you have used too much and the seal will fail.
Can I use the same folds for dumpling wrappers?
Yes, but dumpling dough is thicker and stretchier, so the result will be chewier. The squeeze pouch and bishop's hat translate well; pleated dumpling folds do not, because wonton skins are too thin to hold crimps.
Why did my wontons stick together while boiling?
The pot was not at a rolling boil when they went in, or you crowded it. Drop them in one at a time, stir gently once, and keep the water at a lively simmer, not a furious boil, which bashes them against the sides.
Which fold is easiest for a beginner?
The nurse cap (fold 1). It is two movements, the seal is forgiving, and the shape is stable enough to boil, fry, or freeze.