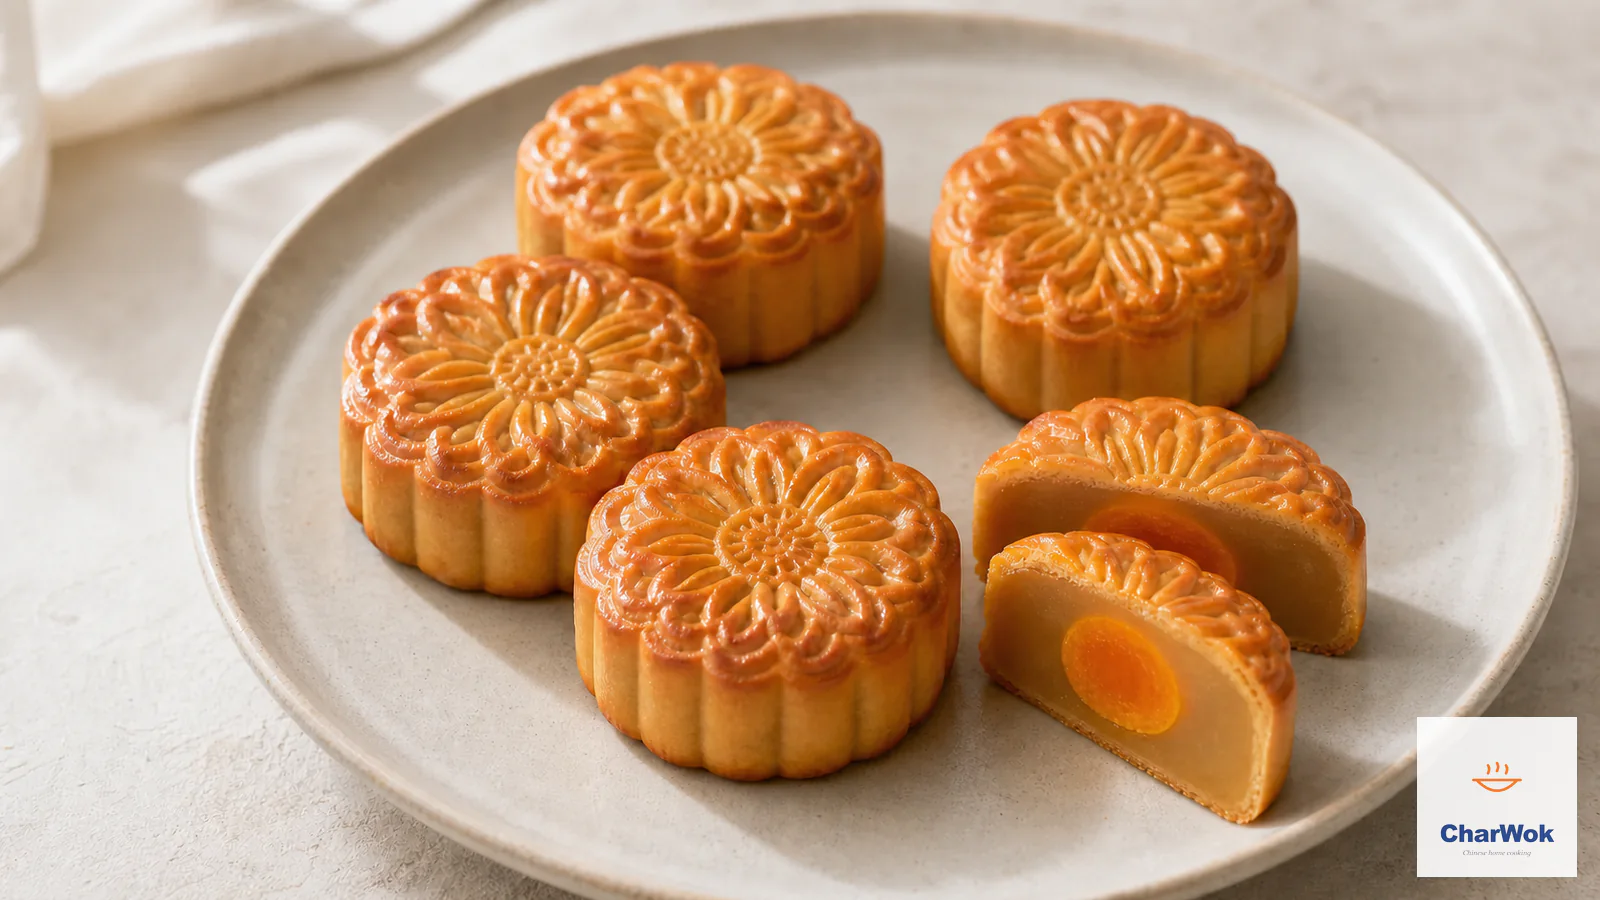
A Cantonese mooncake is one of the few foods where the smell alone can drop you into a specific room at a specific hour. Golden syrup crust, a thin shell around dense lotus seed paste, and a whole salted egg yolk sitting at the center like a small orange sun. The first time I made them at home, they came out of the oven pale, dusty, and visibly wrinkled. I almost threw them away. Then I waited two days, and something close to magic happened: the skin softened, turned glossy, and the raw-flour taste disappeared. That gap between the oven and the table is the whole secret of this pastry, and most home bakers never get told about it.
What follows is a complete, from-scratch recipe for the classic lotus-and-yolk version, the style you see stacked in tins every Mid-Autumn Festival. It makes 20 mooncakes at the standard 50-gram size, with a 20-gram dough wrapper around a 30-gram filling. I will also cover the food science of the lye-water dough, why a two-temperature bake matters, and the failures that wreck an otherwise good batch.
At a glance. The dough-to-filling ratio is 20 g pastry to 30 g filling per 50 g mooncake, and the step everyone skips is the 1-to-2-day rest after baking. Lye water (kansui) is non-negotiable for the golden, soft, slightly glossy skin. Bake hot first (190°C / 375°F) to set the shape, then low (160°C / 320°F) with two thin egg-wash layers for even color. If you can find ready-made lotus paste, use it; the paste from scratch is the hardest part.
What a Cantonese mooncake actually is
Cantonese mooncakes (广式月饼) are the dominant mooncake style in southern China and across the global Chinese diaspora, recognizable by their thin, soft, golden-brown pastry and the intricate motifs pressed into the top by a wooden or plastic mold. They sit alongside the chilled snow-skin mooncake, which skips baking entirely, and regional cousins like Suzhou-style flaky mooncakes and Beijing-style ones. Of all of them, the Cantonese version is the most technically demanding for the home cook because of one ingredient: lye water.
These are eaten to celebrate the Mid-Autumn Festival, when families share a mooncake by cutting it into wedges and pairing it with hot tea. They are rich and sweet by design, a single cake meant to be split, not devoured alone. That intensity is also why the filling matters so much and why a homemade version, where you control the sugar and the oil, can genuinely beat the store-bought tin.
Why this dough behaves nothing like bread dough
The crust is not a gluten-developed dough in any meaningful sense. It is a golden-syrup dough relaxed by an alkaline solution. Two things are happening, and understanding both will save you a lot of frustration.
First, golden syrup is an invert sugar, which means its glucose and fructose have already been split and, as a result, it is strongly hygroscopic. It grabs and holds water, which is why the skin actually softens over the days after baking instead of staling. Invert sugars also brown at a lower temperature than table sugar, which is why the crust races toward color in the oven. Second, the lye water, also called kansui, is a dilute alkaline solution that raises the pH of the dough. A higher pH accelerates Maillard browning and gives the characteristic deep amber color and faintly soapy feel to the raw dough. This is the same alkali that gives ramen noodles their spring and yellow tint. Without lye water, you do not get a Cantonese mooncake. You get a sad cookie.
Because the dough is barely kneaded, the gluten forms only lightly, which is exactly what you want. Overwork it and the pastry shrinks back when you press it into the mold. The 30-minute rest after mixing is partly to hydrate the flour evenly and partly to let the loose gluten strands relax. If you have made Chinese breads or rested a bao dough, this principle is the same, only shorter.
The ingredients, and what you can substitute
Ingredients at a glance
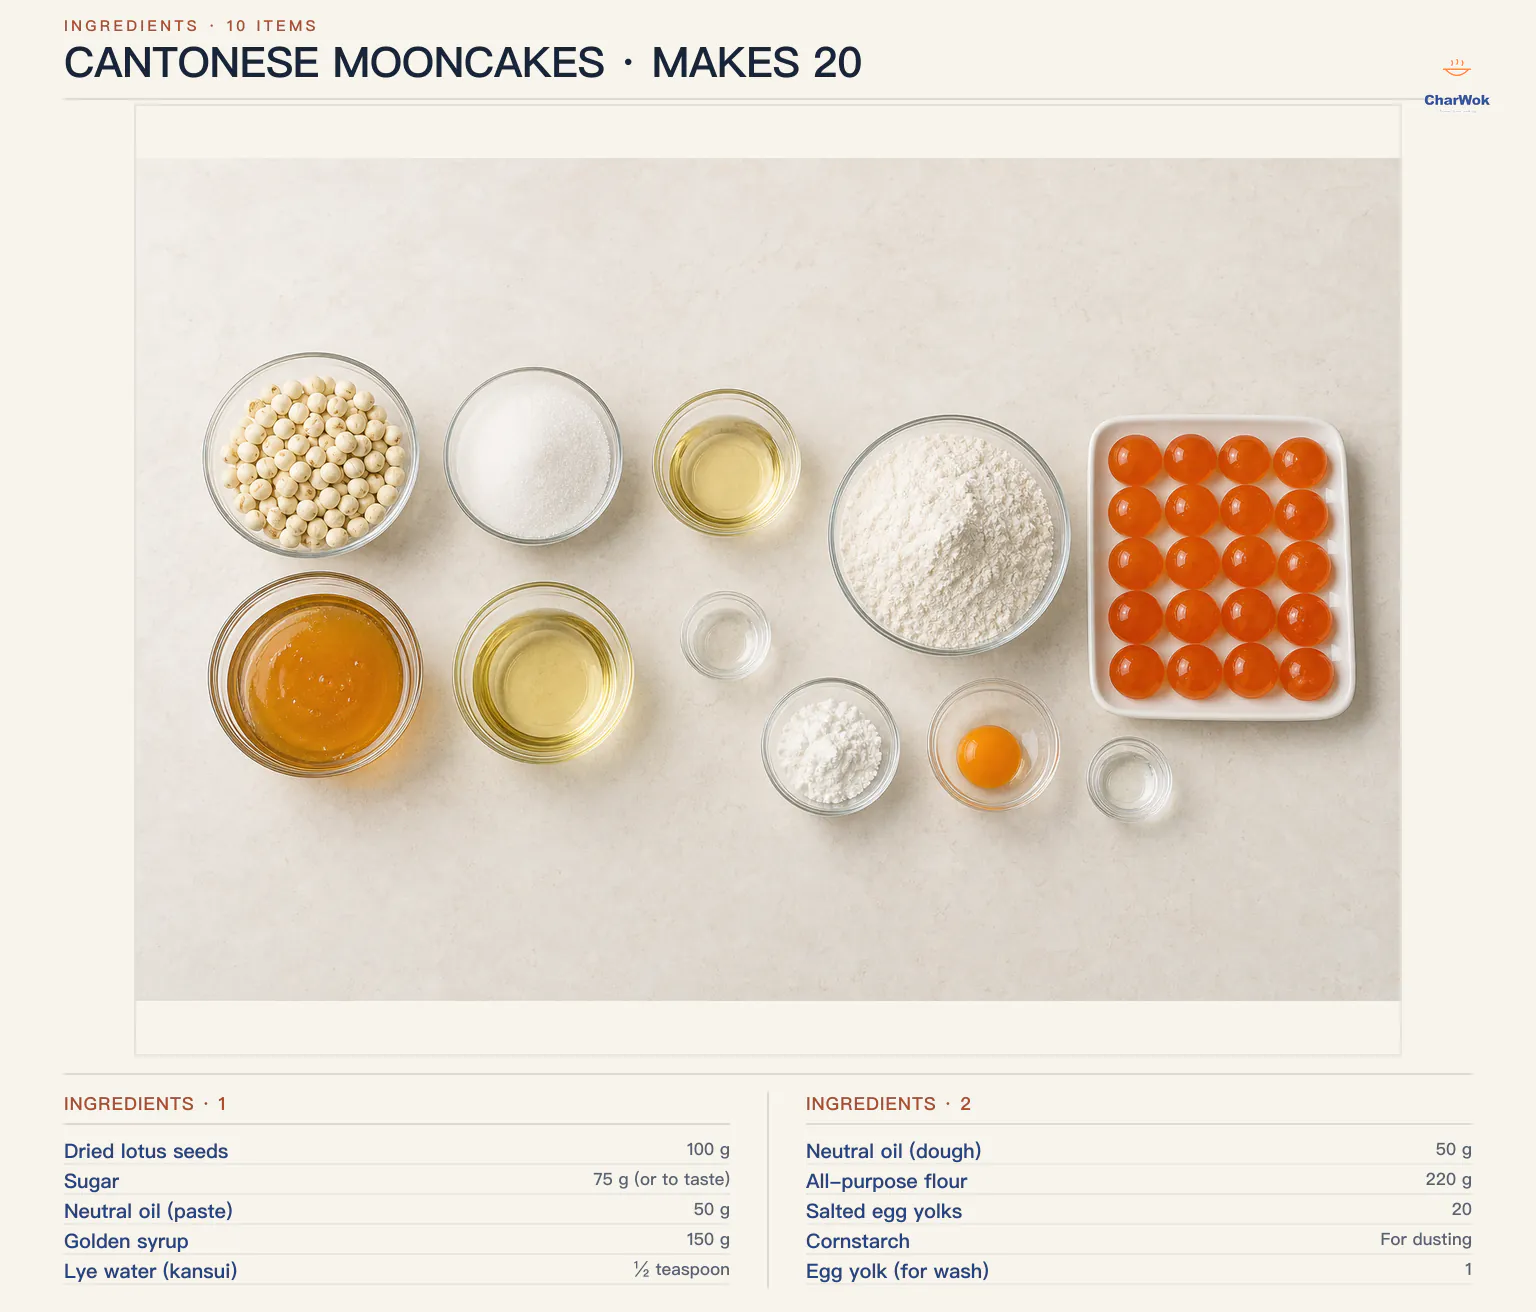
Two things are hard to replace: golden syrup and lye water. Both are sold in Chinese grocers and online, and both keep indefinitely in the pantry. Lye water is also worth keeping around if you ever want to make alkaline noodles at home. Everything else is forgiving.
| Ingredient | Amount | Notes / substitute |
|---|---|---|
| Dried lotus seeds | 100 g | For the paste. Skip entirely if using ready-made lotus paste: plan on about 300 g, since each cake takes only ~15 g of paste wrapped around a yolk. If you make a no-yolk version, double that to ~600 g. |
| Sugar | 75 g (or to taste) | White granulated. Reduce to 60 g if you prefer less sweet. |
| Neutral oil (paste) | 50 g | Sunflower, canola, peanut, or vegetable. |
| Golden syrup | 150 g | Also called invert syrup. Lyle's Golden Syrup works. In a pinch, substitute a thick simple syrup cooked with a squeeze of lemon. |
| Lye water (kansui) | ½ teaspoon | Non-negotiable for the authentic skin. Sold in small bottles; a little goes a long way. |
| Neutral oil (dough) | 50 g | Same neutral oil as above. |
| All-purpose flour | 220 g | Plain flour. Low-protein cake flour gives a more tender crust; bread flour makes it too tough. |
| Salted egg yolks | 20 | Buy ready-to-use vacuum-packed yolks, or salt your own from raw duck eggs. |
| Cornstarch | For dusting | Prevents sticking in the mold. Do not use flour for dusting. |
| Egg yolk (for wash) | 1 | Mixed with 1 tsp water for brushing. |
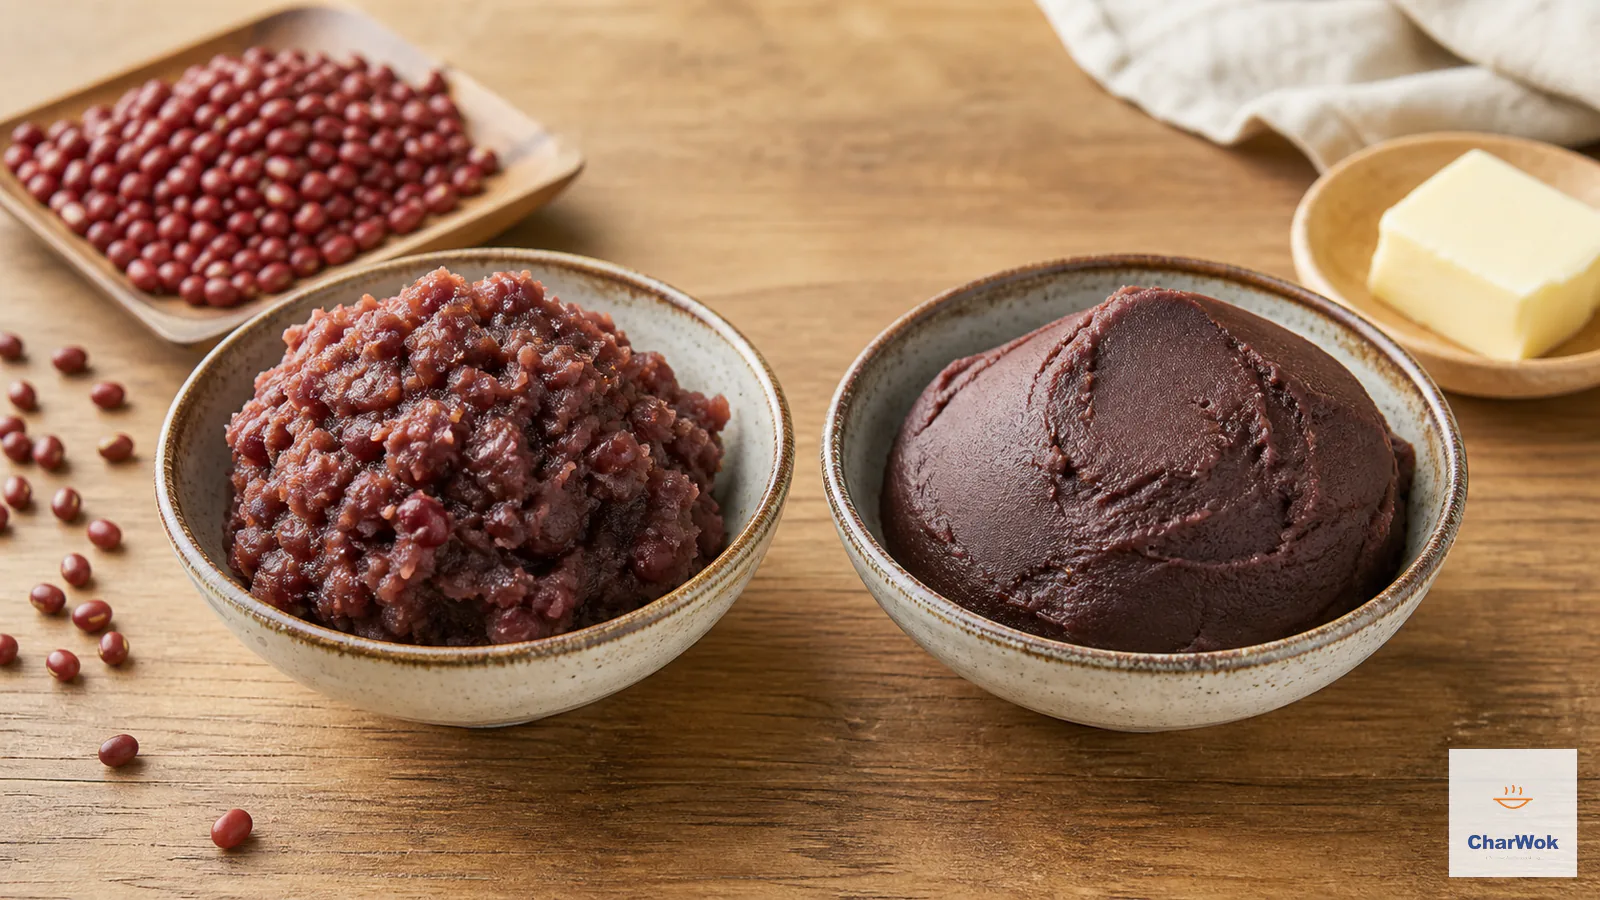
If the lotus paste intimidates you, swap in red bean paste or a dark black sesame filling. Both are traditional mooncake fillings and both are easier to find ready-made. The dough recipe stays the same.
Making the lotus seed paste from scratch
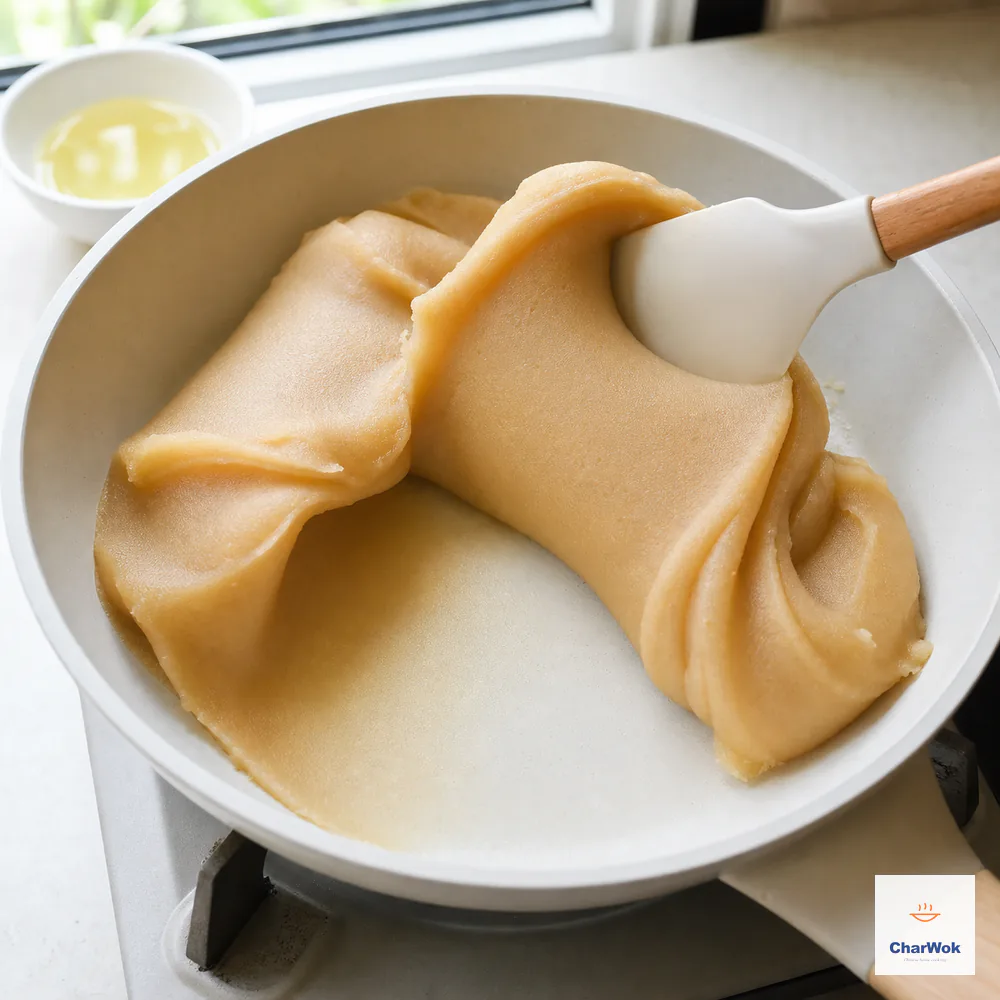
For homemade filling, keep frying and folding until the paste gathers into one smooth mass and a spatula stroke leaves the pan clean; wet paste will soften the pastry later.
This is the hardest part of the whole project, and the part where a good shop-bought paste is a perfectly honorable shortcut. I make it from scratch because I like controlling the sugar, but I will never judge anyone for buying it. If you do buy it, jump to the dough section.
Begin the night before by covering the 100 g of dried lotus seeds with plenty of water. The next morning, drain them and go through one seed at a time, halving it and prying out the pale green sprout tucked inside the heart. It looks harmless but it is the single biggest enemy of a clean-tasting paste: leave it in and the whole batch turns bitter and takes on a murky green cast. Once every seed is sorted, simmer them in water to cover until a seed surrenders to a squeeze of your fingers, which lands somewhere in the 30-to-40-minute range. Drain and run them through a food processor into a smooth puree, loosening with a tablespoon or two of water only if the machine stalls.
The puree then becomes paste through patient stovework, and the goal is twofold: drive off the water the seeds absorbed, and emulsify fat and sugar into what is left. Warm a non-stick pan over medium heat and tip in the puree. Work the 75 g of sugar and 50 g of neutral oil in across several rounds rather than all at once, and keep the spatula moving the whole time, scraping and folding so nothing catches. Watch the texture travel through stages: loose, then thick, then a dense glossy mass that cleaves cleanly from the pan and holds whatever shape you press it into. Budget a good 20 to 30 minutes of arm work. Take it off while it is still marginally softer than your target, because carryover heat and cooling will set it further. The same logic governs the cooked fillings in red bean buns and custard buns: firm enough to handle at the bench, still yielding once it is sealed inside.
Mixing and resting the dough
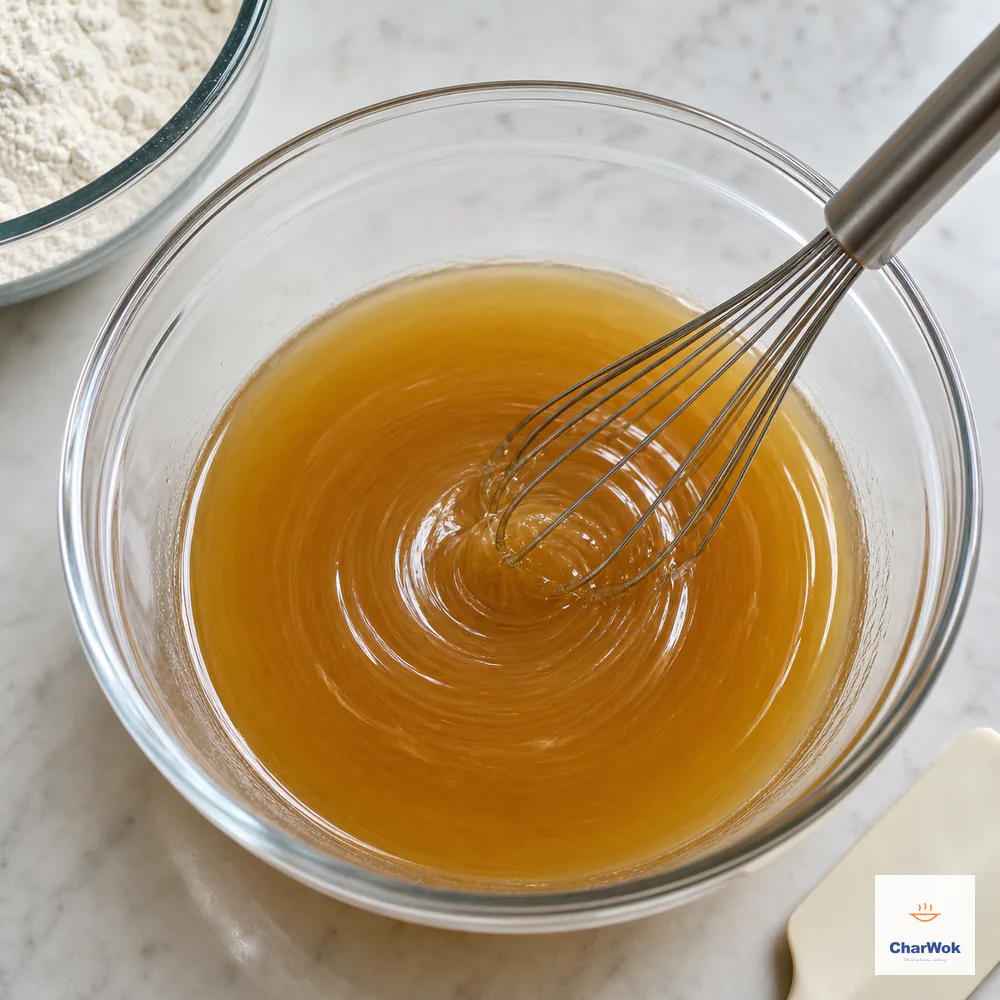
Whisk the golden syrup, dough oil, and lye water until no oily streaks remain, then add the flour; a complete emulsion gives the pastry an even color and texture.
Build the dough in two moves and resist any urge to knead it. In a bowl, whisk the 150 g golden syrup, 50 g neutral oil, and ½ teaspoon lye water into a cloudy, uniform liquid, then dump in the 220 g all-purpose flour in one go and bring it together with a spatula until no dry streaks remain. That is the entire mixing step. Where bread wants developing, this dough wants neglect: a few folds and you stop. Expect it to look rough and cling to your fingers, because that ungainly texture is the dough doing its job.
Cover it tightly with plastic wrap, pressed directly against the surface, and rest for 30 minutes at room temperature. The rest lets the flour hydrate evenly through the syrup and the alkali and lets the light gluten relax. After the rest, the dough will feel smoother and noticeably easier to handle. You can rest it longer, up to about an hour, but past that the dough simply goes slack and gets hard to press cleanly into the mold, so an hour is the practical ceiling.
How to portion, fill, and shape without the pastry tearing
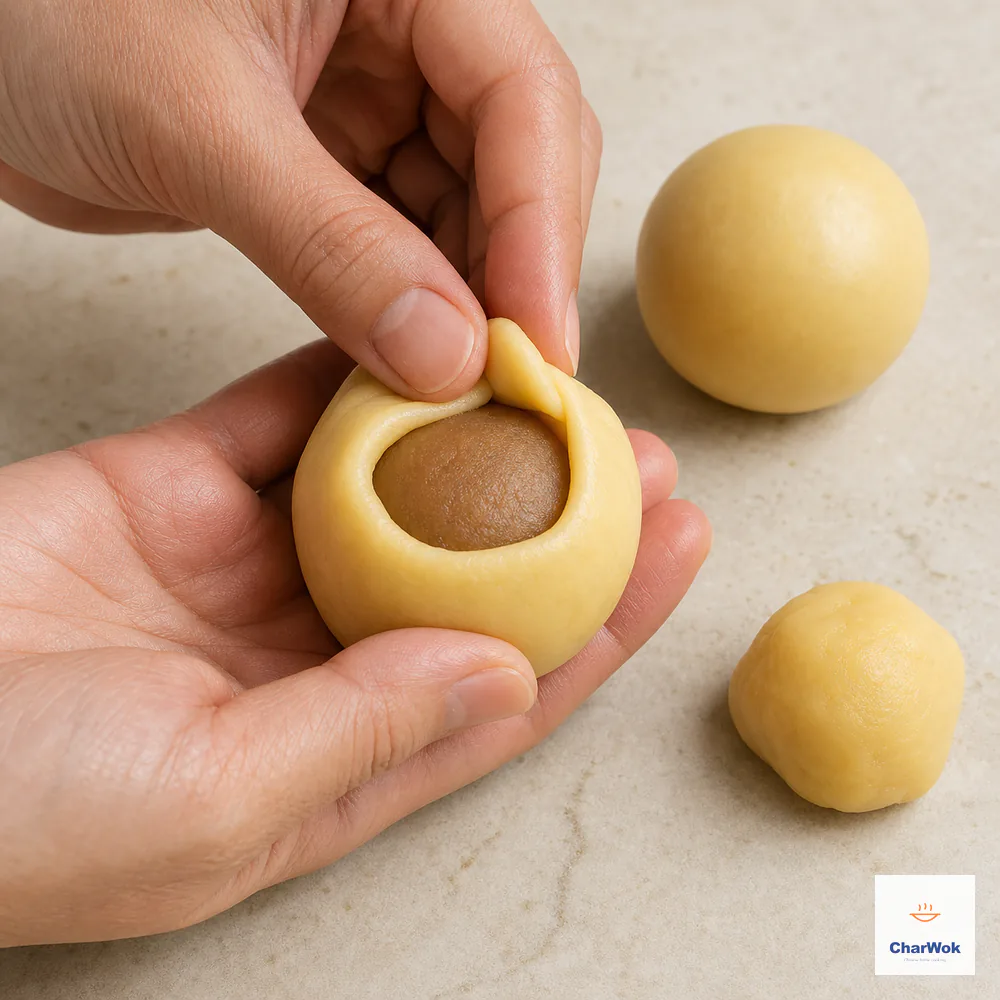
Use about 20 g pastry per cake and push it upward a little at a time, rotating as you go, so the filling is covered by an even shell without cracks.
This is where home bakers fall apart, and the fix is almost entirely about ratios and cold hands. Divide the dough into twenty 20-gram pieces and the paste into twenty portions, sized so that each one, together with one salted egg yolk, totals 30 grams. Keep everything under a damp cloth so the dough does not dry out.
Take one portion of paste, flatten it into a disc in your palm, set a salted egg yolk in the middle, and work the paste upward around it with your thumbs until the yolk is fully enclosed in a smooth ball. Then take one 20-gram piece of dough, flatten it into a thin round, set the filled paste ball in the center, and use the same upward-pushing motion to wrap the dough tightly around it. The trick is to keep the dough thicker in the center and thinner at the edges, and to push the paste up rather than trying to pull the dough down. The dough is stretchy but tears easily, so work slowly. If a tear appears, pinch a tiny scrap of dough over it and smooth it shut.
Now the satisfying part. Give each filled ball a momentary roll in cornstarch and shake off all but a barely-there dusting, because that film is the only thing standing between crisp mold lines and a stuck cake. Set the ball inside the mold, upend the mold onto a parchment-lined tray, and press the plunger down with steady, even body weight to drive the design in. Hold for a beat, then withdraw the mold straight up while easing the plunger back to release the cake onto the paper. Flour does the opposite of cornstarch here and clogs the grooves, so do not be tempted to swap. If your design reads faint, the cause is always one of two: a timid press or too heavy a dusting. Add pressure next time and lighten the coating.
The two-temperature bake and the egg wash
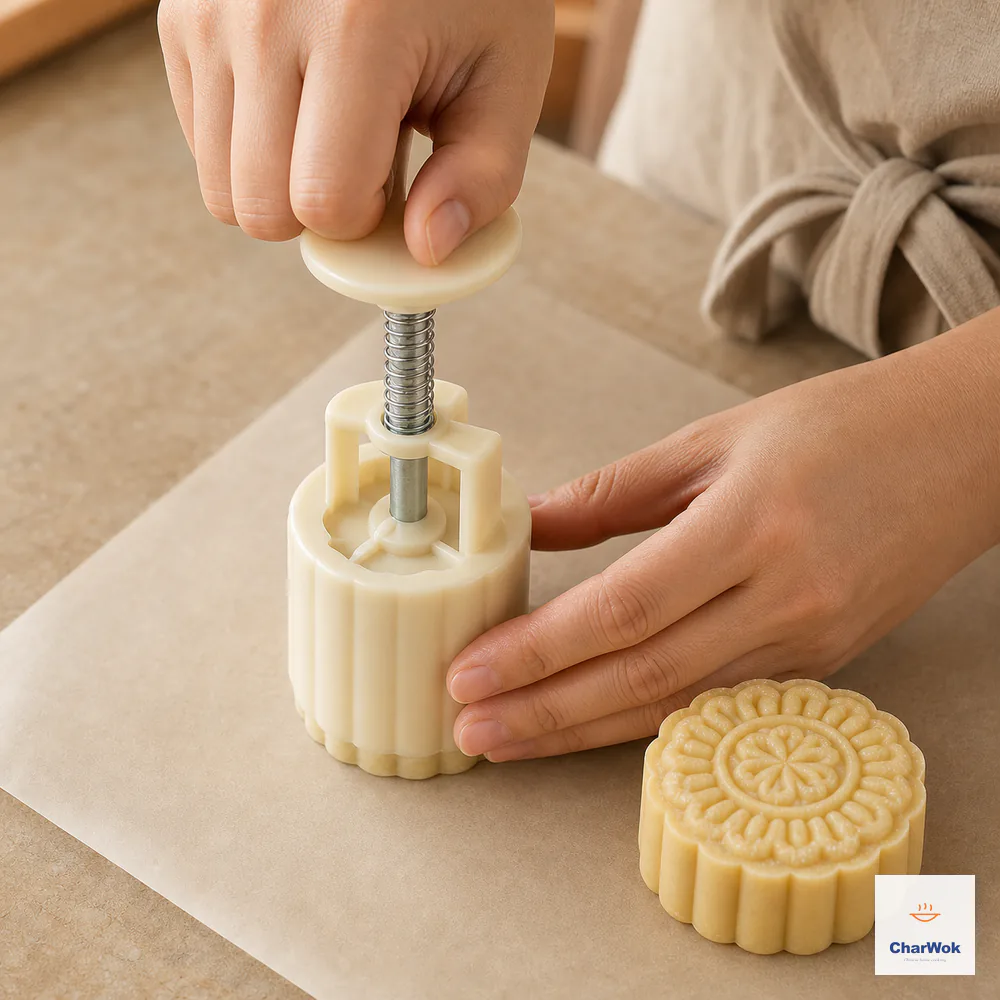
Dust the filled ball with only a thin veil of cornstarch and tap off every excess, then press straight down and release onto parchment to keep the pattern sharp.
The bake is built around protecting the pressed design, which is why it happens in three short visits rather than one long one. A hot oven first — 190°C / 375°F — for a brief 5-minute set. The point of that opening blast is to firm the dough so the lines survive the brushing that comes next. While it works, whisk 1 egg yolk with 1 teaspoon of water into your wash.
Drop the oven to 160°C / 320°F, pull the tray out, and lay down a thin, even coat of wash with a soft brush. Thin is doing all the work in that sentence: a heavy coat settles into the grooves of the pattern, blurs the lines, and bakes into dark stripes. Slide the tray back for another 5 minutes, bring it out for a second light pass of wash, then return it to finish for 10 to 15 minutes, pulling when the tops read an even deep gold. The whole point of splitting the wash across two thin applications rather than one generous one is even color. Count on roughly 20 to 25 minutes of total oven time.
Cool the mooncakes completely on a rack before doing anything else. They will look slightly puffed and the dough will feel hard. This is not a failure. This is the before picture.
Rest them, or throw out everything you just did
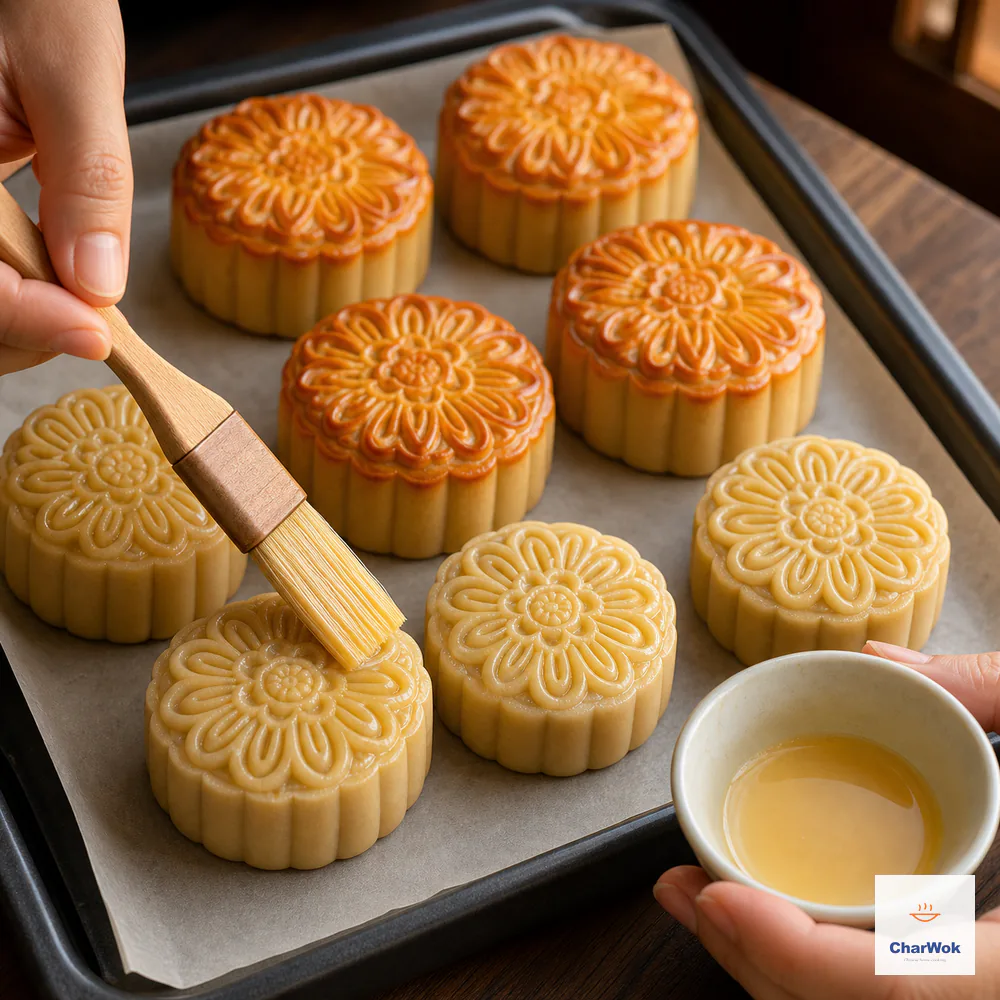
After the first 5-minute set, brush only a whisper of egg wash over the raised pattern without flooding the grooves, then bake again to an even golden-red and rest 1 to 2 days for the oil-return sheen.
Once cool, put the mooncakes in an airtight container and leave them at room temperature for 1 to 2 days before eating. This waiting period goes by the name 回油 (huí yóu), and what is physically happening is the crust taking back its fat: the oil built into the dough, helped along by the moisture-loving invert syrup, migrates outward through the starch and protein of the shell over the first day or two. The shell you took out of the oven, hard and matte, is gradually plasticized into something glossy and giving, and the chalky raw-flour edge disappears with it. I have had readers message me in a panic because their mooncakes looked dull and felt tough the day they baked them. Every single time, the answer was to wait.
You will know they are ready when the skin gives slightly to a gentle press and has a soft sheen. If after two days they are still hard and matte, your dough was overworked or too dry, which I cover in troubleshooting below.
When things go wrong: a troubleshooting guide
I have made every mistake on this list. Here is what causes each failure and how to fix it on the next batch.
The pattern disappeared or blurred. Either the dough was too warm and soft when molded, or the egg wash was too thick. Chill the filled balls for 10 minutes before molding, dust with only a whisper of cornstarch, and apply the wash in two thin layers, not one heavy one.
The crust cracked or the filling bulged out. The dough was too dry or rolled too thin at the seam. Measure the flour by weight, not by volume, and keep the dough slightly thicker at the top of the ball where the pattern sits. A cracked mooncake is still edible, just ugly.
The skin stayed hard and pale after two days (no oil return). Usually too much flour or too little syrup and oil in the dough. Recheck your weights: 150 g syrup, 50 g oil, 220 g flour is the working window. A dough that is dry to the touch right after resting will not soften later.
The yolks look gray-green around the edge. Overbaked yolks. The yolks are raw-cured (brined or salted, then separated), so the bake is what actually cooks them. You want them just set, not driven past done. Pull the mooncakes the moment the crust is evenly golden; leaving them in the oven longer pushes iron and sulfur in the yolk together into the gray-green ring you sometimes see in hard-boiled eggs.
The paste wept oil or felt greasy. The filling was undercooked or the oil was added before enough water had cooked off. Next time, dry the puree longer before adding oil, and add the oil slowly in small additions.
The bottoms burned. A hot spot in the oven, or a dark baking sheet. Use a light-colored tray and double-pan it with a second sheet underneath for insulation.
Variations, fillings, and what to serve alongside
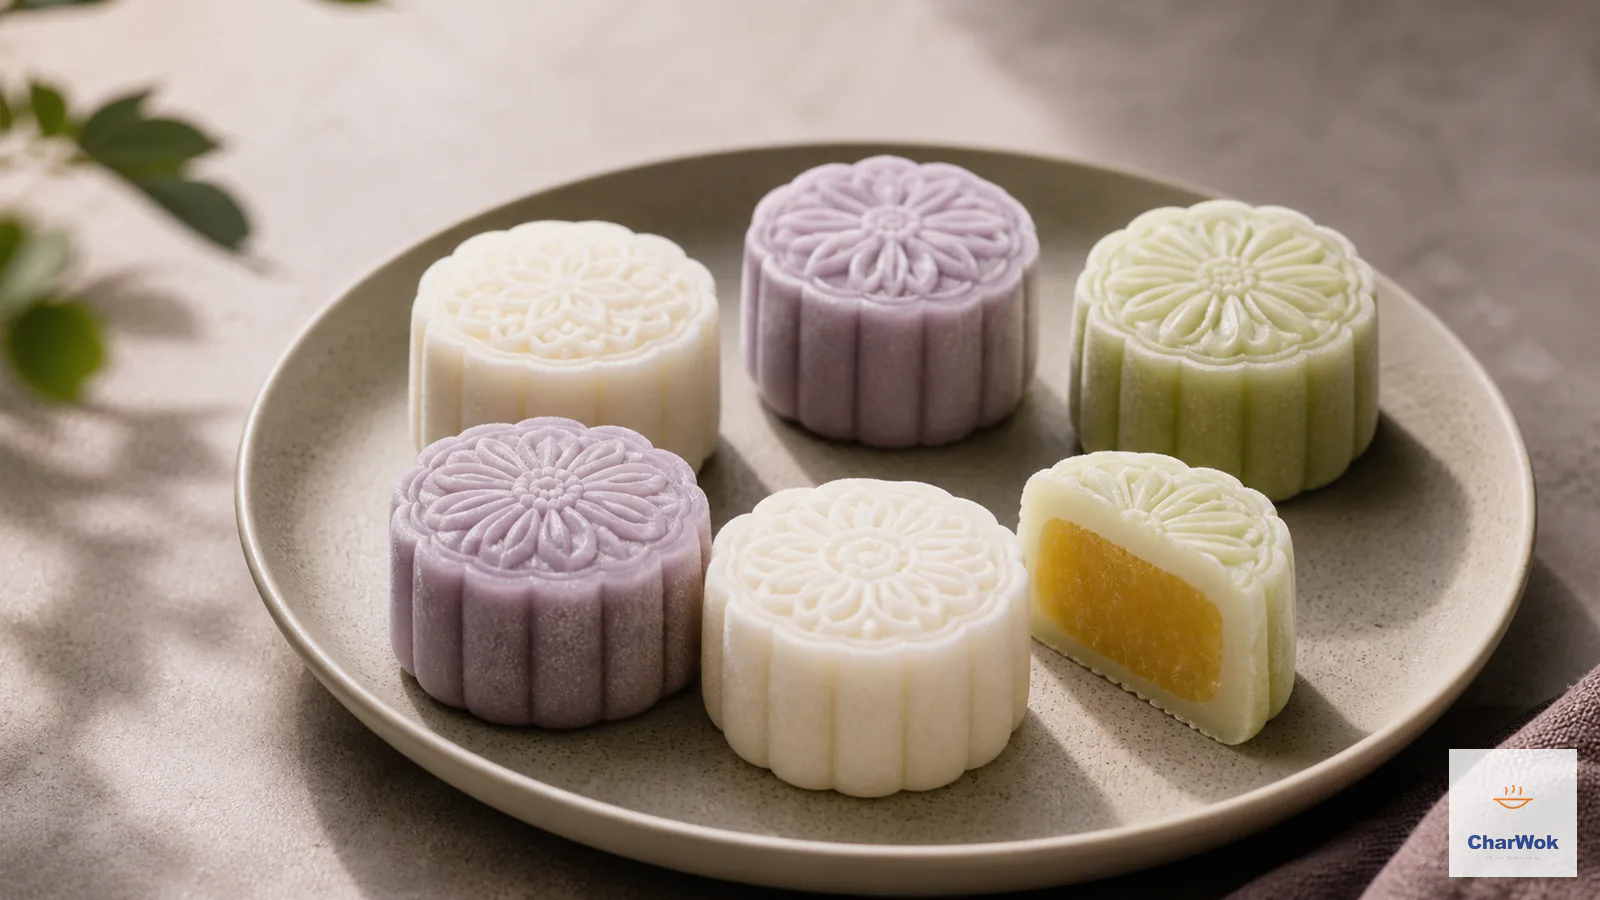
Once the dough method is yours, the fillings open up. The five-kernel mooncake (五仁) mixes chopped nuts and candied winter melon; jujube-paste mooncakes use sweet red date paste; and modern bakery versions hide a molten salted-egg custard center. For a no-bake route that skips the lye water entirely, the snow-skin mooncake uses a glutinous rice-flour dough and is served chilled.
The classic pairing is hot unsweetened tea. Pu-erh, jasmine, or oolong all cut through the richness. In a Cantonese bakery context these sit among the greatest hits of the Cantonese table, alongside char siu bao and sesame balls as festival and teatime sweets. If you want to round out a Mid-Autumn spread, add something crunchy like peanut and sesame brittle or almond cookies, and a lighter baked sweet such as a mango pancake for contrast. For a different kind of celebratory baked treat, a baked rice cake or a tin of homemade fortune cookies travel well as gifts. A bowl of sweet red bean soup served warm makes a quiet, warming finish.
Storage and reheating
Keep rested mooncakes in an airtight container at room temperature for about a week. For longer storage, refrigerate them for up to two weeks and bring them back to room temperature before serving; cold pastry is hard and the yolk texture suffers. They also freeze well for a month or two, wrapped individually. Thaw overnight in the fridge, then rest on the counter. There is no good reason to reheat a mooncake. The soft, glossy, just-rested texture is the whole point, and warmth turns the pastry gummy.
Questions home cooks actually ask
Frequently asked questions
Can I skip the lye water? No, not for an authentic Cantonese crust. Lye water is what gives the golden color and the soft, glossy skin after resting. Without it you get a pale, bread-like wrapper that never softens properly.
Can I use store-bought lotus paste? Yes, and most home bakers should. Look for one labeled lotus seed paste, smooth or with bits depending on your preference. Because each yolk version cake takes only about 15 g of paste, roughly 300 g is enough for the 20 mooncakes here. It saves an hour of stovetop stirring.
Why are my mooncakes hard the day I bake them? That is normal. The crust softens over 1 to 2 days as the syrup and oil migrate outward, a process called oil return. If they are still hard after two days, the dough had too much flour or too little syrup.
Do I need a special mold? A mooncake mold gives the characteristic pressed pattern, and a plastic plunger mold is cheap and reusable. Without one, you can press the balls flat and call them mooncake cookies, but you lose the look.
Can I make these without egg yolks? Yes. Use a solid 30-gram ball of lotus paste, or press a different filling like red bean or black sesame, into the center. Bake time and temperature stay the same.
Why two layers of egg wash instead of one? One thick coat pools in the mold lines, blurs the pattern, and bakes unevenly. Two thin coats, applied five minutes apart, give a clean, even sheen.
The single most important thing I can tell you, after many batches of these, is to trust the rest. A mooncake fresh from the oven is a different object from a mooncake two days later, and the difference is the entire reason this recipe works. Weigh your flour, source the lye water, give the paste the time it needs on the stove, and then let the finished cakes sit until they tell you they are ready.