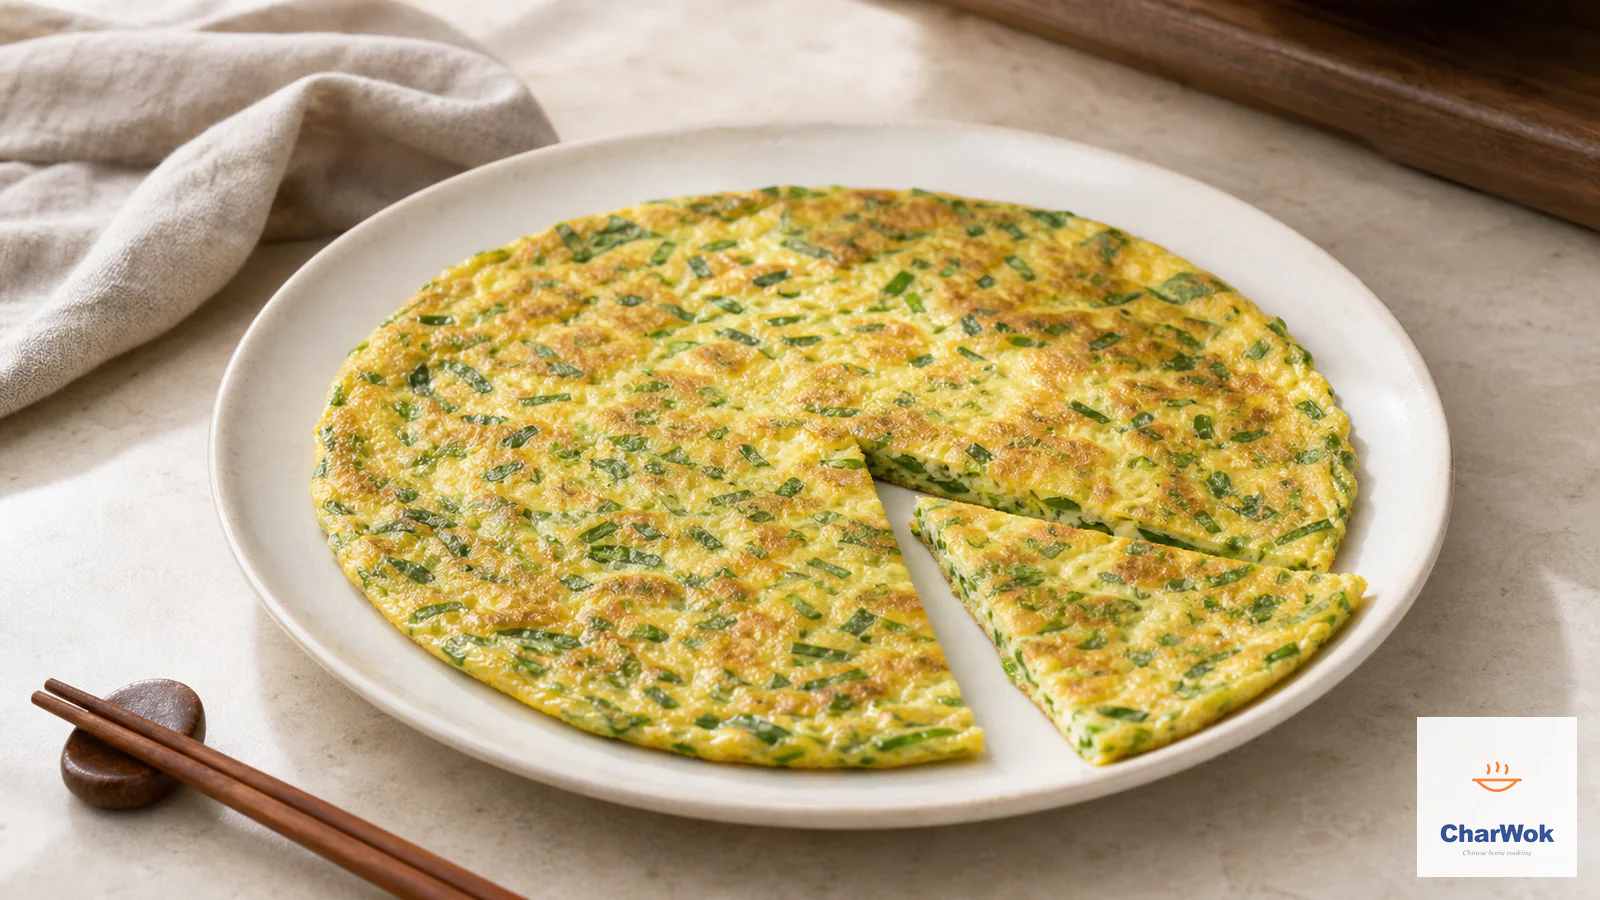
There is a garlic bulb sitting in your kitchen right now with a pale green shoot poking through its center, and you are one decision away from throwing it out. That shoot is not a sign the garlic has gone bad. It is a sign the garlic wants to keep growing, and with a shallow dish of water and a sunny windowsill you can let it. A week later you will be cutting bright green, mild garlic-flavored sprouts straight into a pan of eggs.
This is one of those projects that costs nothing and pays back in flavor. The omelette at the end is the point, but the growing is half the fun, and if you have kids it is the kind of small daily ritual they remember years later. I will walk you through what is actually happening in the bulb, how to set up the dish so the cloves do not rot, and then how to cook the sprouts into a soft, savory omelette that beats anything you can get from raw scallions. I will also be honest about where this technique has limits, because it does.
At a glance: Sprouted garlic cloves, peeled and stood root-down in half a centimeter of water, give you edible green shoots in 7 to 10 days. Snip them when they pass 15 cm (6 in) and fold them into a two-egg omelette cooked over medium-high heat. The one decision that matters most is water depth: just the root plate, never the clove itself.
What is actually growing out of your garlic?
That green shoot inside an old garlic clove is the plant's embryo stem, racing toward light once it has decided winter is over. Botanically garlic reproduces mostly through its cloves, but every clove carries a dormant shoot that will activate given warmth and time. Left in a dry, dark place it eventually pales and turns bitter as it draws starches and sugars out of the surrounding flesh, which is why a sprouted clove tastes sharper and less sweet than a fresh one. The shoot itself, by contrast, is tender and sweet with a clean, grassy garlic note, closer to a young scallion than to the bulb it came from.
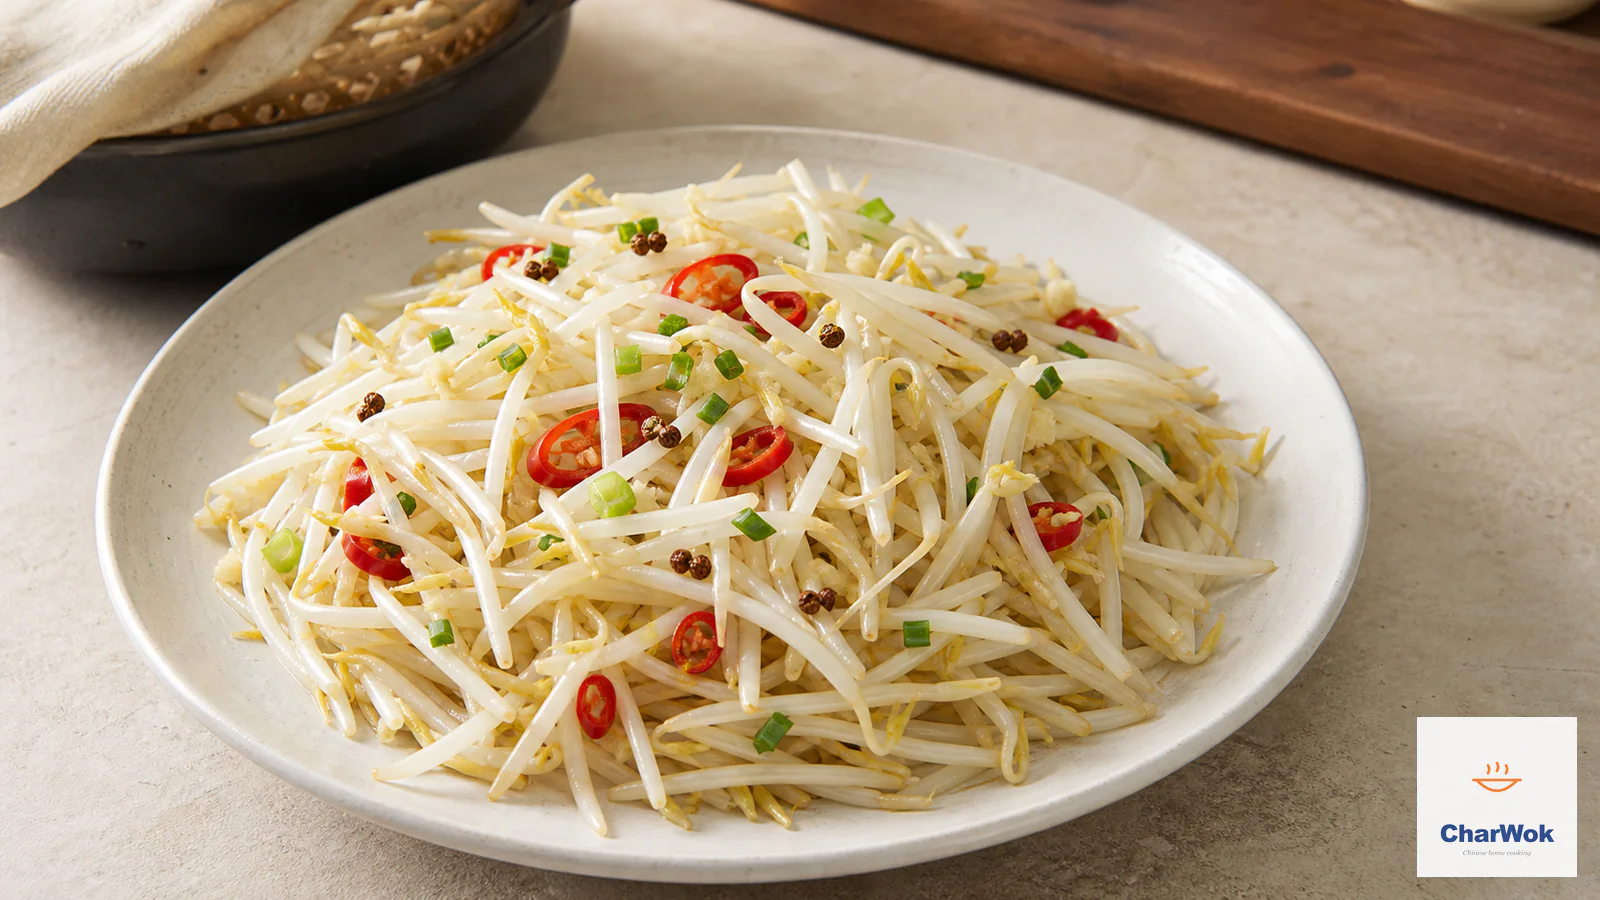
So the bulb is not spoiled. You have two reasonable paths. One is to split the clove and lift out the green core, then use the surrounding flesh as normal garlic, slightly diminished in flavor but fine for a quick stir-fry. The other is to feed the shoot instead of fighting it, which is what we are doing here. If you have tried sprouting other alliums at home, the same instinct applies: this is essentially the same idea as growing mung bean sprouts on the counter, just with a bulb instead of a seed.
Why bother, when scallions exist?
I get the question. Scallions are cheap, always in the store, and need no setup. Here is my honest take. Garlic sprouts are not a replacement for scallions; they taste different. They carry the roundness of cooked garlic without the bite, and a slight sweetness scallions do not have. In a plain egg dish, where there is almost nothing to hide behind, that difference is the whole dish. If you have ever had a really good plate of Chinese chives and egg stir-fried together, you understand how much a single allium can carry a pan of eggs. Sprouted garlic plays the same role with a different accent.
There is also the satisfaction angle, which I will not pretend does not matter. Cooking something you watched grow on your own windowsill changes how the meal feels. It is not better than store-bought in every measurable way, but it is yours.
Setting up the dish (and the one mistake that ruins it)
Use only cloves that already have a visible green shoot. A dormant clove will sit in water and eventually rot. Separate the bulbs by hand, and peel each clove. Leave the woody root plate at the base intact. That flat, hard disk is what will push out the first white roots, and cutting it off sets you back days.
Stand the peeled cloves close together in a small flat-bottomed dish, shoot end pointing up, but not jammed tight. The cloves swell as they drink, and crowding them pushes some above the waterline unevenly. A ramekin, a small tapas dish, or the lid of a jar all work. I avoid tall glasses because you cannot see the water level at a glance.
Now the part most people get wrong. Add only enough water to just cover the root plate at the bottom of each clove, about half a centimeter. If the water comes up the side of the clove, the flesh sits in moisture, goes soft, and rots within days, taking on a sour smell that is impossible to mistake. The clove itself should stay mostly dry and above the water. Think of it as a seed in a shallow tray, not a flower in a vase.
Put the dish on a bright windowsill, out of direct midday sun, and check the water every day. Top it up as it evaporates and change it completely every two to three days to keep the roots oxygenated and odor-free. You will see white roots within a day or two and green shoots climbing fast after that.
When to harvest
The shoots are usable from about 10 cm (4 in) onward, but I wait until they pass 15 cm (6 in) and look like sturdy grass, usually around the seven-to-ten-day mark. Cut them with scissors about 2 cm (an inch) above the clove and you will often get a second, smaller flush. Treat the second cut as a bonus rather than the plan; the clove's reserves are finite and the regrowth is thinner and milder. After the second cut, compost what is left.
Use them the day you cut them if you can. They keep two or three days wrapped loosely in the fridge, but like all tender shoots they lose snap and aroma fast.
The omelette
Ingredients at a glance
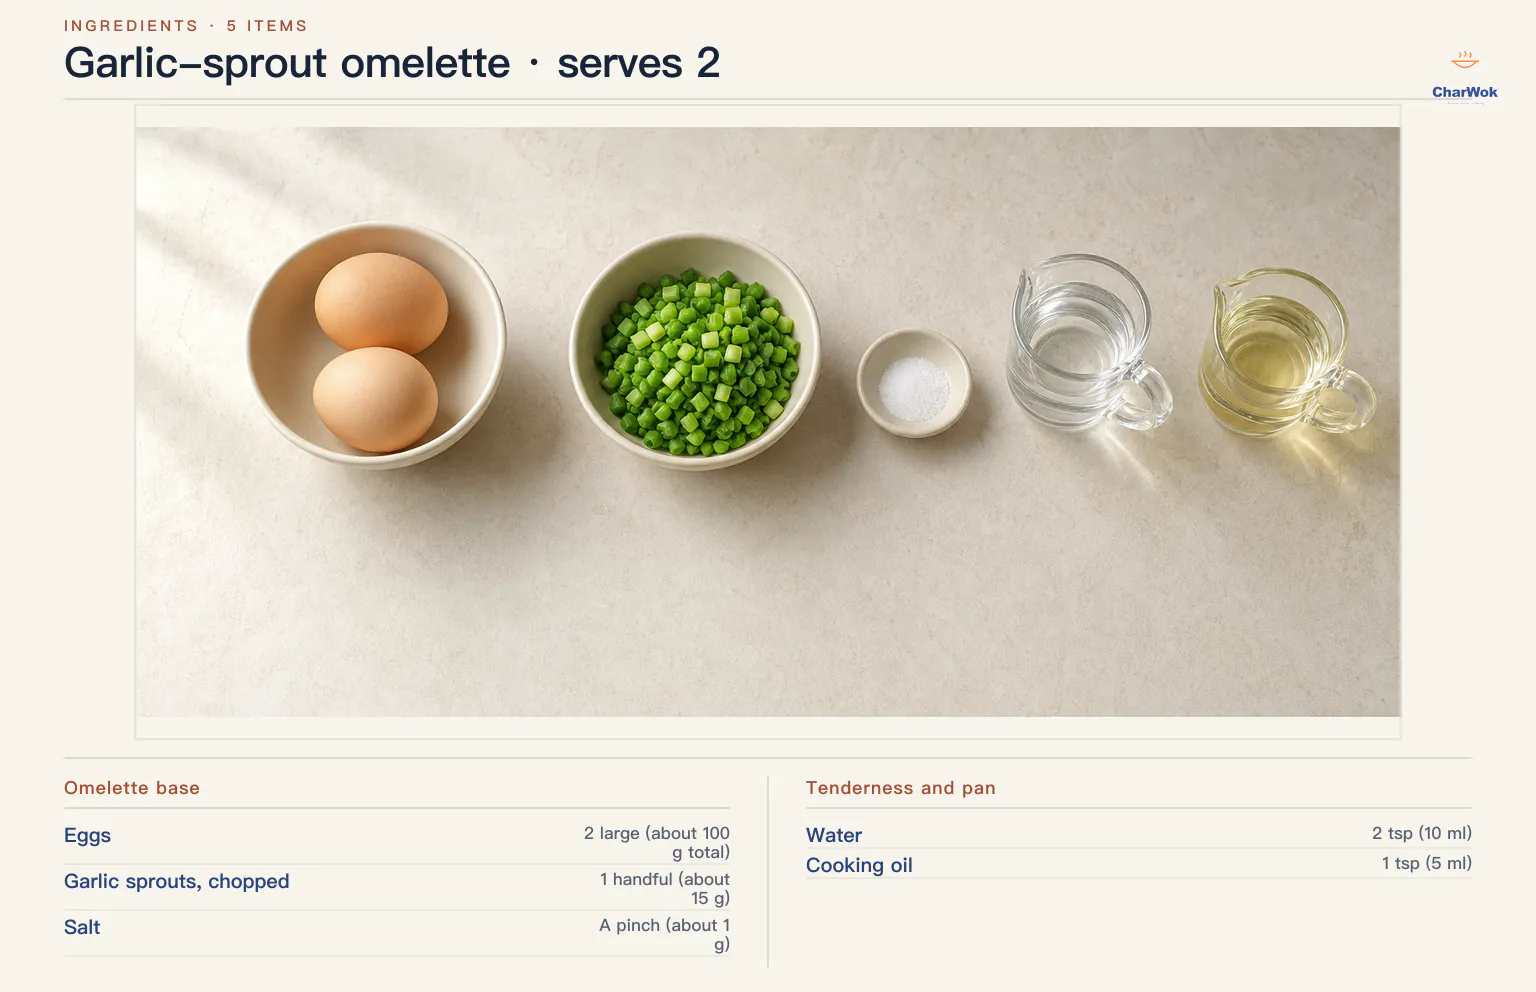
This is a two-egg, two-person omelette built to let the sprouts speak. The trick borrowed from every well-run Chinese egg dish is a splash of water beaten into the eggs: it steams from the inside as the eggs set, leaving the curd softer than eggs alone ever manage. You can see the same principle at work in a tofu omelette or in the custard-like set of properly made Chinese steamed eggs — a little extra water, handled right, is the difference between rubbery and tender.
| Ingredient | Amount | Notes / substitute |
|---|---|---|
| Eggs | 2 large (about 100 g total) | Room temperature if possible; cold works but sets slightly slower |
| Garlic sprouts, chopped | 1 handful (about 15 g) | Substitute scallion greens, garlic chives, or ramps; not raw garlic |
| Salt | A pinch (about 1 g) | Light soy sauce (1/2 tsp) if you prefer a savory edge |
| Water | 2 tsp (10 ml) | The softening agent; do not skip |
| Cooking oil | 1 tsp (5 ml) | Neutral oil; a few drops of sesame oil at the end is optional |
Method
- Beat the eggs with intent. Crack the eggs into a bowl with the water, salt, and chopped sprouts. Whisk until the yolk and white are fully blended and slightly foamy on top, about 30 seconds with a fork. Under-beating leaves streaks of white in the finished omelette; the goal is one uniform pale yellow liquid so the sprouts distribute evenly.
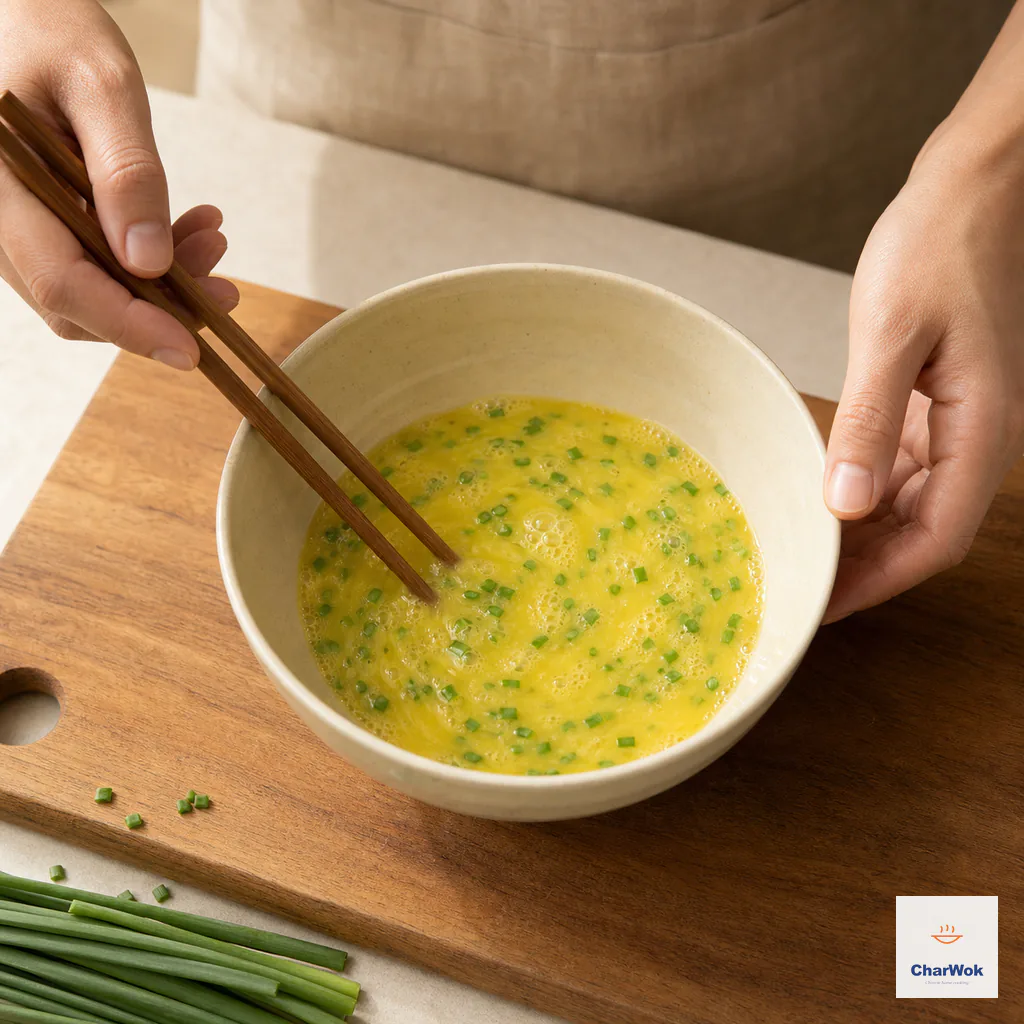
Beat the eggs, chopped sprouts, salt and water until no clear egg-white streaks remain and the sprouts are evenly distributed.
- Heat the pan dry-hot first. Put a nonstick pan (about 20 cm / 8 in) over medium-high heat for a minute before adding the oil. A properly preheated pan is what stops eggs from sticking and gives you that lightly browned, slightly crisp underside. If you add oil to a cold pan and pour in the eggs right away, you get a pale, weepy omelette instead.
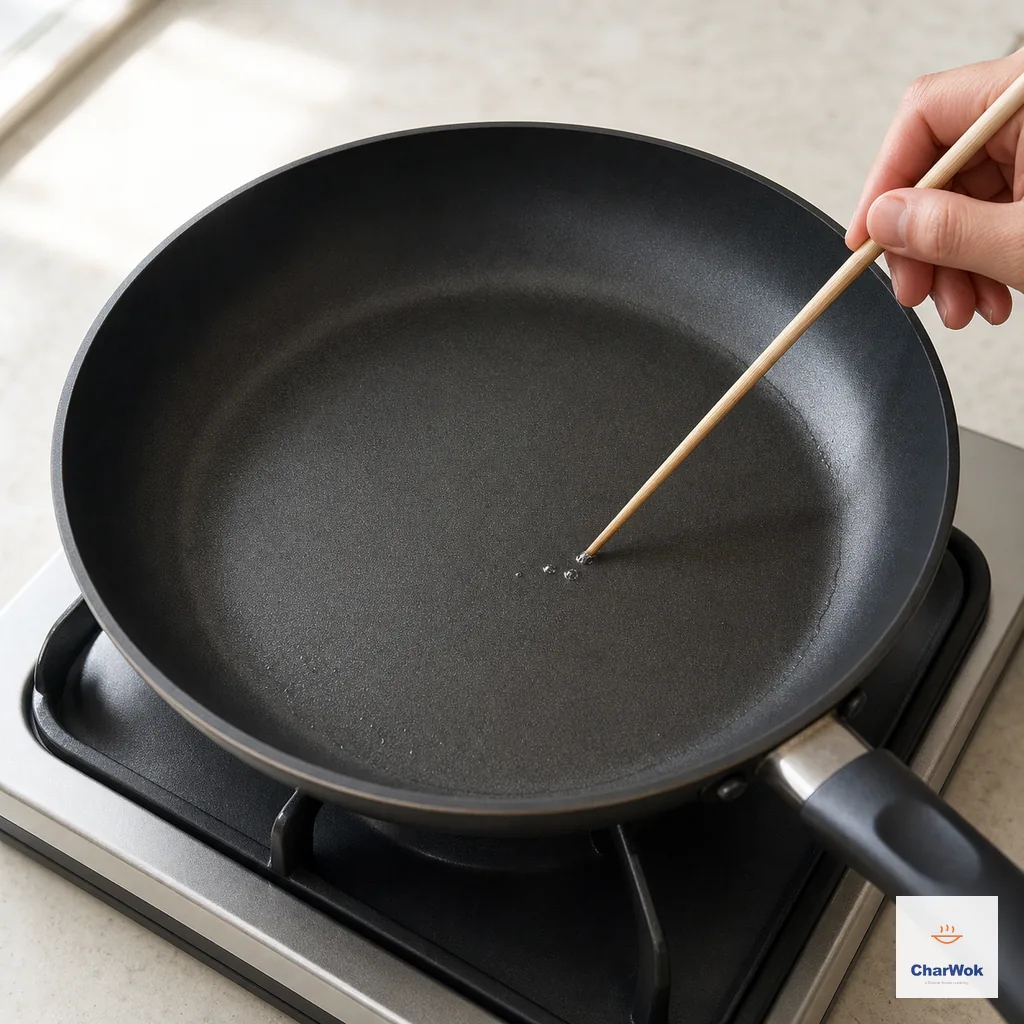
Preheat the dry pan, add one teaspoon oil and wait for tiny bubbles at a chopstick tip without letting the pan smoke.
- Add the oil, then pour immediately. Swirl the oil to coat, then pour in the egg all at once. Tilt the pan so the mixture spreads into a thin round. Let it sit for about 10 seconds until the edges set, then give the pan a gentle shake. The sprouts are already mixed in, so there is nothing to add later.
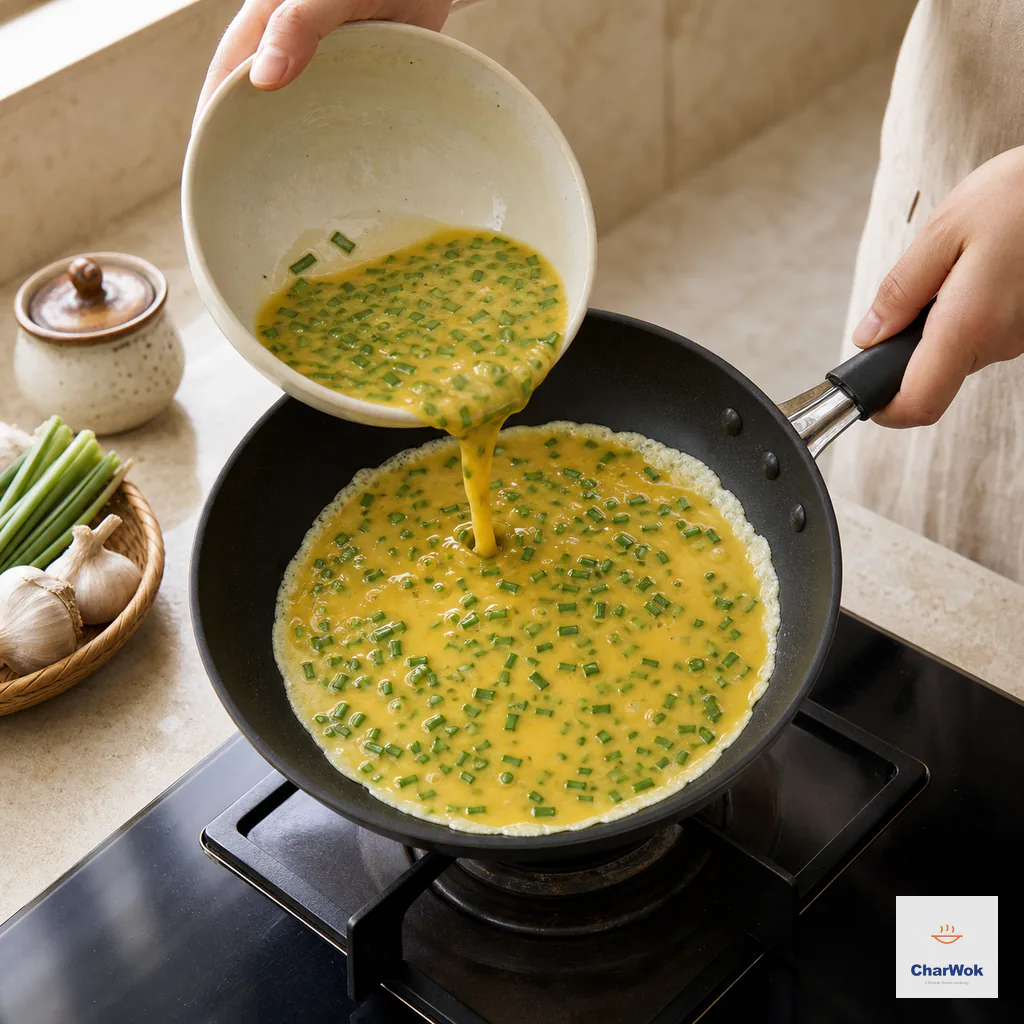
Pour in all the mixture and tilt the pan immediately so it spreads into one thin round; stop moving it once the edge begins to set.
- Flip when the underside is golden, not before. Wait until the bottom is a deep golden brown and the top is still a little wet but no longer liquid. This usually takes 60 to 90 seconds. Flipping too early tears the omelette; waiting until the top is fully dry overcooks it. A thin spatula run around the edge first makes the flip clean.
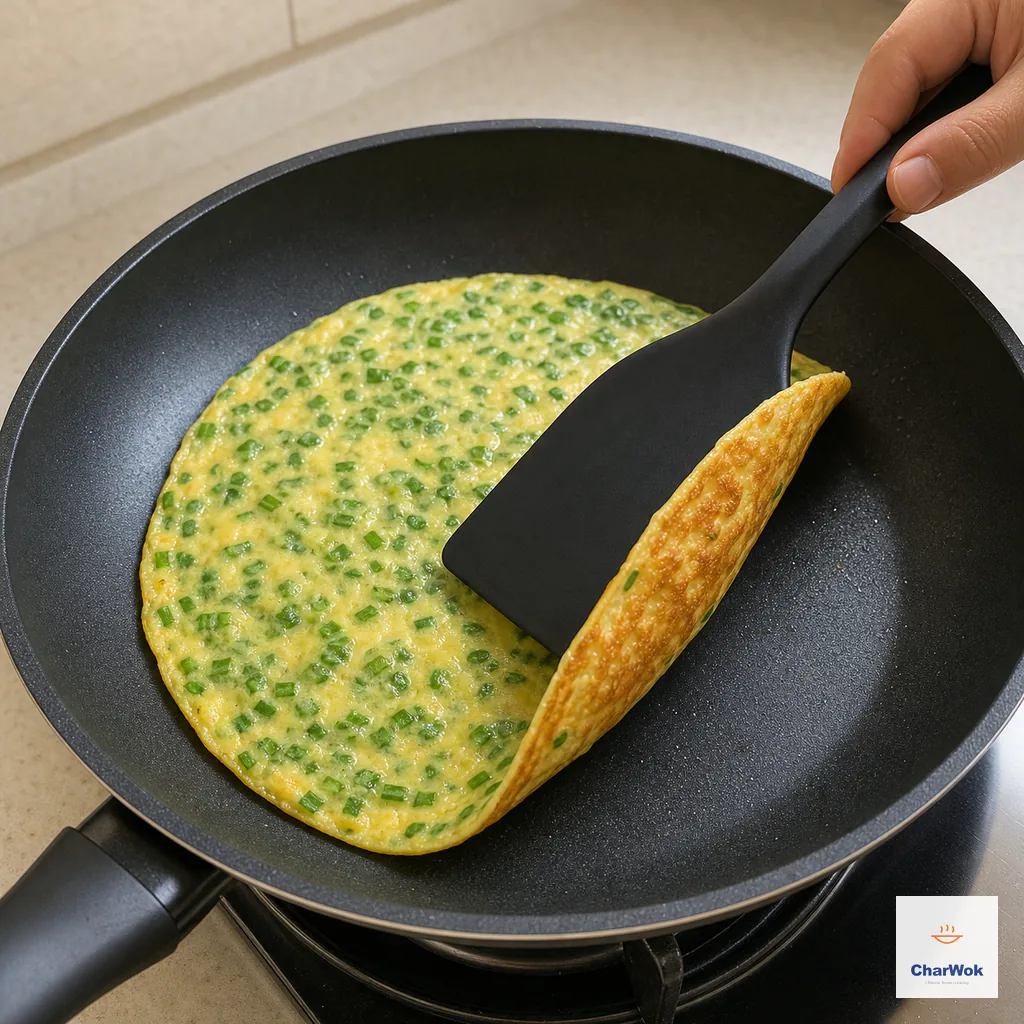
When the underside is golden and the top is still slightly moist but no longer liquid, release the edge and turn the omelette intact.
- Finish the second side briefly. Cook 20 to 30 seconds more — just enough to set the second side and warm it through. Slide it onto a plate. The residual heat finishes the center, so pull it a touch before you think it is done.
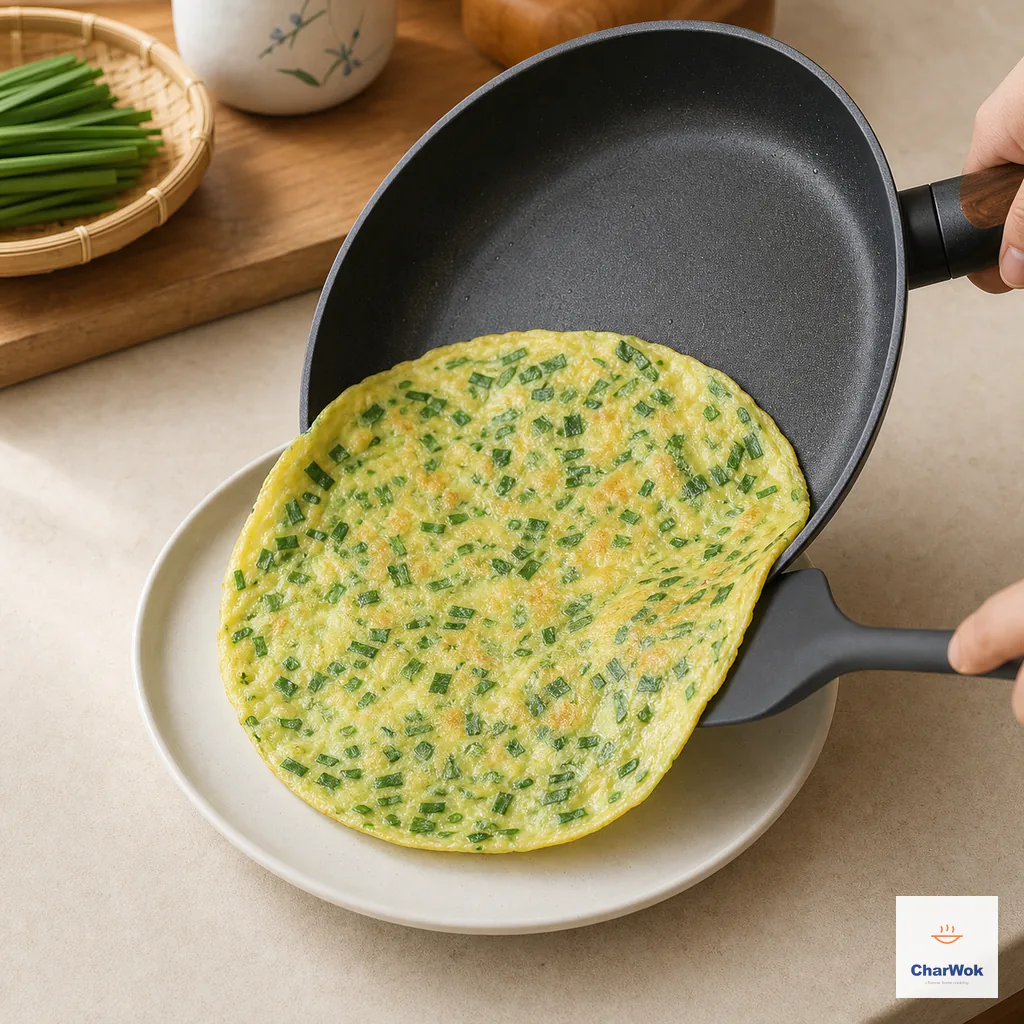
Cook the second side only briefly, then slide the omelette straight onto a plate before the egg dries out.
When the omelette goes wrong (and how to fix it)
Pale, soggy, weeping liquid. The pan was not hot enough or you crowded it with too much egg for the size. Preheat longer, use a smaller pan or fewer eggs, and do not skip the splash of water but do not exceed it. Wet and pale together almost always means low heat.
Brown and rubbery, dry on the plate. You cooked the second side as long as the first. The second side only needs to set, 20 to 30 seconds. Once the omelette is brown on both sides it is overcooked by Chinese-omelette standards, where a soft, just-set interior is the goal.
Omelette tore on the flip. The top was still too liquid when you turned it, or the egg stuck because the pan was underheated. Wait until the surface is mostly set with only a glossy wet film, run a spatula around the edge to release it, and flip with one confident motion.
The cloves rotted and the dish smells sour. The water was too deep. Only the root plate should sit in water; the clove itself stays dry above it. Start over with fresh cloves and half a centimeter of water, and change the water every couple of days.
Other ways to use the sprouts
An omelette is the cleanest showcase, but once you have a flush of sprouts you will want to scatter them everywhere you would use scallions. A few favorites: chopped fine over a bowl of hot and sour glass noodle soup or Sichuan hot and sour noodles, where the garlic sweetness rounds out the vinegar and chili; stirred into the broth of a simple yang chun mian at the last second; or folded through egg-fried rice noodles right before plating. They are also excellent as a raw garnish on a cold plate of smashed cucumber salad, standing in for the scallion you would normally use.
One note on cooking them hard: long, high-heat stir-frying kills the delicate flavor. Treat them as a finishing green, added in the last minute or used raw, the way you would chives. If you want a heartier allium base for a stir-fry, you are better off with regular garlic or with a recipe built around chives, like chive pockets or a flatbread such as oven-baked scallion bread. The sprouts earn their place at the gentle end of the cooking.
A note on the cousins of this dish
Egg-plus-allium is one of the great minimal categories of Chinese home cooking, and the garlic sprout omelette belongs to a small family of recipes that all reward the same attention to heat and timing. Alongside the chive-and-egg stir-fry I mentioned, there is the brighter, juicier tomato and egg stir-fry and the punchy, chili-forward Hunan egg with pickled chilies. Each one is cheap, fast, and surprisingly technical. Once the egg mechanics click for you here, the others come easily.
Storage and reheating
The omelette is best eaten the moment it leaves the pan; reheated egg is never as good as fresh egg. If you must, gently warm a leftover slice in a covered pan over low heat for a minute; the microwave makes it rubbery and weeps water. The raw sprouts keep two to three days wrapped loosely in the fridge, but the cloves in their dish keep producing, so you are better off cutting what you need each morning.
Questions that come up
Is the green shoot inside garlic safe to eat?
Yes. It is edible, though bitter when raw and cooked inside the clove. The shoots grown in water are sweeter and milder, which is the whole reason to grow them separately rather than eat the in-clove shoot.
Can I grow them in soil instead of water?
You can, and soil will give you sturdier, longer-lasting shoots and eventually garlic greens you can cut repeatedly. Water is faster and cleaner for a kitchen windowsill, and it lets you watch the roots, which is why I default to it for a first batch.
Will I get a new garlic bulb from this?
No. A single clove in water gives shoots, not a bulb. Growing a full bulb takes months in soil, cold weather to trigger it, and a different setup entirely. Treat this as a quick crop of flavorful greens, not a garlic harvest.
My sprouts taste weak. What happened?
Usually two things: you harvested too early, before the flavor concentrated, or the cloves were old and spent. Let shoots reach at least 15 cm (6 in), and start with cloves whose shoots are just emerging, not cloves that have been sitting soft for months.
So: rescue the next sprouted bulb from the compost bowl, stand it root-down in a shallow dish of water, and in a week or so you will have the best egg dish in your rotation. It is a small project, but the kind that quietly changes how you feel about the odd ends of your pantry.