The first time I made nian gao it came out of the tin looking fine and tasting of nothing much: a dense brown puck, gummy in the middle, with a raw-flour smell no amount of sugar could hide. I had done what a lot of recipes quietly tell you to do: mix cold water into glutinous rice flour, pour it into a pan, and steam it for an hour and hope. It took me three more tries to understand that this cake only behaves when you scald the flour first.
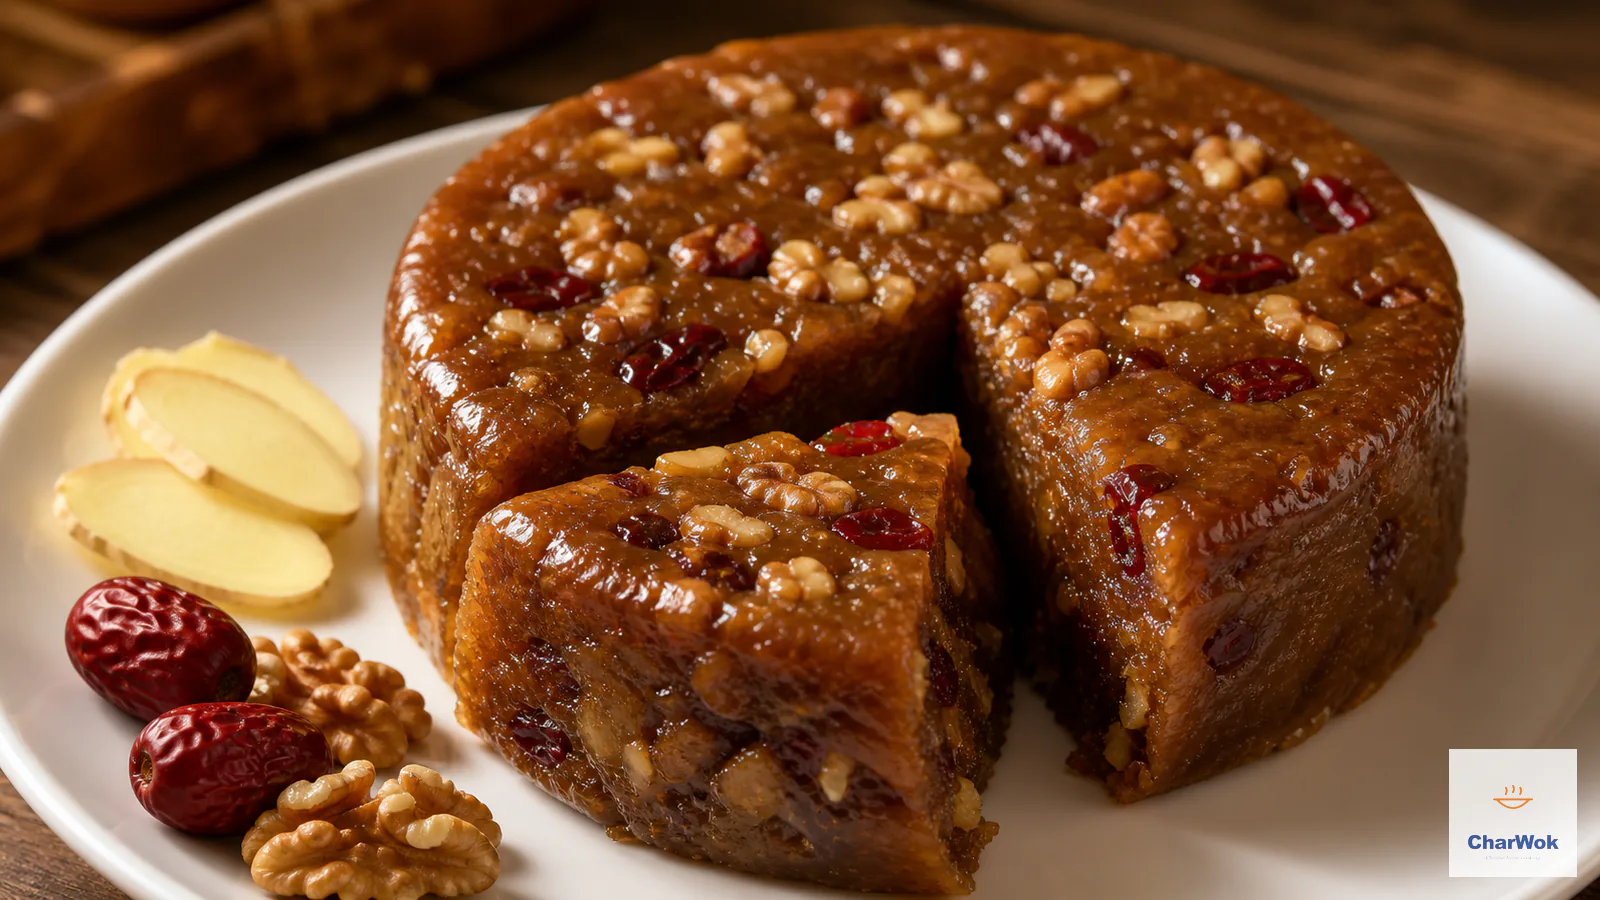
That scald is the whole point of this version. You dissolve dark brown sugar in water, bring it to a real boil, then pour it hot over the rice flour. The starch granules swell and gelatinize on contact, so the dough is half-cooked before it ever sees the steamer. The result is a cake that steams through in 45 minutes instead of 90, with no raw core and a cleaner, deeper flavor. Fold in soaked jujubes and toasted walnuts and you have the kind of nian gao people actually fight over: bouncy, glossy, studded with sweet-tart fruit and crunch.
At a glance. A 5:1 ratio of glutinous rice flour to regular rice flour gives the classic chew without turning to paste. Scald the flour with boiling sugar syrup, knead into a soft dough, fold in jujubes and walnuts, and steam 45 minutes over medium heat. The single biggest mistake is under-steaming or using cold liquid; both leave a gummy, raw-flour center. Cool fully before slicing.
What nian gao actually is
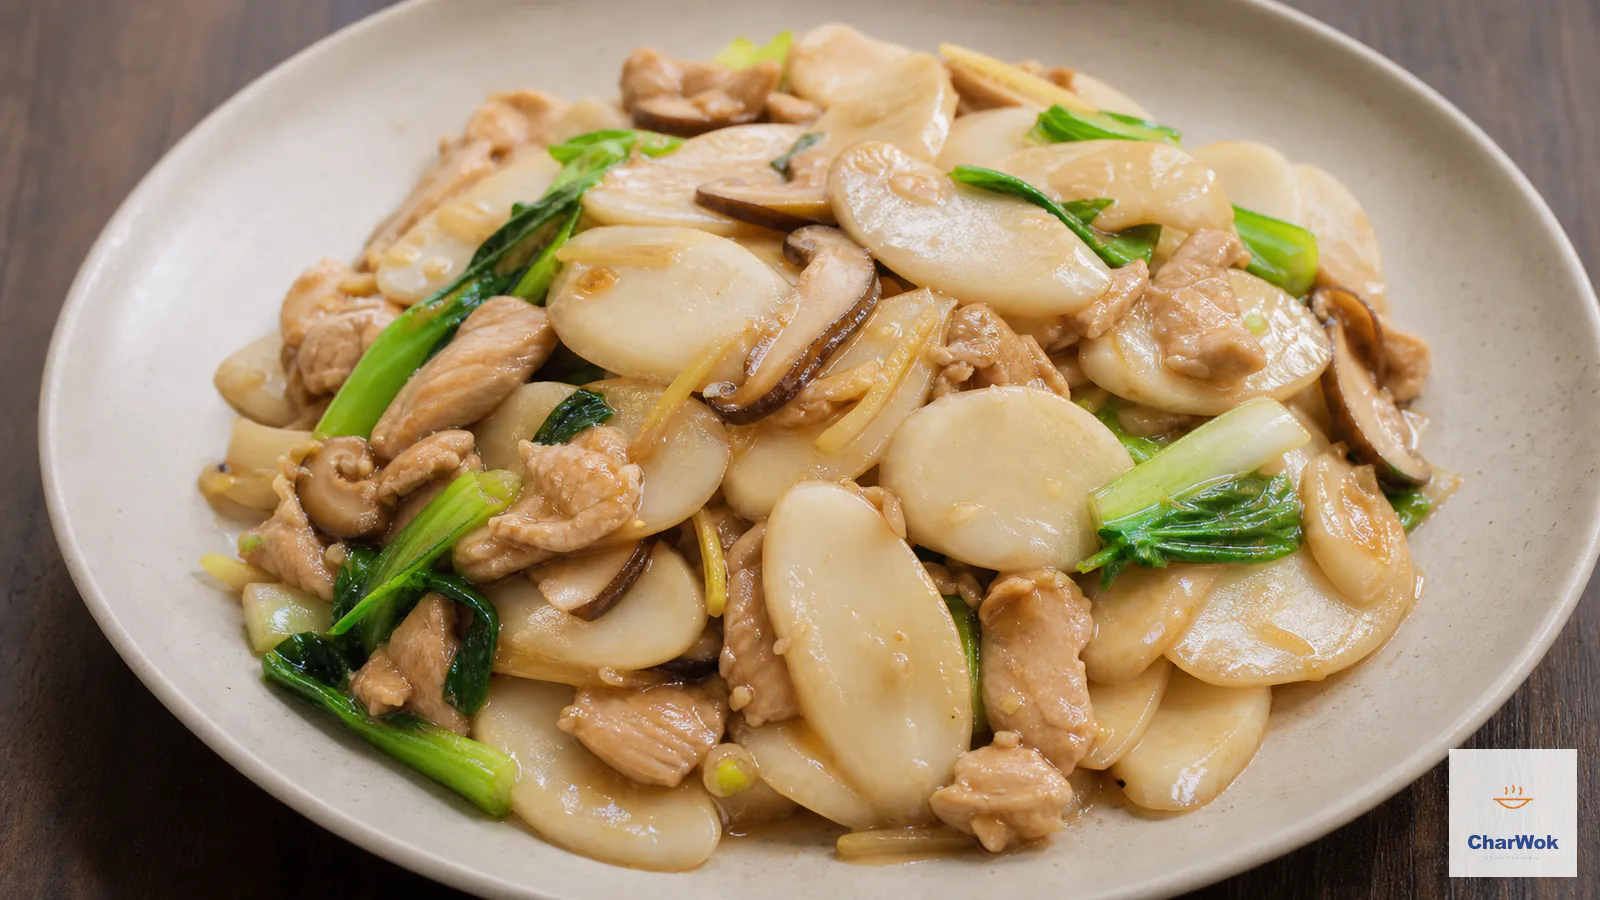
Nian gao (年糕) is the sticky rice cake that shows up on Chinese tables around the Lunar New Year. The name is a small pun: gao sounds like the word for "high" or "tall," so eating it is a wish to rise in the coming year. Across China the cake splits into two main camps. The northern style, the one here, is sweet: a dark, dense disc of brown sugar and rice flour, sliced and pan-fried until the outside crisps. The southern, Shanghai-and-below style is often the same sticky cake but eaten in savory slices stir-fried with pork and cabbage. (If you have leftover cake, that savory route is excellent; I have a separate guide to stir-fried rice cakes that covers it.)
This recipe is the sweet, steamed disc. It belongs squarely to the family of festive New Year foods that trade on symbolism as much as flavor, but it earns its place on the plate: the jujubes add a caramel-tart note that plain sugar can't, and the walnuts keep each bite from collapsing into pure stickiness. If you already make eight treasure rice pudding for the holiday, this is its denser, chewier cousin.
The two flours, and why you need both
Glutinous rice flour (sweet rice flour, nuo mi fen) is the body of the cake. Despite the name it contains no gluten; "glutinous" refers to the stickiness of the starch, which is almost entirely amylopectin. When heated with water it turns stretchy and translucent, which is the exact texture you want. I use 450 g of it here.
Pure glutinous flour, though, makes a cake so clingy it can feel like eating caulk. That is why I cut it with 100 g of regular rice flour (nian mi fen, milled from non-sticky rice). The regular flour has a higher proportion of amylose, which sets firmer and shortens the chew. A 5:1 ratio is the sweet spot for most people. Push it to 4:1 if you like a cake you can actually slice cleanly at room temperature; go 100% glutinous only if you want the softest, most mochi-like bite and don't mind the stickiness. It is the same logic behind why tang yuan dough is sometimes cut with a little regular rice flour so the balls hold their shape in boiling water.
Ingredients
Nian gao ingredients at a glance
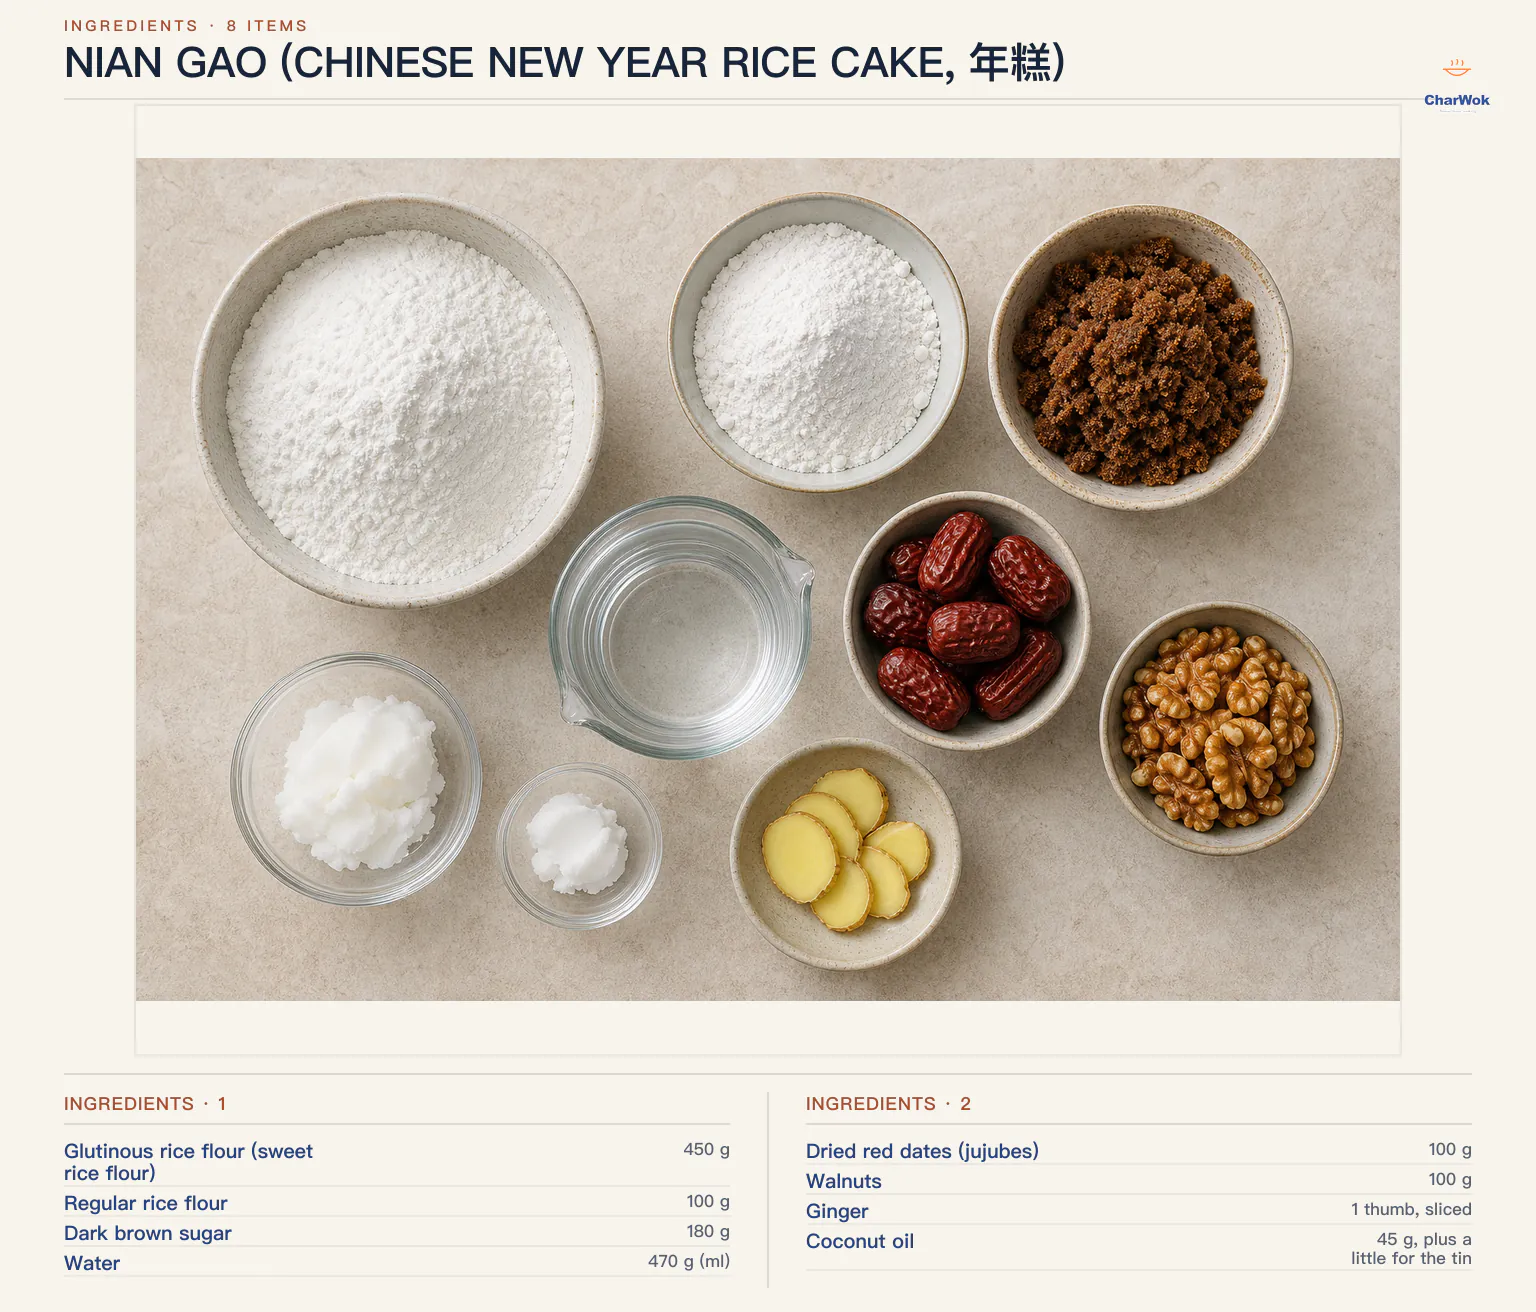
| Ingredient | Amount | Notes / substitute |
|---|---|---|
| Glutinous rice flour (sweet rice flour) | 450 g | Look for "glutinous rice flour" or "sweet rice flour." Mochiko works. Do not substitute regular rice flour alone. |
| Regular rice flour | 100 g | Milled non-sticky rice. If you can't find it, use 50 g tapioca starch for a similar firming effect. |
| Dark brown sugar | 180 g | Muscovado or Chinese brown rock sugar (bing pian tang) both work and give a deeper molasses note. Light brown is fine but paler. |
| Water | 470 g (ml) | Weigh it; you may not use all of it. |
| Dried red dates (jujubes) | 100 g | Find them in any Chinese grocery. Dried Medjool dates are a passable substitute; cranberries or raisins work for an allergy-friendly version. |
| Walnuts | 100 g | Peanuts, pecans, or sunflower seeds all fine. Toast them first for more flavor. |
| Ginger | 1 thumb, sliced | Steeped in the syrup for warmth, then removed. Skip if you dislike ginger warmth. |
| Coconut oil | 45 g, plus a little for the tin | Neutral oil (canola, grapeseed) works; coconut gives a faint fragrance I like. |
Equipment: a steamer you can trust
You need a heatproof container that fits inside your steamer with the lid closing. A 20 cm (8 in) round cake tin, ideally springform, is the classic shape (round for the "reunion" symbolism), but a square glass storage container or a deep plate works just as well. If you don't own a dedicated steamer, a wok or wide pot with a rack and a tight lid is enough; the same setup I use for pumpkin mochi and most of my steamed buns. The one thing that matters is that the lid domes up or is wrapped in cloth, so condensation doesn't drip straight onto the cake and leave a wet crater.
Method
- Soak the fruit and nuts. Cover the dried jujubes and walnuts in water the night before. Rehydration does two things: it softens the jujubes so they chop cleanly instead of shredding, and it lets the nuts release a little of their papery bitterness. If you forgot, a 30-minute soak in hot water will do in a pinch. Reserve one whole jujube for the top.
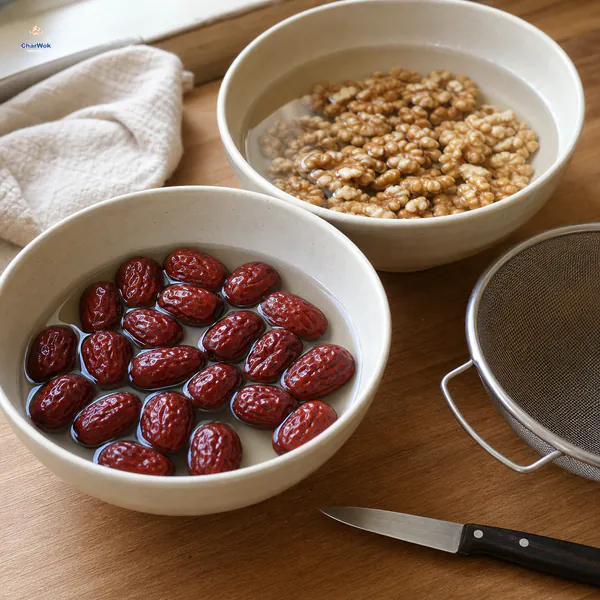
Soak the jujubes and walnuts for at least 4 hours or overnight, then drain them, remove the date pits and chop both into small pieces while reserving one whole date.
- Prep the tin. Brush a thin film of oil over the inside of your container and press a round of parchment into the bottom. The oil is the only thing between you and a cake that won't release; don't skip it.
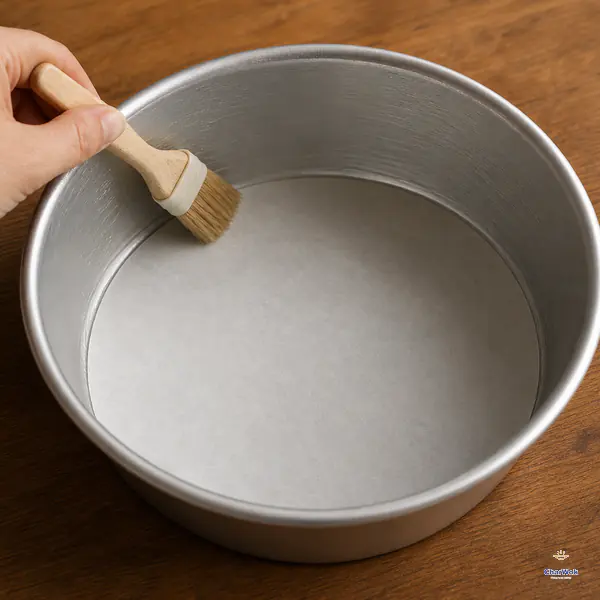
Brush a thin film of oil over the inside of the empty 20-centimetre tin and press one round of parchment flat against the bottom before adding any dough.
- Chop and combine the dry mix. Drain the jujubes, pull out any pits, and chop the fruit and nuts fairly fine (a food processor works, but pulse so you don't paste the walnuts). Toss them in a large bowl with both flours. Distributing the fruit through the flour now means no clumpy pockets later.
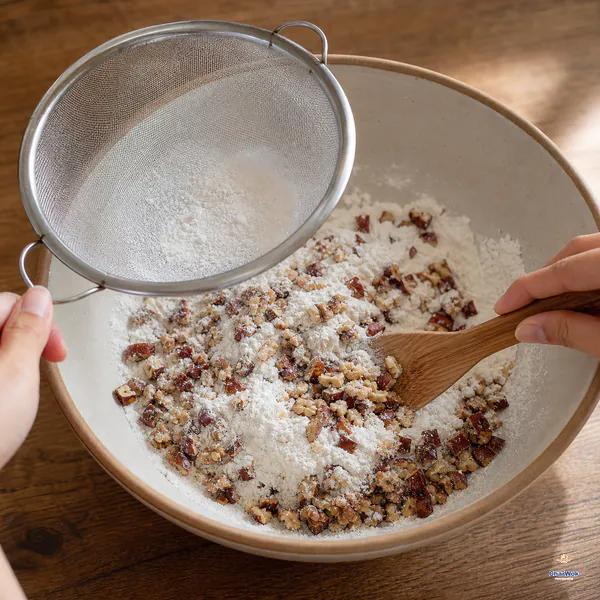
Sift both rice flours into a large bowl, then distribute the chopped jujubes and walnuts evenly through the dry mixture so no flour lumps remain.
- Make the syrup and scald the flour. Combine the sugar, ginger, and water in a saucepan and bring it to a full boil. Lower the heat, cover, and simmer 3 minutes; this is just to infuse the ginger and dissolve every crystal. Fish out the ginger, stir in the oil until it disappears, then pour about 90% of the hot liquid over the flour mixture. This is the step that defines the cake. The near-boiling syrup gelatinizes the surface starch, so the dough comes together soft and slightly translucent rather than chalky. You will feel the difference immediately.
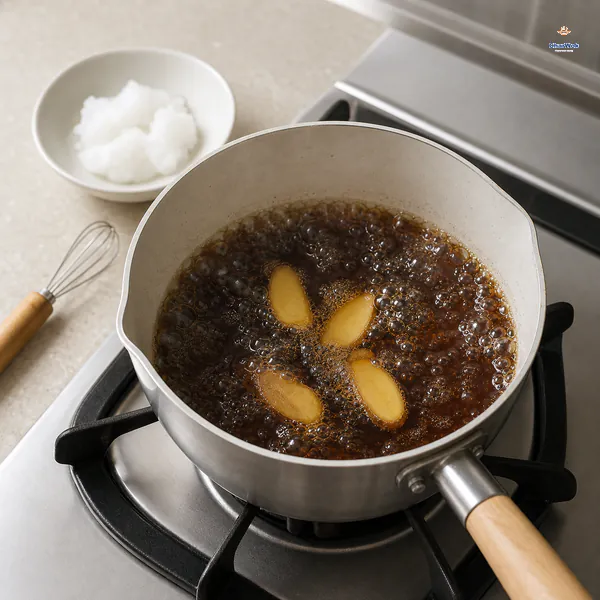
Bring the brown sugar, ginger and water to a full boil, cover and simmer for 3 minutes, then remove the ginger and whisk in the coconut oil until incorporated.
- Knead to a soft dough. Mix with a spatula, then use your hands once it's cool enough. Add the remaining syrup a splash at a time. You are looking for a dough that holds together like soft playdough and leaves the bowl clean, not a pourable batter. Different flours and different simmering evaporation rates mean the exact liquid varies; trust the texture, not the number.
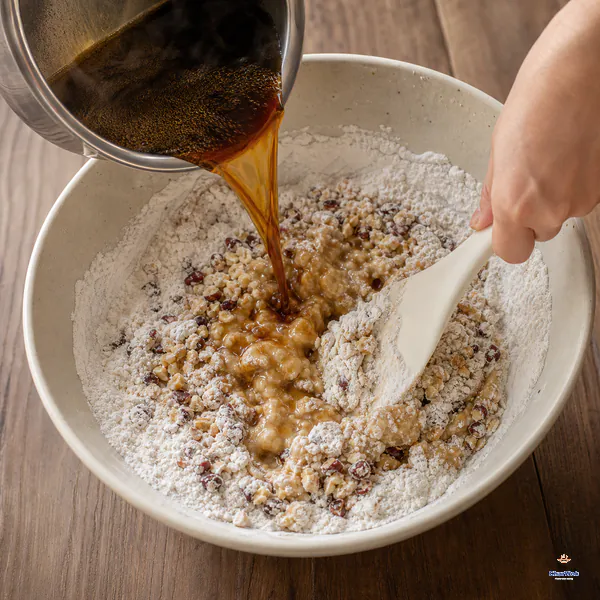
Immediately pour about 90% of the boiling syrup into the flour mixture and mix firmly; add the remainder only as needed until a soft, slightly sticky dough forms without becoming pourable.
- Shape and garnish. Press the dough evenly into the prepared tin, smooth the top with an oiled spatula, and press the reserved whole jujube into the center. The center is the slowest part to cook, so a garnish there doubles as a marker.
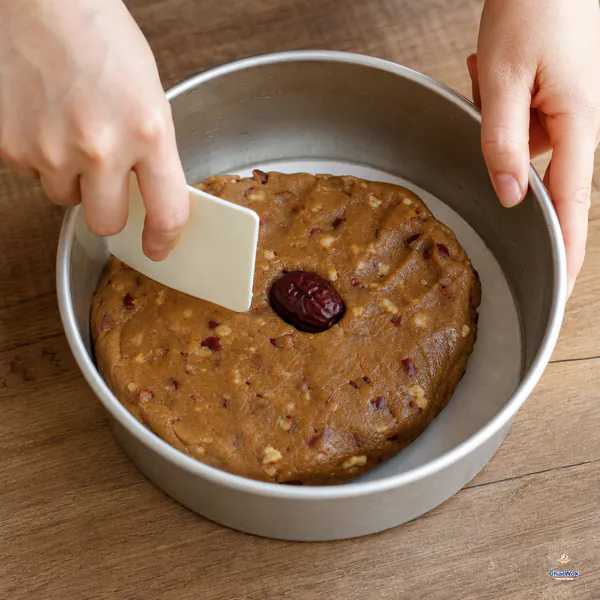
Oil the 20-centimetre tin, line its base with parchment, press in the non-flowing dough and level it before setting the reserved whole jujube in the centre.
- Steam 45 minutes over medium heat. Get the steamer water to a rolling boil before the tin goes in, then drop to a steady medium. Start a timer at 45 minutes. At the halfway mark, check the water level and top up with boiling water (never cold) if needed. A toothpick or chopstick plunged into the center should come out clean, with no wet paste clinging to it; if not, give it another 5 to 10 minutes.
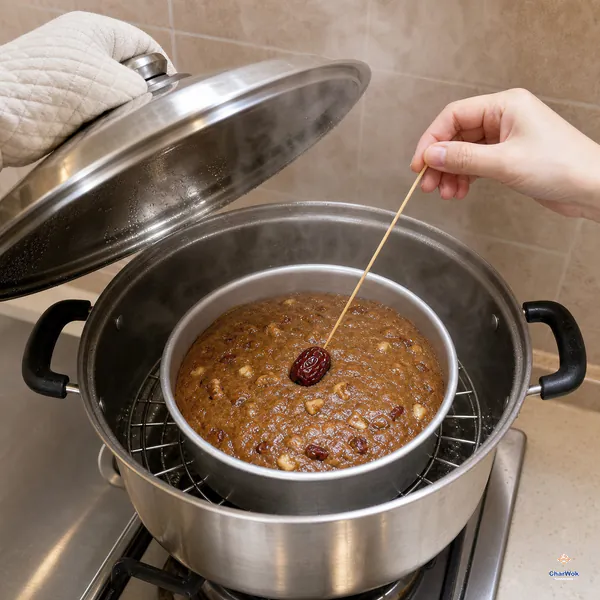
Put the tin over already-boiling water, steam steadily over medium heat for 45 minutes and top up only with hot water; the centre is done when the skewer comes out without wet paste.
- Cool fully before unmolding. Let the cake sit in the tin until it is completely cool, at least an hour. Warm nian gao is structurally hopeless; it will tear and slump. Once cool, run a thin knife around the edge and invert it onto a plate.
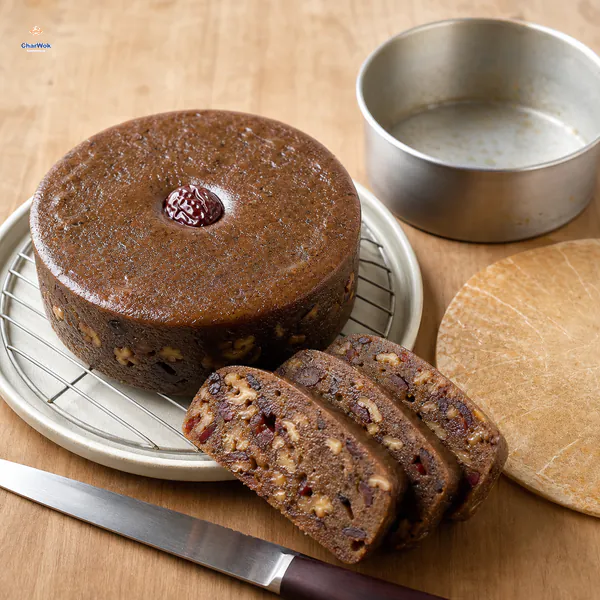
Cool the cake completely in its tin for at least 1 hour before unmolding; chilling firms it further, and a lightly oiled knife cuts clean slices without tearing the cake.
When it goes wrong: troubleshooting
I have ruined this cake in most of the ways it can be ruined, so here is what each failure looks like and how to fix it next time.
- Gummy, raw-flour center. The classic failure. Either the liquid wasn't hot enough when it hit the flour, or the cake was under-steamed. Make sure the syrup is at a true boil when you pour it on, and don't pull the cake early: the chopstick test is non-negotiable.
- Too soft, won't hold a slice. Too much liquid in the dough, or too high a glutinous-to-regular flour ratio. Cut the water back by 30 g next time, or nudge the flour ratio toward 4:1.
- Dry, hard, rubbery. Over-steaming or too much regular rice flour. Pull it the moment the chopstick comes out clean; the cake keeps cooking in its own heat afterward.
- Crater on top from dripping water. Your steamer lid is raining on the cake. Wrap the lid in a cloth, or tent a piece of foil loosely over the tin inside the steamer.
- Cake stuck to the tin. More oil on the tin, and line the bottom with parchment. Springform pans with a parchment round release cleanly; bare metal does not.
- Weak flavor. Dark brown sugar carries more character than light. A tablespoon of toasted sesame folded in with the nuts, or swapping in red bean paste as a hidden layer, fixes a bland cake instantly.
How to serve and eat it
Two ways, and the second is the reason most people make this cake in the first place.
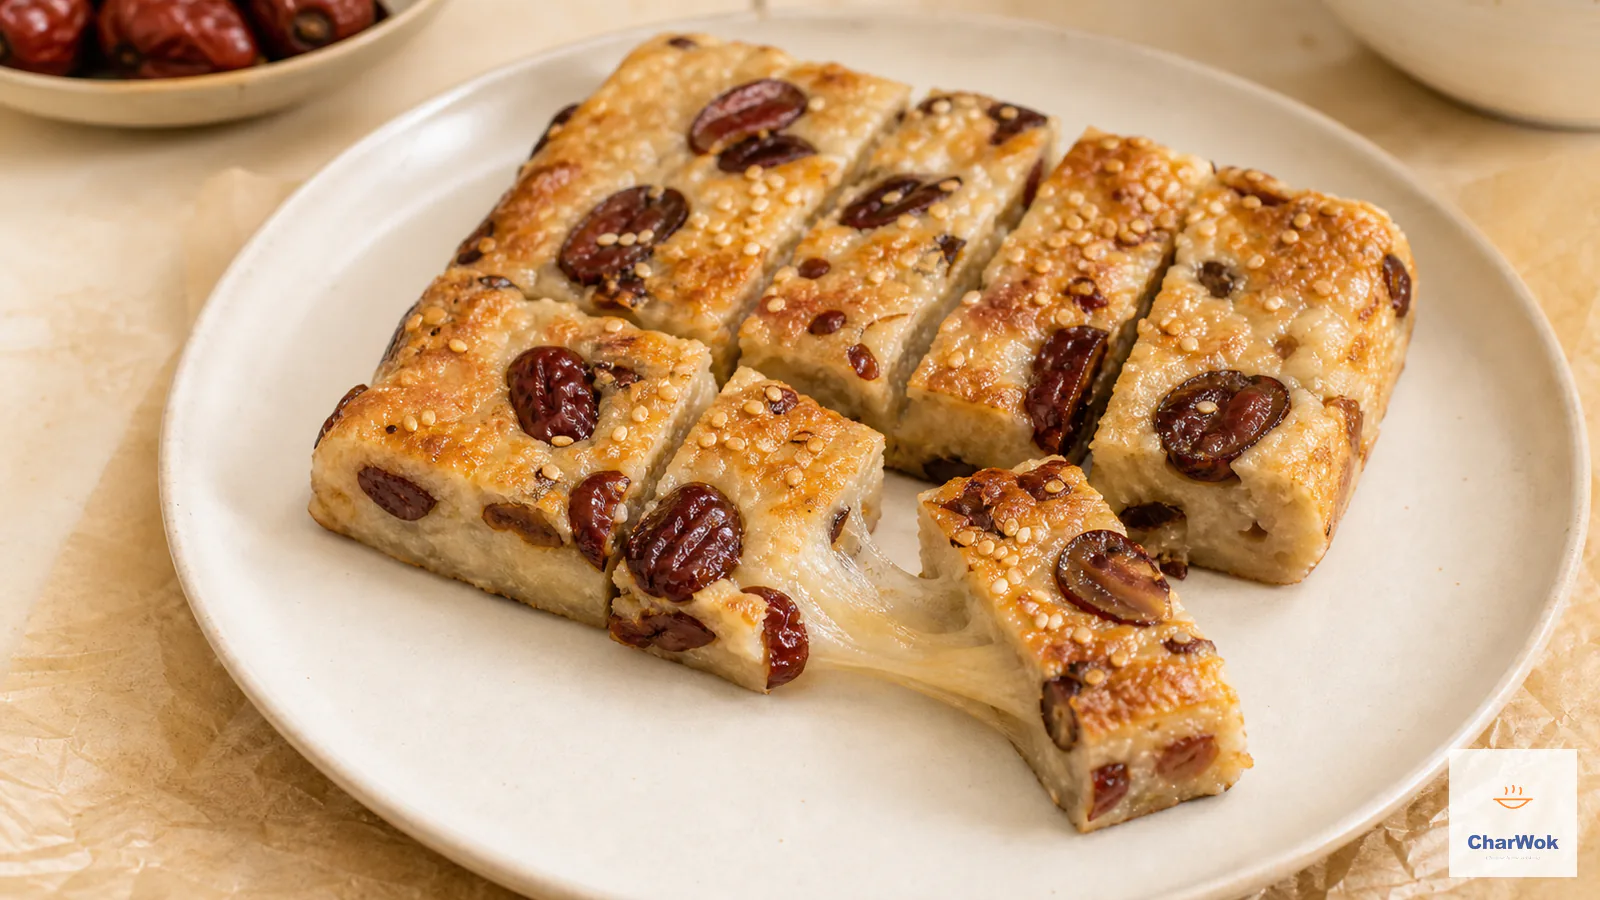
Sliced, at room temperature. Chill the cake for an hour so it firms up, then slice with an oiled knife. The texture is bouncy and dense, like a firm mochi, and the jujubes give little hits of tart sweetness. This is the polite, holiday-table way to eat it.
Pan-fried. This is where nian gao becomes irresistible. Cut firm, cold slices about 8 mm (a third of an inch) thick and pan-fry them in a little oil over medium-low heat. Patience matters more than heat; the sugar in the cake caramelizes slowly, and the inside softens and stretches as the outside blisters and crisps. For an even cracklier crust, dunk each slice in beaten egg first, the way you would for French toast. The contrast between the crisp egg shell and the molten, chewy middle is the whole reason this recipe exists. The same pan-fried treatment is what makes red bean buns and sesame balls sing the next morning, and it works here too.
Variations and pairings
The base dough is a canvas. A few directions worth taking it:
- Taro or sweet potato. Swap a quarter of the rice flour for steamed, mashed taro. The cake gets a lavender tint and a more complex sweetness.
- Coconut and pandan. Replace half the water with full-fat coconut milk and add a few drops of pandan extract for a Southeast Asian leaning.
- No-bake shortcut. If steaming feels like too much, the baked rice cake method uses the same ingredients and an oven, and it's nearly foolproof.
- Savory next-day. Leftover slices pan-fried with napa cabbage and pork is a real dish: chewy, savory, nothing like dessert.
For a New Year dessert spread, set slices alongside red bean soup or a bowl of ginger milk curd, and finish with almond cookies and shards of peanut sesame brittle. The脆 brittle and the chewy cake play off each other beautifully. Nian gao also freezes well, so it is worth making two — one for the table, one to slip into the freezer for steamed custard buns mornings when you want something sweet with tea. For a vegetarian holiday table, it sits comfortably next to lotus root stuffed with sticky rice, another sticky-rice centerpiece.
Storage
Once completely cool, seal the cake airtight. It will keep one day on the counter (less if your kitchen is warm), up to five days in the fridge, and two to three months in the freezer. Always slice before freezing; defrosting a whole cake and then trying to cut it is a chore. Defrost slices in the fridge overnight and eat them cold, or drop them straight from frozen into a hot pan with a little oil; no thawing needed.
One honest caveat: nian gao does not improve with age. The texture is at its best within the first two days, when the chew is springy and the surface still glossy. After that it slowly dries and the sugar crystallizes a touch, which is exactly why pan-frying was invented for day-three cake. That is not a failure of the recipe; it is the intended second act.
FAQ
Can I make nian gao without a steamer?
Yes. Any wide pot with a tight lid and a rack to hold the tin above boiling water works. If you'd rather skip steaming entirely, the baked version of this cake uses the same ingredients in the oven.
Why is the middle still gummy after 45 minutes?
Usually the sugar syrup wasn't hot enough when it met the flour, so the starch never pre-gelled. Bring the syrup to a full boil before pouring. A wet-center cake also means you pulled it early; keep steaming until a chopstick comes out clean.
Can I use all glutinous rice flour and skip the regular rice flour?
You can, but the cake will be very sticky and harder to slice. The 5:1 ratio exists to firm it up. If you want a softer, mochi-like bite, go ahead; if you want clean slices, keep the regular rice flour in.
Do I have to pan-fry it, or can I eat it cold?
Both work. Cold slices are dense and bouncy; pan-fried slices are crisp outside and molten within. Most people prefer them fried, and it is the best use of day-old cake.
Back at the beginning I said the scald is the whole point, and I'll stand by it. Get the syrup truly hot, pour it over the flour, and the rest of the recipe is forgiving in a way the cold-batter version never is. Make one for the holiday, make two, and don't be surprised when the second one disappears from the freezer before the week is out.